
Follow Me On Social Media!
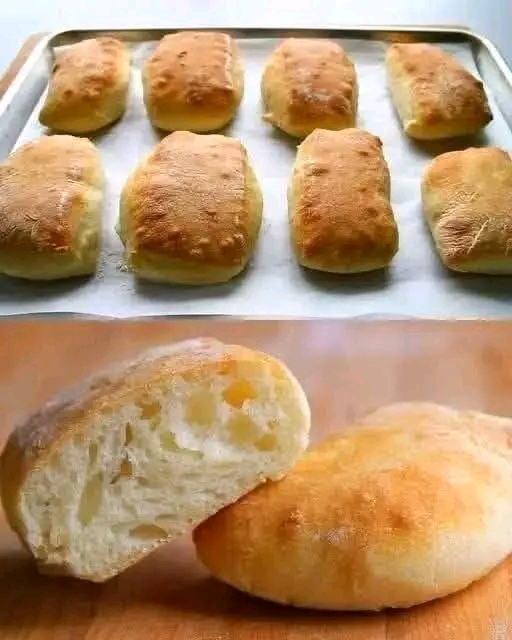
Homemade Bread Rolls Recipe: Soft, Fluffy, and Delicious

Introduction
There’s nothing quite like the aroma of freshly baked bread filling your kitchen. Homemade bread rolls bring a sense of warmth and comfort that few foods can match. Perfectly golden on the outside and light and fluffy on the inside, these rolls are an essential addition to any meal. Whether you’re serving them at a holiday dinner, for a casual brunch, or simply enjoying them with soup, this recipe guarantees to impress. In this article, we’ll explore everything from the ingredients to the baking process, along with tips to make your bread rolls the best they can be.
Why Make Homemade Bread Rolls?
Baking your own bread rolls is not just about flavor; it’s also about experience. The joy of crafting something from scratch, coupled with the satisfaction of sharing it with loved ones, makes the effort worthwhile. Additionally, you can customize these rolls to suit your taste, making them healthier or more indulgent depending on your preferences.
Ingredients
Main Ingredients:
- 4 cups all-purpose flour
- 2 teaspoons active dry yeast
- 1 tablespoon sugar
- 1 teaspoon salt
- 1/4 cup unsalted butter (melted)
- 1 1/2 cups warm milk (110°F to 115°F)
- 1 large egg (lightly beaten)
Optional Ingredients:
- Sesame seeds or poppy seeds for topping
- Garlic powder for added flavor
- Herbs like rosemary or thyme for a fragrant twist
Equipment Needed
- Mixing bowl
- Measuring cups and spoons
- Wooden spoon or dough whisk
- Baking sheet
- Parchment paper
- Clean kitchen towel
Step-by-Step Instructions
Step 1: Activate the Yeast
In a small bowl, combine the warm milk, sugar, and yeast. Allow it to sit for about 5-10 minutes until it becomes frothy. This step is crucial as it activates the yeast, which helps the bread rise.
Step 2: Mix the Dough
In a large mixing bowl, combine the flour and salt. Once the yeast mixture is frothy, add it to the flour along with the melted butter and the beaten egg. Using a wooden spoon or dough whisk, stir until a dough begins to form.
Step 3: Knead the Dough
Transfer the dough onto a lightly floured surface. Knead it for about 8-10 minutes until it becomes smooth and elastic. If it feels too sticky, add a little more flour as needed. This step develops the gluten, giving the bread rolls their structure.
Step 4: First Rise
Place the kneaded dough into a lightly greased bowl, cover it with a clean kitchen towel, and let it rise in a warm, draft-free area. Allow the dough to rise for about 1 hour or until it doubles in size.
Step 5: Shape the Rolls
Once the dough has risen, punch it down to release the air. Divide it into 12 equal pieces, and shape each piece into a ball. You can also make oval shapes for a more rustic look. Place the shaped rolls onto a baking sheet lined with parchment paper, leaving some space between each.
Step 6: Second Rise
Cover the shaped rolls with a towel and let them rise again for 30 minutes. This step allows them to puff up before baking.
Step 7: Preheat the Oven
While the rolls are rising, preheat your oven to 375°F (190°C).
Step 8: Bake the Rolls
Once the rolls have risen, you can optionally brush the tops with melted butter and sprinkle with sesame or poppy seeds. Bake them in the preheated oven for 15-20 minutes, or until they are golden brown.
Step 9: Cool and Serve
After baking, remove the rolls from the oven and let them cool on a wire rack for a few minutes. Enjoy them warm with butter or your favorite spread.
Tips for Success
- Warm Environment for Rising: If your kitchen is cold, place the dough in an oven preheated to 200°F for a few minutes, then turn it off and let the dough rise.
- Don’t Rush the Process: Allowing sufficient rising time is crucial for achieving fluffy rolls. Patience pays off in better texture and flavor.
- Store Properly: To keep the rolls fresh, store them in an airtight container at room temperature for up to three days, or freeze for longer storage.
Variations to Try
- Cheesy Garlic Rolls: Add shredded cheese and garlic to the dough for a more decadent flavor.
- Herbed Rolls: Mix in dried herbs like oregano or basil for an aromatic touch.
- Whole Wheat Rolls: Substitute half of the all-purpose flour with whole wheat flour for a healthier option.
Serving Suggestions
These homemade bread rolls are incredibly versatile. Serve them:
- As a side with hearty soups or stews
- For breakfast with jam or honey
- As the base for mini sandwiches or sliders
- Alongside your favorite pasta dish
Conclusion
Homemade bread rolls are a delightful addition to any meal, bringing warmth and comfort to your kitchen. With this easy-to-follow recipe, you can bake your own rolls that are both soft and fluffy. Not only do they taste incredible, but they also provide a fun and rewarding baking experience. So gather your ingredients, roll up your sleeves, and get ready to enjoy the delightful aroma of fresh bread wafting through your home. Your family and friends will thank you!



