
Follow Me On Social Media!
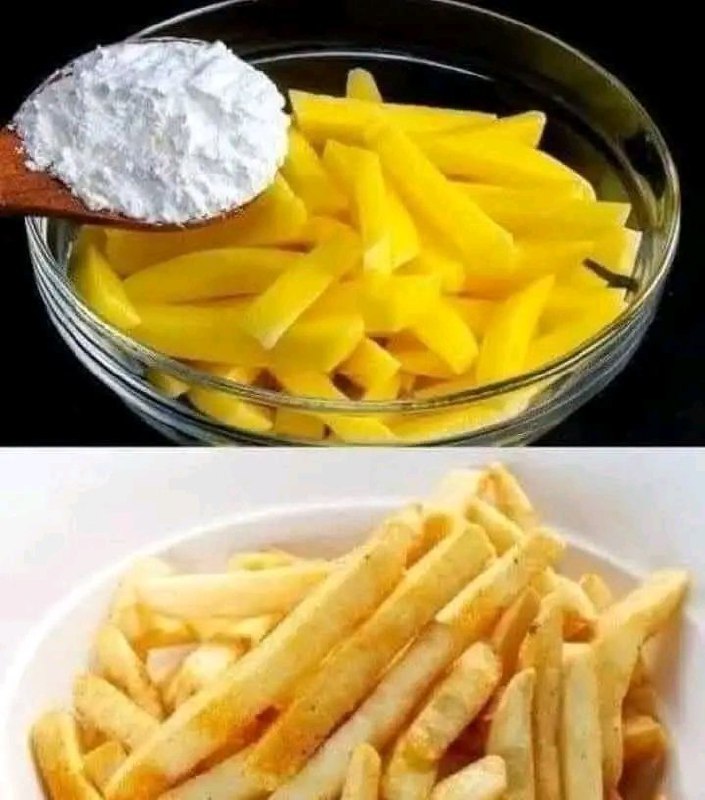
The trick to making delicious crispy chips without a drop of oil

Introduction
Imagine biting into a perfectly golden, undeniably crispy chip, the kind that delivers that satisfying crunch you crave, but without a single drop of oil. Sounds like a dream, right? For too long, the delicious indulgence of crispy chips has been synonymous with deep-frying, leaving many of us to compromise between our cravings and our health goals. We all love that salty, starchy goodness, but the grease, the mess, and the guilt often deter us from enjoying this classic snack as often as we’d like. What if I told you there’s a game-changing trick that allows you to achieve that ultimate crispiness, a texture that rivals even the best fried versions, using nothing more than your oven and a pantry staple?
This isn’t just about making “healthier” chips; it’s about unlocking a new level of crispy perfection. Forget soggy, limp baked fries or air-fried attempts that never quite hit the mark. This method taps into a simple scientific principle, leveraging a secret ingredient that transforms humble potatoes into irresistible, guilt-free crispy chips. It’s a revelation for anyone looking to enjoy their favorite snack with significantly less fat and fewer calories, without sacrificing an ounce of flavor or that coveted crunch. Get ready to revolutionize your snack game and impress everyone with these unbelievably crispy, oil-free delights.
The beauty of this recipe lies in its simplicity and accessibility. You don’t need any special equipment beyond a baking sheet and your oven, and the “trick” ingredient is something you likely already have in your kitchen. This method isn’t just for health-conscious eaters; it’s for anyone who appreciates a truly great chip. Prepare to be amazed as you pull out a batch of these golden wonders, each one boasting a light, airy interior and an incredibly crisp exterior that snaps with every bite. Say goodbye to greasy fingers and hello to the future of crispy, delicious, and utterly satisfying chips!
Nutritional Information
Per serving (approximate values):
- Calories: 180
- Protein: 4g
- Carbohydrates: 40g
- Fat: 0.5g
- Fiber: 4g
- Sodium: 250mg
Ingredients
- 2 large Russet potatoes (about 1.5 lbs total), peeled
- 3 tablespoons cornstarch (or potato starch, tapioca starch)
- 1 teaspoon salt, plus more to taste
- 1/2 teaspoon garlic powder (optional)
- 1/4 teaspoon paprika (optional)
- Pinch of black pepper (optional)
Instructions
- Prepare the Potatoes: Wash and peel the Russet potatoes thoroughly. Using a sharp knife, mandoline, or a French fry cutter, slice the potatoes into uniform sticks, about 1/4 to 1/3 inch thick. Uniformity is key for even cooking and crispiness.
- Soak and Rinse: Place the cut potato sticks into a large bowl and cover them completely with cold water. Let them soak for at least 30 minutes, or up to an hour. This step helps remove excess surface starch, which can lead to gummy chips.
- Rinse and Dry Thoroughly: After soaking, drain the potatoes and rinse them under cold running water until the water runs clear. This ensures all excess starch is removed. Now, and this is crucial, spread the potato sticks out on a clean kitchen towel or several layers of paper towels. Pat them absolutely dry. Any residual moisture will prevent the starch from adhering properly and inhibit crispiness. You want them as dry as possible!
- Preheat Oven and Prepare Baking Sheet: While the potatoes are drying, preheat your oven to 425°F (220°C). Line a large baking sheet with parchment paper. This prevents sticking and makes cleanup easier. If you have two baking sheets, use both to avoid overcrowding.
- The Secret Starch Coating: In a large, dry bowl, combine the cornstarch, 1 teaspoon of salt, garlic powder (if using), paprika (if using), and black pepper (if using). Whisk them together until well combined.
- Coat the Potatoes: Add the thoroughly dried potato sticks to the bowl with the starch mixture. Toss them vigorously until every single potato stick is lightly and evenly coated with the starch. You should see a thin, white powdery layer on each piece. Don’t be shy; ensure a good, even coating.
- Arrange on Baking Sheet: Spread the coated potato sticks in a single layer on the prepared baking sheet(s). It is absolutely essential not to overcrowd the baking sheet. Give each chip a little space; if they are too close together, they will steam instead of crisping. If necessary, use two baking sheets.
- First Bake: Place the baking sheet(s) in the preheated oven. Bake for 15-20 minutes.
- Flip and Continue Baking: After the initial baking time, carefully remove the baking sheet(s) from the oven. Using a spatula, flip each potato stick to ensure even crisping on all sides. Return to the oven and continue baking for another 15-25 minutes, or until the chips are golden brown, deeply crispy, and cooked through. Keep a close eye on them during the last 10 minutes, as they can go from perfectly golden to burnt quickly.
- Final Seasoning and Serve: Once the chips are golden and crispy to your liking, remove them from the oven. Transfer them to a serving bowl. Taste and add additional salt immediately if desired (the salt sticks best when they’re hot). Serve hot and enjoy your guilt-free, incredibly crispy, oil-free chips!
Cooking Tips and Variations
Achieving perfectly crispy, oil-free chips is more than just following the steps; it’s understanding the nuances. Here are some essential tips to guarantee success every time, along with exciting variations to keep things interesting:
Tips for Best Results:
- Potato Variety Matters: While Russet potatoes are highly recommended for their high starch content and fluffy interior, Yukon Gold can also work, offering a slightly creamier texture. Avoid waxy potatoes like red or new potatoes, as they won’t achieve the same crispiness.
- Uniformity is Non-Negotiable: Whether you’re using a knife, mandoline, or a fry cutter, strive for consistent thickness in your potato sticks. Inconsistent sizes mean some chips will burn while others remain undercooked or soggy. Aim for about 1/4 to 1/3 inch thickness.
- The Soaking and Drying Dance: Do not skip the soaking step! This draws out excess starches that can make your chips gummy. Equally important is the drying process. Pat those potatoes until they are bone dry. Any moisture will create steam and prevent the starch coating from working its magic.
- Don’t Skimp on Starch, But Don’t Overdo It: The goal is a thin, even coating. Too little, and you won’t get the crisp. Too much, and you might get a slightly chalky texture. Toss vigorously until every piece is lightly dusted.
- Single Layer Supremacy: This is perhaps the most critical tip for crispiness. Overcrowding your baking sheet is the enemy of crispy chips. When potatoes are packed too tightly, they release steam, which gets trapped and makes them soft instead of crisp. Use two baking sheets if necessary, giving each chip plenty of breathing room.
- High Heat is Your Friend: A hot oven (425°F/220°C) is essential for rapid moisture evaporation and achieving that coveted golden-brown crisp. Don’t be tempted to lower the temperature.
- Flipping for Evenness: Flipping the chips halfway through ensures that all sides get equal exposure to the direct heat, leading to uniform golden color and crunch.
- Listen and Look: Beyond the timer, trust your senses. The chips are done when they are deeply golden brown and sound crispy when you gently tap them with a spatula. They should snap when broken.
- Season After Baking: While some salt is mixed with the starch, the best time to add additional salt is immediately after they come out of the oven. The heat helps the salt adhere and dissolves it onto the surface for maximum flavor.
Flavor Variations:
- Garlic Parmesan: Add 1/2 teaspoon garlic powder and 2 tablespoons grated Parmesan cheese to the starch mixture.
- Spicy Chipotle: Incorporate 1/2 teaspoon chipotle powder or cayenne pepper for a fiery kick.
- Herb Garden: Mix in 1 teaspoon dried Italian herbs (oregano, basil, thyme) or finely chopped fresh rosemary for an aromatic twist.
- Smoked Paprika: Use smoked paprika instead of regular paprika for a deeper, smoky flavor profile.
- Sweet Potato Chips: This method also works beautifully with sweet potatoes! Follow the same steps, but sweet potatoes might cook a little faster, so keep a closer eye on them.
- Vinegar Chips: For a tangy kick, lightly mist the hot chips with apple cider vinegar or white vinegar after baking, then sprinkle with extra salt.
Storage and Reheating
While these oil-free crispy chips are undeniably best enjoyed fresh from the oven, sometimes you might have leftovers or want to prepare a batch in advance. Proper storage and reheating techniques can help maintain some of their crispiness.
Storage:
Allow the chips to cool completely to room temperature before storing. This is crucial; if you store them while warm, condensation will form, making them soggy. Once cool, transfer them to an airtight container. Line the container with a paper towel to absorb any residual moisture. Store at room temperature for up to 2 days. For longer storage, you can keep them in the refrigerator for up to 4-5 days, though their crispness will diminish.
Reheating:
Reheating in an oven or air fryer is the best way to revive the crispness. Microwaving is not recommended as it will make them soft and chewy.
- Oven Method: Preheat your oven to 375°F (190°C). Spread the chips in a single layer on a baking sheet (no need for parchment paper unless you prefer it). Reheat for 5-10 minutes, or until they are hot and crispy again. Keep a close eye on them to prevent burning.
- Air Fryer Method: Place the chips in a single layer in your air fryer basket. Air fry at 350°F (175°C) for 3-5 minutes, shaking the basket halfway through, until they are hot and re-crisped.
Even with reheating, they may not be quite as perfectly crisp as they were fresh, but these methods will bring them back to a very enjoyable state.
Frequently Asked Questions
What is the secret ingredient that makes these chips crispy without oil?
The “secret ingredient” is cornstarch (or another similar starch like potato starch or tapioca starch). When coated on the potatoes and baked at high heat, the starch forms a thin, crispy shell as the moisture evaporates, mimicking the crisping effect of traditional oil-frying without the added fat.
Can I use this method for other vegetables besides potatoes?
Yes, this method can be adapted for other starchy vegetables like sweet potatoes, parsnips, or even carrots. Adjust baking times as needed, as different vegetables have varying moisture content and cook at different rates. Always ensure they are thoroughly dried before coating with starch.
Why is it so important to dry the potatoes thoroughly after soaking?
Drying the potatoes thoroughly is critical because any residual moisture will prevent the cornstarch from adhering properly to the surface of the potato. If the potatoes are wet, the starch will clump or wash off, and the moisture will create steam during baking, leading to soggy chips rather than crispy ones. A dry surface allows the starch to form an even, effective coating for maximum crispiness.
My chips aren’t as crispy as I’d like. What went wrong?
There are a few common culprits if your chips aren’t crispy: 1) The potatoes weren’t dried enough after soaking. 2) The baking sheet was overcrowded, causing the chips to steam instead of crisp. 3) The oven temperature wasn’t high enough, or they weren’t baked long enough. 4) The potato pieces weren’t uniform, leading to uneven cooking. Review the tips section for detailed guidance on how to achieve perfect crispiness every time.



