
Follow Me On Social Media!
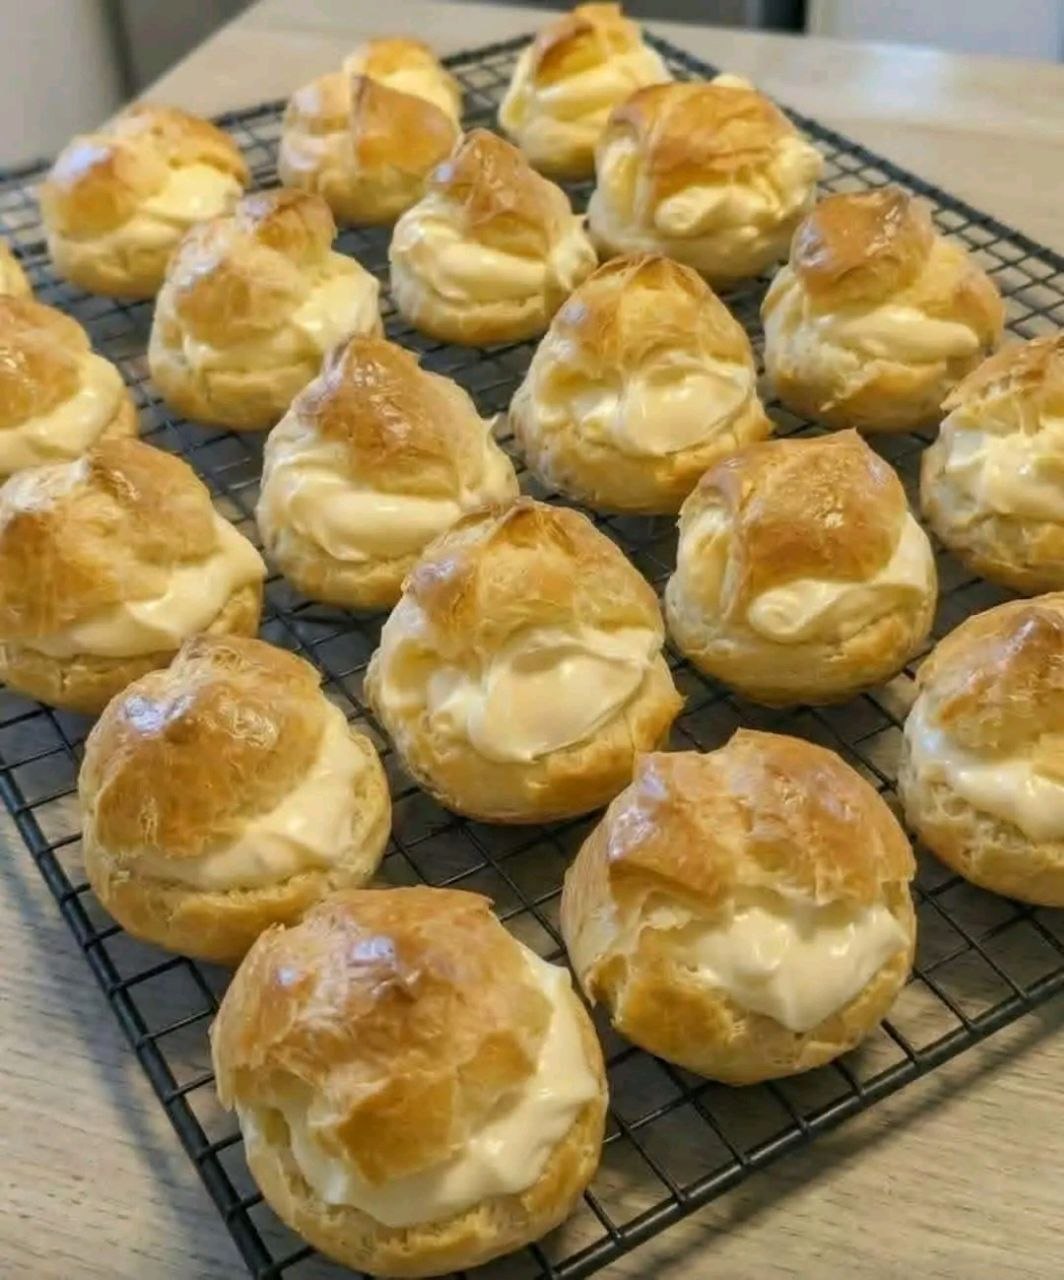
Famous Cream Puffs The Cloud Light French Pastry That Melts in Your Mouth Choux Pastry Silky Cream

Introduction
Prepare to embark on a culinary journey to the heart of French patisserie, where clouds aren’t just in the sky, but on your plate! We’re talking about the legendary cream puff, a dessert so exquisitely delicate and satisfying, it has charmed palates for centuries. Imagine a pastry so light, so airy, it practically floats, giving way to an eruption of rich, silky cream that melts on your tongue. This isn’t just a dessert; it’s an experience, a symphony of textures and flavors that will leave you dreaming of your next bite. And today, we’re going to demystify the magic behind this famous treat, making it accessible to every home baker.
What makes a cream puff so famous? It’s the perfect harmony of its two main components: the ethereal choux pastry and the luscious filling. The choux pastry, pronounced “shoo,” is a marvel in itself – a simple dough that transforms in the oven into a hollow, golden shell, begging to be filled. Its unique structure, born from the steam generated during baking, creates that signature “cloud light” texture that sets cream puffs apart. Paired with a generously piped dollop of smooth, sweet cream, often infused with vanilla, it creates a dessert that is both elegant and comforting, sophisticated yet approachable.
Forget everything you thought you knew about complex French baking. While the name “choux pastry” might sound intimidating, this recipe is designed to guide you through each step with ease, ensuring a foolproof path to pastry perfection. We’ll unlock the secrets to achieving that perfect puff, that golden hue, and that velvety cream filling that truly melts in your mouth. Get ready to impress your friends and family with these irresistible, homemade cream puffs – a testament to the fact that sometimes, the simplest pleasures are the most profound.
Nutritional Information
Per serving (approximate values):
- Calories: 285
- Protein: 6g
- Carbohydrates: 28g
- Fat: 17g
- Fiber: 1g
- Sodium: 110mg
Ingredients
For the Choux Pastry:
- 1 cup (240ml) water
- 1/2 cup (113g) unsalted butter, cubed
- 1/4 teaspoon salt
- 1 cup (120g) all-purpose flour, sifted
- 4 large eggs, at room temperature
For the Silky Cream Filling:
- 2 cups (480ml) whole milk
- 1/2 cup (100g) granulated sugar
- 1/4 cup (30g) cornstarch
- 4 large egg yolks
- 2 tablespoons (28g) unsalted butter
- 1 teaspoon vanilla extract
For Garnish (Optional):
- Powdered sugar for dusting
Instructions
Part 1: Making the Choux Pastry
- Preheat your oven to 400°F (200°C). Line two baking sheets with parchment paper.
- In a medium saucepan, combine the water, cubed butter, and salt. Heat over medium-high heat, stirring occasionally, until the butter is completely melted and the mixture comes to a rolling boil.
- Remove the saucepan from the heat. Immediately add the sifted flour all at once. Stir vigorously with a wooden spoon or spatula until the mixture forms a ball and pulls away from the sides of the pan. This process is called “drying out” the dough.
- Return the saucepan to low heat and continue to stir the dough for another 1-2 minutes to further dry it out. This step is crucial for achieving light and airy puffs. The dough should form a thin film on the bottom of the pan.
- Remove the dough from the heat and transfer it to a large mixing bowl or the bowl of a stand mixer fitted with the paddle attachment. Let it cool for 5 minutes, stirring occasionally, to prevent the eggs from scrambling.
- Add the eggs one at a time, beating well after each addition until fully incorporated. The dough will look curdled and separated at first, but keep mixing; it will come together to form a smooth, thick, and glossy paste. The final dough should be thick enough to hold its shape but soft enough to pipe. When you lift the paddle or spoon, the dough should slowly fall off in a “V” shape.
- Transfer the choux pastry to a piping bag fitted with a large round tip (or simply cut off the corner of a sturdy Ziploc bag).
- Pipe 1.5-inch round mounds of dough onto the prepared baking sheets, leaving about 2 inches between each puff as they will expand. You should get about 24-30 puffs.
- Dip your finger in a little water and gently smooth down any peaks on top of the piped dough. This helps prevent them from burning.
- Bake for 15 minutes at 400°F (200°C), then reduce the oven temperature to 350°F (175°C) and continue to bake for another 20-25 minutes, or until the cream puffs are golden brown, puffed, and firm to the touch. Do NOT open the oven door during the first 25 minutes of baking, as this can cause the puffs to deflate.
- Once baked, turn off the oven and prop the oven door open slightly with a wooden spoon. Let the cream puffs cool in the oven for an additional 10-15 minutes. This helps them dry out and prevents them from collapsing.
- Remove the cream puffs from the oven and transfer them to a wire rack to cool completely before filling. If you plan to fill them later, poke a small hole in the bottom of each puff to release steam and prevent sogginess.
Part 2: Making the Silky Cream Filling (Pastry Cream)
- In a medium saucepan, combine the milk and half of the granulated sugar. Heat over medium heat until the mixture just begins to simmer around the edges. Do not let it boil.
- In a separate medium bowl, whisk together the remaining granulated sugar, cornstarch, and egg yolks until smooth and pale yellow.
- Once the milk mixture is simmering, slowly temper the egg yolk mixture by gradually pouring about half of the hot milk into the egg yolks while whisking constantly. This prevents the yolks from scrambling.
- Pour the tempered egg yolk mixture back into the saucepan with the remaining hot milk. Continue to cook over medium heat, whisking constantly, until the mixture thickens significantly and comes to a gentle boil. Whisk for another 1-2 minutes after it boils to ensure the cornstarch is fully cooked and the cream is very thick.
- Remove the saucepan from the heat. Stir in the butter and vanilla extract until fully incorporated and the butter has melted.
- Transfer the pastry cream to a clean bowl. Press a piece of plastic wrap directly onto the surface of the cream to prevent a skin from forming.
- Refrigerate for at least 2-3 hours, or until thoroughly chilled and firm.
Part 3: Assembly
- Once the cream puffs are completely cool and the pastry cream is thoroughly chilled, you are ready to assemble.
- If you poked holes in the bottom of the puffs, you can use those. Otherwise, cut each cream puff in half horizontally using a serrated knife, or make a small incision on the bottom or side of each puff.
- Transfer the chilled pastry cream to a piping bag fitted with a star tip or a plain round tip.
- Pipe a generous amount of pastry cream into the bottom half of each cream puff, or fill through the incision. If cutting in half, place the top half back on.
- Arrange the filled cream puffs on a serving platter.
- Dust generously with powdered sugar just before serving, if desired.
Cooking Tips and Variations
Accuracy is Key: Baking is a science, and choux pastry is particularly sensitive to measurements. Use a kitchen scale for flour and butter for the most accurate results.
Room Temperature Eggs: Ensure your eggs are at room temperature for the choux pastry. This helps them incorporate more smoothly and evenly into the dough, leading to a better emulsion and lighter texture.
Drying the Dough: Don’t skip the step of drying out the choux dough on the stovetop. This evaporates excess moisture, creating a crispier shell and preventing soggy puffs.
Proper Egg Incorporation: Add eggs one at a time to the choux dough, beating thoroughly after each addition. The dough will look odd and separated at first, but keep mixing, and it will come together into a smooth, thick paste. Stop adding eggs when the dough forms a “V” shape and slowly falls off a spoon or paddle.
No Peeking! Resist the urge to open the oven door during the initial baking phase of the choux pastry. The sudden drop in temperature can cause the puffs to deflate, ruining their hollow structure.
Cooling in the Oven: Cooling the baked choux puffs in the turned-off oven with the door ajar helps them dry out completely and prevents them from becoming soft or collapsing once removed.
Poke a Hole: For unfilled puffs, poke a small hole in the bottom of each hot puff as soon as they come out of the oven. This allows steam to escape, preventing them from getting soggy inside.
Plastic Wrap on Cream: Always press plastic wrap directly onto the surface of the pastry cream while it chills. This prevents a rubbery skin from forming on top.
Chill Thoroughly: Ensure your pastry cream is completely chilled and firm before attempting to fill the puffs. Warm or runny cream will make for a messy and less appealing dessert.
Variations:
- Chocolate Cream Puffs: Add 1/2 cup (85g) melted dark chocolate to the pastry cream after it has thickened and cooled slightly, or use a chocolate ganache as a filling. You can also drizzle melted chocolate over the finished puffs.
- Coffee Cream Puffs: Dissolve 1-2 teaspoons of instant espresso powder in the milk when making the pastry cream for a delightful coffee flavor.
- Fruit-Filled Puffs: Alongside the pastry cream, add a few fresh berries (strawberries, raspberries) or a spoonful of fruit compote for a burst of freshness.
- Whipped Cream Filling: For a lighter option, fill the puffs with sweetened whipped cream instead of pastry cream.
- Savory Gougères: Omit the sugar from the choux pastry and add grated Gruyère or Parmesan cheese along with herbs like chives or thyme for a delicious savory appetizer.
- Glaze Topping: Instead of powdered sugar, dip the tops of the filled cream puffs in a simple glaze made from powdered sugar and a tiny amount of milk or lemon juice.
Storage and Reheating
Unfilled Choux Pastry: Baked and cooled choux pastry shells can be stored in an airtight container at room temperature for up to 2 days, or in the freezer for up to 1 month. If freezing, arrange them in a single layer on a baking sheet until frozen solid, then transfer to a freezer-safe bag. To refresh, simply bake them in a preheated oven at 300°F (150°C) for 5-10 minutes until crisp again.
Pastry Cream: Unused pastry cream can be stored in an airtight container with plastic wrap pressed directly onto the surface in the refrigerator for up to 3 days. Whisk it well before using to restore its smooth consistency.
Filled Cream Puffs: Filled cream puffs are best enjoyed within a few hours of assembly as the pastry can start to soften. Store them loosely covered in the refrigerator for no more than 1 day. The pastry will inevitably soften, but they will still be delicious.
Reheating: Cream puffs are not ideal for reheating once filled, as the cream will melt and the pastry will become soggy. For the best experience, fill them just before serving.
Frequently Asked Questions
Why did my cream puffs collapse or not puff up?
There are several common reasons. The most frequent culprits are not drying out the dough enough on the stovetop, not adding enough eggs (or adding too many), opening the oven door too early during baking, or not baking them long enough. Ensure your oven temperature is accurate and resist opening the door!
Can I make the choux pastry ahead of time?
Yes, you can make the choux pastry dough and pipe it onto parchment-lined baking sheets. Freeze the piped dough until solid, then transfer the frozen individual mounds to a freezer-safe bag. When ready to bake, place the frozen dough directly onto a baking sheet and bake as directed, adding a few extra minutes to the baking time.
My pastry cream has lumps. What went wrong?
Lumps in pastry cream usually occur if the egg mixture wasn’t whisked thoroughly enough before adding the hot milk, or if the cream wasn’t whisked constantly while thickening on the stove. To fix it, you can push the warm pastry cream through a fine-mesh sieve to remove any lumps, then chill as usual.
Can I use different fillings for cream puffs?
Absolutely! While classic pastry cream is divine, cream puffs are incredibly versatile. You can fill them with sweetened whipped cream, chocolate mousse, lemon curd, fruit fillings, or even savory fillings like chicken salad or cheese for a different kind of choux experience.



