
Follow Me On Social Media!
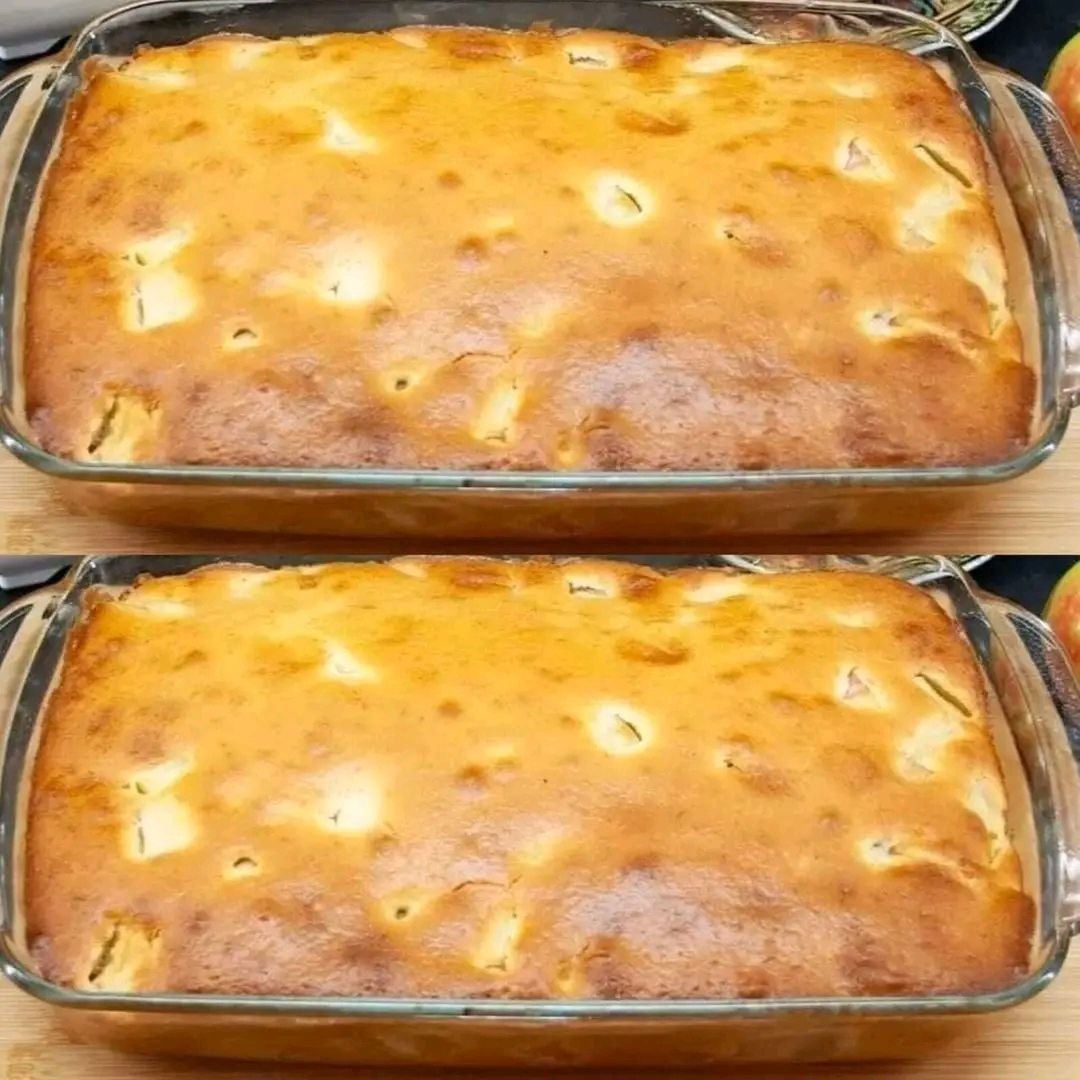
Apple pie that melts in your mouth

Introduction
Get ready to experience an apple pie like no other – one that truly melts in your mouth with every single bite. Forget dry, crumbly crusts or overly firm apple fillings; this recipe delivers a heavenly dessert that’s incredibly soft, moist, and bursting with the comforting flavors of baked apples and warm spices. It’s the kind of pie that evokes childhood memories, cozy evenings, and the simple joy of a perfectly executed homemade treat. The secret lies in a delicate balance of ingredients and a baking technique that ensures a tender, almost custard-like texture, making it undeniably special.
This isn’t just another apple pie recipe; it’s an invitation to create a culinary masterpiece in your own kitchen, effortlessly. We’ve meticulously crafted this recipe to be straightforward and approachable, even for novice bakers. The “melt-in-your-mouth” quality isn’t achieved through complicated steps, but rather through thoughtful ingredient selection and precise timing. The apples remain tender without becoming mushy, enveloped in a rich, buttery batter that practically dissolves on your tongue, leaving behind a delightful sweetness and a hint of spice. It’s a pie that truly lives up to its name, promising an unparalleled textural experience.
Prepare to impress your family and friends with this show-stopping dessert. Its golden-brown top hints at the deliciousness within, and the aroma alone will draw everyone to the kitchen. Whether served warm with a scoop of vanilla ice cream or enjoyed on its own, this apple pie is destined to become a beloved staple in your recipe collection. It’s comforting, familiar, yet remarkably refined, proving that sometimes, the simplest pleasures are the most profound. Let’s dive into creating this extraordinary apple pie that will have everyone asking for seconds!
Nutritional Information
Per serving (approximate values):
- Calories: 380
- Protein: 4g
- Carbohydrates: 55g
- Fat: 17g
- Fiber: 3g
- Sodium: 220mg
Ingredients
- 1 ½ cups (3 sticks) unsalted butter, softened
- 1 ½ cups granulated sugar, plus 2 tablespoons for sprinkling
- 3 large eggs, at room temperature
- 1 teaspoon vanilla extract
- 2 cups all-purpose flour, plus 2 tablespoons for dusting apples
- 2 teaspoons baking powder
- ½ teaspoon salt
- ½ cup whole milk, at room temperature
- 6-7 medium-sized apples (about 3 pounds), such as Granny Smith, Honeycrisp, or Fuji, peeled, cored, and sliced ¼-inch thick
- 1 teaspoon ground cinnamon
- ¼ teaspoon ground nutmeg
- Juice of ½ a lemon (about 1 tablespoon)
- Powdered sugar, for dusting (optional)
Instructions
- Preheat your oven to 350°F (175°C). Grease and flour a 9×13 inch rectangular glass baking dish.
- In a large mixing bowl, using an electric mixer on medium speed, cream together the softened butter and 1 ½ cups granulated sugar until light and fluffy, about 3-5 minutes.
- Beat in the eggs one at a time, incorporating each egg fully before adding the next. Stir in the vanilla extract.
- In a separate medium bowl, whisk together the 2 cups all-purpose flour, baking powder, and salt.
- Gradually add the dry ingredients to the wet ingredients, alternating with the milk, beginning and ending with the dry ingredients. Mix on low speed until just combined. Be careful not to overmix; overmixing can lead to a tough cake.
- In another large bowl, combine the peeled, cored, and sliced apples. Toss them with 2 tablespoons of all-purpose flour, ground cinnamon, ground nutmeg, and lemon juice until the apples are evenly coated. The flour helps to slightly thicken the apple juices during baking and prevents the bottom of the pie from becoming soggy.
- Pour about two-thirds of the batter into the prepared baking dish and spread it evenly to form the bottom layer.
- Arrange the seasoned apple slices evenly over the batter in the baking dish. You can layer them slightly to create a nice mound.
- Carefully dollop the remaining batter over the apples. It doesn’t need to completely cover them; the batter will spread as it bakes.
- Sprinkle the remaining 2 tablespoons of granulated sugar evenly over the top of the pie. This will create a beautiful golden-brown crust.
- Bake for 60-75 minutes, or until the top is golden brown, and a wooden skewer or toothpick inserted into the center of the pie (avoiding an apple slice) comes out clean. If the top starts to brown too quickly, you can loosely tent it with aluminum foil.
- Once baked, remove the pie from the oven and let it cool on a wire rack for at least 30 minutes before slicing and serving. Cooling allows the filling to set properly and prevents it from falling apart when cut.
- For an extra touch, dust with powdered sugar just before serving, if desired.
Cooking Tips and Variations
Achieving that coveted “melt-in-your-mouth” texture for your apple pie is all about the details. First, don’t skimp on the quality of your butter; using good quality unsalted butter will significantly enhance the flavor and richness of your batter, contributing to its tender crumb. Ensure all your cold ingredients, especially the butter, eggs, and milk, are at room temperature before you start mixing. This allows them to emulsify properly, creating a smoother, more uniform batter that bakes evenly and results in a lighter texture. When mixing the batter, resist the urge to overmix. Mix until just combined; overmixing develops the gluten in the flour, which can lead to a tough, dense pie instead of the tender, melt-in-your-mouth consistency we’re aiming for.
The choice of apples is also crucial. A mix of apple varieties offers a more complex flavor profile and texture. Granny Smith apples provide a tart counterpoint and hold their shape well, while Honeycrisp or Fuji apples add sweetness and a softer texture. Tossing the apples with a little flour before adding them to the batter is a vital step. This flour absorbs some of the excess moisture released by the apples during baking, preventing the bottom crust from becoming soggy and ensuring the pie retains its delightful texture. Don’t forget the lemon juice with the apples; it brightens their flavor and helps prevent them from browning too much. For an added layer of flavor, consider incorporating a pinch of cardamom or a touch of allspice along with the cinnamon and nutmeg. These spices complement the apples beautifully and add warmth.
To vary this recipe, you have several delicious options. For a nutty crunch, fold in ½ cup of chopped walnuts or pecans into the apple mixture before layering. If you prefer a streusel topping, combine ½ cup all-purpose flour, ¼ cup granulated sugar, ¼ cup packed light brown sugar, ½ teaspoon ground cinnamon, and ¼ cup (½ stick) cold unsalted butter, cut into small pieces. Use your fingertips or a pastry blender to mix until crumbly, then sprinkle over the apples before adding the remaining batter. This creates a wonderful textural contrast. For a richer, more decadent pie, you can drizzle ¼ cup of caramel sauce over the apples before adding the top layer of batter. This adds a gooey, sweet dimension that pairs perfectly with the tartness of the apples. Finally, always let your pie cool sufficiently before slicing. This allows the filling to set and prevents it from being a runny mess, ensuring each slice is perfect.
Storage and Reheating
To store your leftover apple pie and maintain its melt-in-your-mouth quality, first ensure it has completely cooled down to room temperature. Once cool, cover the baking dish tightly with plastic wrap or aluminum foil. You can also transfer individual slices to an airtight container. The pie can be stored at room temperature for up to 2 days, especially if your kitchen isn’t overly warm. For longer storage, or if you live in a warmer climate, it’s best to refrigerate the pie. Stored in the refrigerator, it will stay fresh for up to 4-5 days. While you can freeze individual slices in airtight containers or wrapped tightly in plastic wrap and then foil for up to 2-3 months, the texture of the apples might become slightly softer upon thawing.
When it comes to reheating, the goal is to warm the pie through without drying it out or making it soggy. If reheating a whole pie or a large portion, preheat your oven to 300°F (150°C). Place the pie (still in its baking dish, loosely covered with foil to prevent over-browning) in the oven and heat for about 15-20 minutes, or until warmed through. The foil helps to retain moisture. For individual slices, the oven method works well too; place a slice on a baking sheet and heat for 8-10 minutes. Alternatively, you can use a microwave for individual slices, but be aware that this can sometimes lead to a slightly softer texture. Heat microwave-safe slices in 30-second intervals until warm, being careful not to overheat. No matter the method, a reheated slice of this apple pie, especially with a scoop of vanilla ice cream, is a truly comforting treat.
Frequently Asked Questions
What kind of apples are best for this “melt-in-your-mouth” pie?
For the best balance of flavor and texture, we recommend using a mix of apples. Granny Smith apples provide a pleasant tartness and hold their shape well during baking, while Honeycrisp, Fuji, or Golden Delicious apples add sweetness and contribute to the softer, more tender texture that makes this pie so special. Using a combination ensures a complex flavor profile and prevents the pie from being either too sweet or too tart.
My pie batter seemed a bit thick; did I do something wrong?
It’s normal for this particular batter to be on the thicker side compared to a standard cake batter. This density is what helps support the apples and creates the rich, almost custard-like texture that contributes to the “melt-in-your-mouth” quality. As long as you followed the ingredient measurements and didn’t overmix, your batter should be just right. It will spread beautifully as it bakes.
How can I prevent the bottom of my apple pie from becoming soggy?
There are a few key steps in this recipe specifically designed to prevent a soggy bottom. Tossing the sliced apples with 2 tablespoons of all-purpose flour before adding them to the batter is crucial. This flour absorbs some of the moisture released by the apples during baking, preventing it from seeping into the bottom layer of the pie. Additionally, ensuring your oven is preheated to the correct temperature and baking the pie for the recommended time allows the bottom to cook through and set properly.
Can I make this pie ahead of time for an event?
Yes, absolutely! This apple pie is an excellent make-ahead dessert. You can bake it up to 1-2 days in advance. Once completely cooled, cover it tightly with plastic wrap or aluminum foil and store it at room temperature. When you’re ready to serve, you can enjoy it at room temperature, or gently reheat it in a 300°F (150°C) oven for about 15-20 minutes to warm it through, which will enhance its flavors and texture, making it feel freshly baked.



