
Follow Me On Social Media!
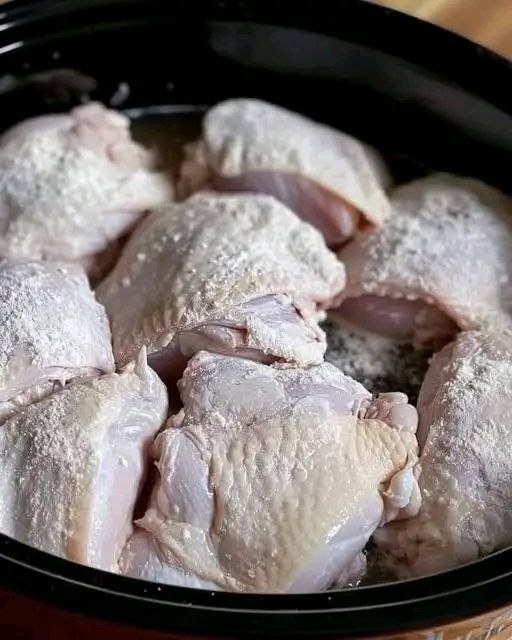
One pot honey garlic chicken

Introduction
Life is busy, and sometimes the thought of a delicious, home-cooked meal feels like a distant dream. But what if we told you that you could whip up a flavorful, crowd-plepleasing dinner with minimal fuss and even less cleanup? Enter the glorious world of one-pot meals, and today, we’re diving headfirst into a recipe that will revolutionize your weeknights: One Pot Honey Garlic Chicken. This dish isn’t just easy; it’s a symphony of sweet and savory notes, with tender chicken bathed in a glossy, irresistible sauce that will have everyone asking for seconds.
Imagine succulent chicken thighs, their skin kissed to a golden perfection, braised in a rich, sticky honey garlic sauce that’s both tangy and deeply satisfying. This isn’t just another chicken dish; it’s a culinary hug, a comforting and robust meal that’s perfect for family dinners, entertaining friends, or simply treating yourself after a long day. The beauty of this recipe lies in its simplicity – everything comes together in a single pot, concentrating all those incredible flavors and saving you from a mountain of dishes. It’s a true weeknight warrior, delivering maximum flavor with minimum effort.
What makes our One Pot Honey Garlic Chicken truly special is the perfect balance it strikes. The natural sweetness of honey is beautifully complemented by the pungent kick of fresh garlic, creating a sauce that clings to every piece of chicken. The chicken thighs, known for their rich flavor and forgiving nature, become incredibly tender as they simmer in this aromatic liquid. Whether you’re a seasoned home cook or just starting your culinary journey, this recipe is designed for success, promising a delicious outcome every single time. Get ready to discover your new favorite one-pot wonder!
Nutritional Information
Per serving (approximate values):
- Calories: 480
- Protein: 45g
- Carbohydrates: 30g
- Fat: 20g
- Fiber: 1g
- Sodium: 650mg
Ingredients
- 8 bone-in, skin-on chicken thighs (about 3-3.5 lbs total)
- 1/2 cup all-purpose flour
- 1 teaspoon salt
- 1/2 teaspoon black pepper
- 2 tablespoons olive oil
- 1 tablespoon unsalted butter
- 1 large onion, chopped
- 4 cloves garlic, minced
- 1/2 cup low-sodium chicken broth
- 1/2 cup honey
- 1/4 cup soy sauce (low sodium preferred)
- 2 tablespoons apple cider vinegar
- 1 tablespoon sriracha (optional, for a slight kick)
- 1 teaspoon grated fresh ginger (optional)
- 1 tablespoon cornstarch (mixed with 2 tablespoons cold water, for thickening)
- Fresh parsley or green onions, chopped (for garnish)
- Sesame seeds (for garnish)
Instructions
- Pat the chicken thighs very dry with paper towels. In a shallow dish, combine the flour, salt, and black pepper. Dredge each chicken thigh in the flour mixture, ensuring it’s evenly coated, then shake off any excess.
- Heat the olive oil and butter in a large, heavy-bottomed pot or Dutch oven over medium-high heat. Once the butter is melted and sizzling, carefully place the floured chicken thighs, skin-side down, into the hot pot. Do not overcrowd the pot; cook in batches if necessary.
- Sear the chicken for 5-7 minutes per side, until the skin is deeply golden brown and crispy. This step is crucial for flavor and texture. Remove the browned chicken from the pot and set aside on a plate.
- Reduce the heat to medium. Add the chopped onion to the pot and sauté for 3-5 minutes, scraping up any browned bits from the bottom of the pot with a wooden spoon, until the onion softens and becomes translucent.
- Add the minced garlic and grated ginger (if using) to the pot and cook for another minute until fragrant, being careful not to burn the garlic.
- Pour in the chicken broth, honey, soy sauce, apple cider vinegar, and sriracha (if using). Bring the mixture to a gentle simmer, stirring constantly to combine all the ingredients and dissolve any remaining browned bits.
- Carefully return the browned chicken thighs to the pot, nestling them into the sauce. Ensure the chicken is mostly submerged in the liquid.
- Bring the sauce back to a simmer, then reduce the heat to low, cover the pot, and let it cook for 25-30 minutes, or until the chicken is cooked through and very tender. The internal temperature of the chicken should reach 165°F (74°C).
- Once the chicken is cooked, remove the thighs from the pot and set them aside on a clean plate.
- In a small bowl, whisk together the cornstarch and cold water to create a slurry. Slowly pour the cornstarch slurry into the simmering sauce in the pot, whisking continuously, until the sauce thickens to your desired consistency. This usually takes 1-2 minutes.
- Return the chicken thighs to the pot, spooning the thickened honey garlic sauce over them to coat.
- Serve hot, garnished with fresh chopped parsley or green onions and a sprinkle of sesame seeds.
Cooking Tips and Variations
Achieving the perfect One Pot Honey Garlic Chicken is all about understanding a few key techniques and being open to delicious variations. For the crispiest skin, ensure your chicken thighs are bone-in and skin-on, and pat them thoroughly dry before flouring. The browning step is non-negotiable; it locks in flavor and creates that desirable golden crust. Don’t rush it! Cook the chicken in batches if your pot isn’t large enough to avoid overcrowding, which can steam the chicken instead of searing it. When making the sauce, feel free to adjust the sweetness and spice to your liking. A little extra sriracha can add a pleasant kick, while a touch more honey can mellow it out. If your sauce is too thin, simply simmer it uncovered for a few extra minutes to reduce. If it’s too thick, a splash of extra chicken broth will do the trick.
This versatile recipe can be easily adapted to suit your preferences. For a leaner option, boneless, skinless chicken thighs or even chicken breasts can be used, though cooking times will need to be adjusted (chicken breasts cook faster and can dry out if overcooked). If using chicken breasts, consider cutting them into larger chunks to prevent them from drying out. You can also turn this into a truly complete meal by adding vegetables directly to the pot. Broccoli florets, bell pepper strips, sliced carrots, or green beans can be added during the last 10-15 minutes of simmering, allowing them to cook directly in the flavorful sauce. For an even deeper umami flavor, swap out half of the chicken broth for dry sherry or mirin. A pinch of red pepper flakes can also be added with the garlic for a subtle, lingering heat. Don’t be afraid to experiment with different herbs; a sprig of fresh thyme or rosemary added during the braising process can infuse the dish with an earthy aroma.
Consider serving this glorious chicken over fluffy white rice or brown rice to soak up every last drop of that incredible sauce. For a lighter meal, quinoa or couscous are excellent choices. Roasted or steamed vegetables like asparagus, green beans, or a simple side salad with a light vinaigrette would also complement the richness of the chicken beautifully. The presentation matters too – a sprinkle of toasted sesame seeds and vibrant green onions or fresh parsley not only add visual appeal but also a fresh burst of flavor and texture. If you’re planning ahead, this dish reheats wonderfully, making it perfect for meal prepping. Just be sure to store it in an airtight container in the refrigerator.
Storage and Reheating
Proper storage and reheating are key to enjoying your One Pot Honey Garlic Chicken for days to come. Once the chicken has cooled to room temperature, transfer it along with the sauce to an airtight container. It can be stored in the refrigerator for up to 3-4 days. For longer storage, this dish freezes exceptionally well. Place the chicken and sauce in a freezer-safe container or heavy-duty freezer bag, ensuring there’s minimal air in the container to prevent freezer burn. It can be frozen for up to 2-3 months. Thaw frozen chicken overnight in the refrigerator before reheating.
When reheating, the goal is to warm the chicken through without drying it out or compromising the sauce’s texture. For best results, reheat individual portions on the stovetop over medium-low heat in a covered skillet or saucepan. Add a splash of chicken broth or water if the sauce appears too thick or dry. Stir occasionally until heated through. Alternatively, you can reheat in the microwave in 30-second intervals, stirring in between, until hot. If reheating a larger batch in the oven, place the chicken and sauce in an oven-safe dish, cover with foil, and bake at 325°F (160°C) for 15-20 minutes, or until thoroughly heated. Ensure the internal temperature reaches 165°F (74°C) for safe consumption. The skin might not be as crispy as when freshly made, but the flavor will remain just as delicious.
Frequently Asked Questions
Can I use boneless, skinless chicken?
Yes, you absolutely can! Boneless, skinless chicken thighs or even chicken breasts work well. If using boneless, skinless thighs, reduce the initial searing time to about 3-4 minutes per side. For chicken breasts, consider cutting them into larger chunks to prevent them from drying out, and reduce the simmering time to 15-20 minutes, or until cooked through to 165°F (74°C).
How can I make the sauce thicker or thinner?
To make the sauce thicker, you can either simmer it uncovered for a few extra minutes after removing the chicken, allowing it to reduce naturally, or you can add a bit more of the cornstarch slurry. For a thinner sauce, simply whisk in a tablespoon or two of extra chicken broth until it reaches your desired consistency.
What if I don’t have apple cider vinegar?
If you don’t have apple cider vinegar, you can substitute it with rice vinegar, white wine vinegar, or even a squeeze of fresh lemon juice. The vinegar adds a crucial tangy element that balances the sweetness of the honey and the richness of the soy sauce, so don’t skip it entirely!
Can I prepare this dish in a slow cooker?
Absolutely! For a slow cooker version, you would still brown the floured chicken thighs in a separate skillet first for best flavor and texture, then transfer them to the slow cooker. Sauté the onion and garlic, then add the sauce ingredients and bring to a simmer before pouring over the chicken. Cook on low for 3-4 hours or on high for 2-3 hours, or until the chicken is tender. Thicken the sauce with a cornstarch slurry on the stovetop or directly in the slow cooker during the last 30 minutes if desired.



