
Follow Me On Social Media!
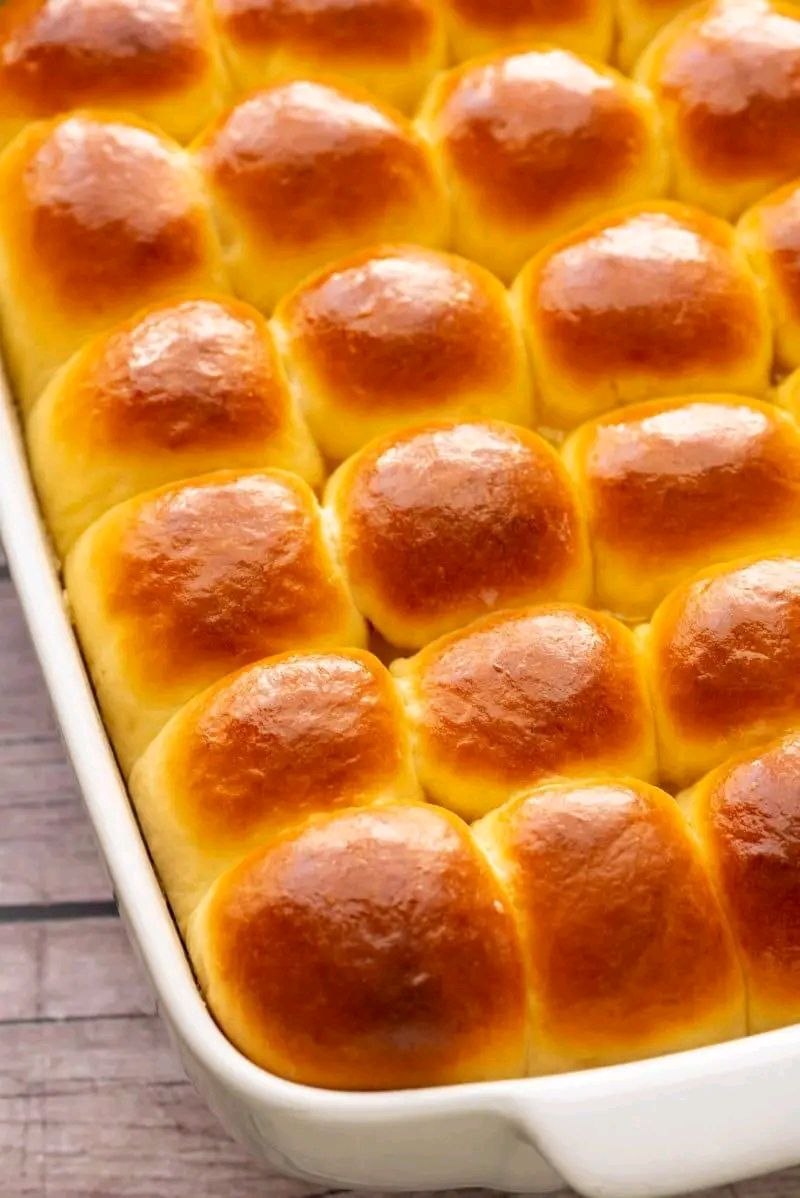
Ultimate Fluffy Homemade Dinner Rolls

Ultimate Fluffy Homemade Dinner Rolls
Imagine this: the aroma of freshly baked bread wafting through your kitchen, a symphony of warmth and comfort. You pull apart a golden-brown roll, steam gently rising, revealing an impossibly soft, airy interior. This isn’t just a dream; it’s the reality you can create with our recipe for the Ultimate Fluffy Homemade Dinner Rolls. There’s something undeniably magical about homemade bread, and these rolls are the epitome of that magic – a staple at any dinner table, a comforting side, and a guaranteed crowd-pleaser.
What makes these dinner rolls truly “ultimate”? It’s the perfect balance of a tender crumb, a delicate sweetness, and that irresistible buttery finish. We’ve meticulously crafted this recipe to ensure every bite is a cloud-like experience, melting in your mouth with a rich, comforting flavor. Forget dry, dense, or bland rolls; these are light, airy, and bursting with homemade goodness. And the best part? They’re surprisingly easy to make, even for novice bakers. Get ready to impress your family and friends with a batch of these extraordinary dinner rolls that are sure to become a cherished part of your culinary repertoire.
Nutritional Information
Per serving (approximate values):
- Calories: 220
- Protein: 7g
- Carbohydrates: 35g
- Fat: 6g
- Fiber: 2g
- Sodium: 250mg
Ingredients
- 1 cup (240ml) whole milk, warmed to 105-115°F (40-46°C)
- 2 ¼ teaspoons (1 packet) active dry yeast
- ¼ cup (50g) granulated sugar, plus 1 teaspoon
- 1 large egg, at room temperature
- ¼ cup (56g) unsalted butter, melted and slightly cooled, plus 2 tablespoons for brushing
- 1 teaspoon salt
- 3 ½ cups (420g) all-purpose flour, plus more for dusting
Instructions
- In a large bowl or the bowl of a stand mixer, combine the warm milk, 1 teaspoon of granulated sugar, and the active dry yeast. Stir gently and let it sit for 5-10 minutes, or until foamy. This indicates the yeast is active.
- Add the remaining ¼ cup of granulated sugar, the room temperature egg, ¼ cup of melted butter, and salt to the yeast mixture. Whisk until well combined.
- Gradually add the all-purpose flour, one cup at a time, mixing on low speed with a dough hook attachment (or with a wooden spoon if kneading by hand) until a shaggy dough forms.
- Increase the mixer speed to medium-low and knead for 7-10 minutes, or until the dough is smooth, elastic, and pulls away from the sides of the bowl. If kneading by hand, turn the dough out onto a lightly floured surface and knead for 10-12 minutes. The dough should be slightly sticky but manageable.
- Lightly grease a large clean bowl with a little oil or cooking spray. Transfer the dough to the bowl, turning it once to coat all sides. Cover the bowl tightly with plastic wrap or a clean kitchen towel.
- Let the dough rise in a warm place for 1-1.5 hours, or until it has doubled in size. A slightly warm oven (turned off) or a sunny spot on your counter works well.
- Once the dough has doubled, gently punch it down to release the air. Turn the dough out onto a lightly floured surface.
- Divide the dough into 12 equal pieces. For best results, use a kitchen scale to ensure even sizing, aiming for approximately 65-70g per piece.
- Shape each piece of dough into a round ball. To do this, pull the edges of the dough underneath itself, creating a smooth top surface, and then roll it between your palm and the counter in a circular motion until a tight, smooth ball forms.
- Arrange the shaped rolls in a greased 9×13 inch baking dish, leaving a little space between each roll (they will expand).
- Cover the baking dish loosely with plastic wrap or a clean kitchen towel and let the rolls rise again in a warm place for another 30-45 minutes, or until they are visibly puffy and nearly doubled in size.
- Preheat your oven to 375°F (190°C) about 15 minutes before the second proofing is complete.
- Bake the rolls for 18-22 minutes, or until they are golden brown on top and cooked through. If the tops are browning too quickly, you can loosely tent the dish with aluminum foil.
- While the rolls are still hot from the oven, melt the remaining 2 tablespoons of unsalted butter and brush it generously over the tops of the rolls. This adds shine, flavor, and extra tenderness.
- Let the rolls cool in the baking dish for 5-10 minutes before serving. Serve warm and enjoy!
Cooking Tips and Variations
For the ultimate fluffy texture, ensuring your yeast is active is paramount. If your milk is too hot, it will kill the yeast; too cold, and it won’t activate properly. Aim for a temperature that feels like a warm bath on your wrist. If your yeast doesn’t foam after 5-10 minutes, discard the mixture and start again with fresh yeast. Don’t be tempted to add too much flour during kneading, as this can lead to dry, dense rolls. The dough should be slightly sticky but easy to handle. If it’s too sticky to work with, add flour one tablespoon at a time. Proper kneading develops the gluten, which is essential for that signature chewy-yet-tender texture. You’ll know it’s ready when you can stretch a small piece of dough thin enough to see light through it without it tearing (the windowpane test).
Proofing is the magic behind fluffy rolls. A warm environment is key. If your kitchen is cool, you can create a warm spot by turning your oven on for a minute or two, then turning it off and letting the dough rise inside (with the door ajar). Alternatively, a proofing drawer or even placing the covered bowl near a sunny window works well. Don’t rush the proofing process; letting the dough rise fully ensures a light and airy result. When shaping the rolls, aim for consistent sizes so they bake evenly. A kitchen scale is your best friend here. For variations, consider adding 1-2 tablespoons of finely chopped fresh rosemary or thyme to the dough for an herb-infused roll. For a sweeter touch, sprinkle cinnamon sugar on top before the second proofing. You can also make garlic butter rolls by mixing minced garlic and fresh parsley into the melted butter you brush on after baking.
Storage and Reheating
These homemade dinner rolls are best enjoyed fresh and warm from the oven. However, if you have leftovers, they can be stored at room temperature in an airtight container or a resealable plastic bag for up to 2-3 days. To extend their freshness, you can also store them in the refrigerator for up to 5 days. For longer storage, these rolls freeze beautifully. Once completely cooled, place them in a freezer-safe bag or airtight container and freeze for up to 2-3 months. Thaw frozen rolls at room temperature before reheating.
To reheat, for best results and to revive their fluffy texture, preheat your oven to 350°F (175°C). Place the rolls directly on a baking sheet or wrap them loosely in aluminum foil. Bake for 5-10 minutes, or until warmed through. If reheating from frozen, you may need to add an extra 5-10 minutes. For a quicker reheat, you can use a microwave, but be careful not to overdo it, as this can make them tough. Microwave individual rolls for 15-30 seconds until warm. Brushing with a little melted butter after reheating can also help restore some of their original luster and tenderness.
Frequently Asked Questions
What makes these rolls so fluffy?
The fluffiness comes from a combination of perfectly activated yeast, proper kneading to develop gluten, and two crucial proofing stages. The yeast produces carbon dioxide, creating air pockets, while the gluten provides the structure to trap those gases, resulting in a light and airy texture. The enriched dough, with milk, butter, and egg, also contributes to their tender crumb.
Can I make the dough ahead of time?
Yes, you can! After the first proofing, you can punch down the dough, cover it tightly, and refrigerate it for up to 24 hours. When you’re ready to bake, take the dough out of the refrigerator, let it come to room temperature for about 30-60 minutes, then proceed with shaping, the second proofing, and baking as instructed.
My dough isn’t rising; what went wrong?
The most common reasons for dough not rising are inactive yeast (milk too hot or too cold, or old yeast), too much flour making the dough too stiff, or a cold environment for proofing. Ensure your milk temperature is correct, use fresh yeast, and provide a warm spot for the dough to rise. If your yeast didn’t foam in the initial step, it’s best to start over.
Can I use whole wheat flour for these rolls?
While you can substitute some whole wheat flour, using 100% whole wheat will result in a denser roll. For a fluffier result, we recommend using all-purpose flour. If you want to incorporate whole wheat, try replacing up to half of the all-purpose flour with whole wheat flour. You might need to add a little extra liquid as whole wheat flour absorbs more.



