
Follow Me On Social Media!
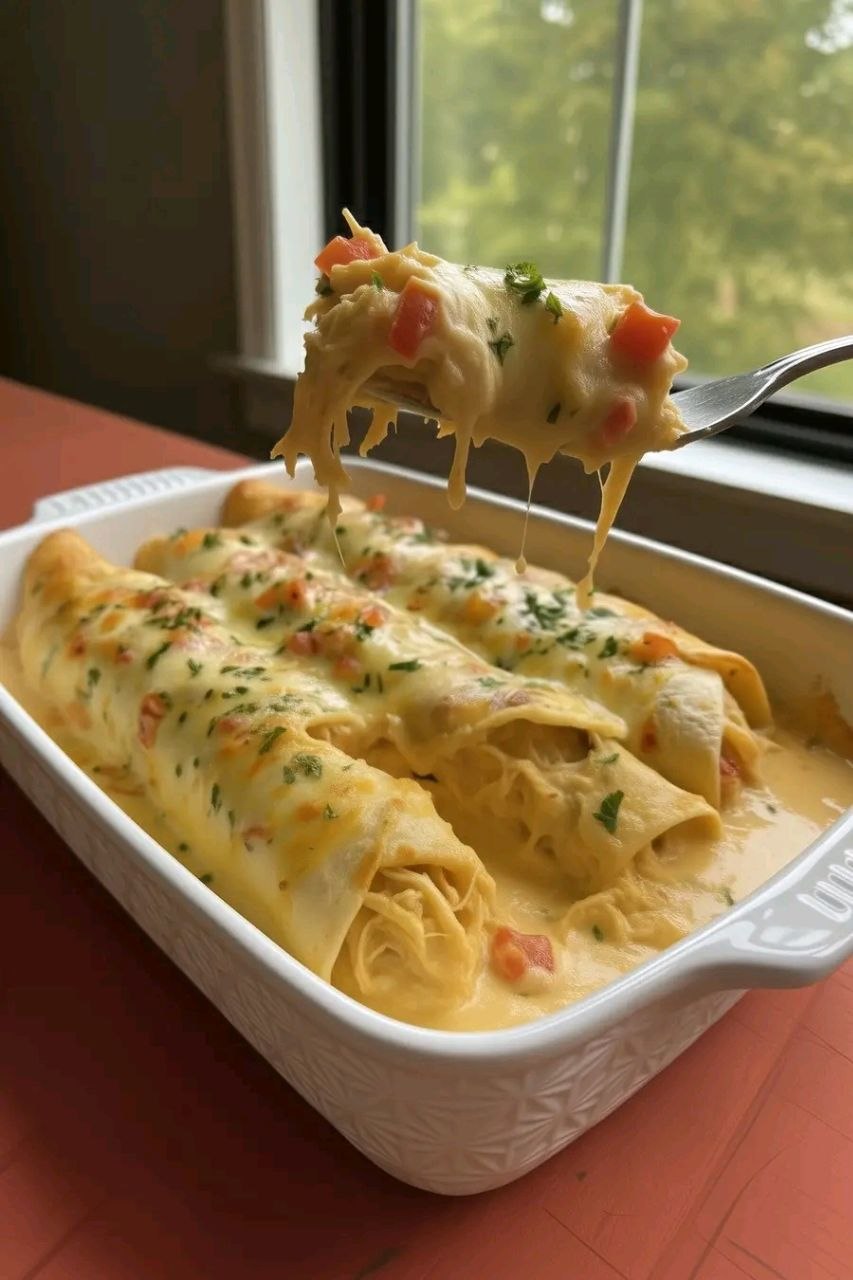
Chicken Enchiladas

Introduction
Sink your teeth into these cheesy, creamy Chicken Enchiladas! This classic Mexican-inspired dish is a beloved comfort food for a reason: tender chicken, rich sauce, and melted cheese all baked together in a warm tortilla create an irresistible symphony of flavors and textures. Whether you’re a seasoned chef or a kitchen novice, this recipe promises to deliver a satisfying meal that will have everyone asking for seconds. It’s the perfect dish for a family dinner, a potluck, or simply when you’re craving something hearty and delicious.
What makes *this* particular chicken enchilada recipe stand out is its incredibly creamy sauce and straightforward preparation. We’re talking about a luscious, savory sauce that perfectly coats every bite, ensuring your enchiladas are never dry. Plus, we’ve designed this recipe to be approachable, breaking down each step so you can achieve restaurant-quality results in your own kitchen without any fuss. Say goodbye to bland, dry enchiladas and hello to a dish that’s bursting with flavor and comforting warmth.
Imagine pulling a bubbling casserole dish from the oven, the aroma of spices and melted cheese filling your home. These enchiladas are not just a meal; they’re an experience. With perfectly shredded chicken enveloped in a creamy mixture, rolled in soft flour tortillas, and then bathed in even more of that delectable sauce and a generous layer of cheese, each bite is pure bliss. Garnished with fresh diced tomatoes and vibrant cilantro, they are as beautiful to look at as they are delicious to eat.
Nutritional Information
Per serving (approximate values):
- Calories: 485
- Protein: 35g
- Carbohydrates: 30g
- Fat: 25g
- Fiber: 3g
- Sodium: 980mg
Ingredients
- 2 tablespoons olive oil
- 1 pound boneless, skinless chicken breasts or thighs, cooked and shredded (about 3 cups)
- 1 medium onion, finely chopped
- 2 cloves garlic, minced
- 1 (10.5 ounce) can condensed cream of chicken soup
- 1 (4 ounce) can diced green chiles, undrained
- 1/2 cup sour cream (full-fat recommended for best creaminess)
- 1/4 cup milk (any kind)
- 1 teaspoon ground cumin
- 1/2 teaspoon chili powder
- 1/4 teaspoon black pepper
- 1/4 teaspoon salt (or to taste)
- 10-12 medium flour tortillas (8-inch size)
- 2 cups shredded cheddar cheese, divided (or Monterey Jack, or a blend)
- 1 (14.5 ounce) can diced tomatoes, drained (for garnish)
- 1/4 cup fresh cilantro, chopped (for garnish)
Instructions
- Prepare the Chicken: If your chicken isn’t already cooked, you can boil, bake, or pan-fry it until cooked through. Once cooked, let it cool slightly and then shred it using two forks or a stand mixer. Set aside.
- Sauté Aromatics: Heat the olive oil in a large skillet or Dutch oven over medium heat. Add the chopped onion and cook until softened and translucent, about 5-7 minutes. Add the minced garlic and cook for another minute until fragrant, being careful not to burn it.
- Make the Creamy Filling Base: To the skillet with the onions and garlic, add the condensed cream of chicken soup, diced green chiles (undrained), sour cream, milk, ground cumin, chili powder, black pepper, and salt. Stir well to combine all ingredients until smooth and heated through.
- Combine Filling: Add the shredded chicken to the creamy sauce mixture in the skillet. Stir gently until the chicken is evenly coated. Remove from heat.
- Preheat Oven and Prepare Dish: Preheat your oven to 375°F (190°C). Lightly grease a 9×13-inch baking dish with cooking spray or a little olive oil.
- Warm Tortillas: For easier rolling and to prevent tearing, lightly warm the tortillas. You can do this by wrapping them in a damp paper towel and microwaving for 30-60 seconds, or by heating them individually in a dry skillet for 10-15 seconds per side until pliable.
- Assemble Enchiladas: Lay a warm tortilla flat. Spoon about 1/4 to 1/3 cup of the chicken filling down the center of the tortilla. Sprinkle a small amount of shredded cheese (about 1 tablespoon) over the filling.
- Roll and Arrange: Tightly roll the tortilla and place it seam-side down in the prepared baking dish. Repeat with the remaining tortillas and filling, arranging them snugly in a single layer in the baking dish.
- Top with Sauce and Cheese: Once all enchiladas are assembled in the dish, pour any remaining creamy chicken mixture from the skillet evenly over the top of the rolled enchiladas. Then, generously sprinkle the remaining 1.5 cups of shredded cheddar cheese over everything.
- Bake: Cover the baking dish loosely with aluminum foil. Bake for 20 minutes.
- Uncover and Brown: Remove the foil and continue to bake for another 10-15 minutes, or until the cheese is melted, bubbly, and lightly golden brown, and the enchiladas are heated through.
- Rest and Garnish: Carefully remove the baking dish from the oven. Let the enchiladas rest for 5-10 minutes before serving. This allows the sauce to set slightly. Garnish with drained diced tomatoes and fresh chopped cilantro before serving.
Cooking Tips and Variations
To ensure your chicken enchiladas are a resounding success, here are some invaluable tips and exciting variations to try. First and foremost, don’t overfill your tortillas. While it’s tempting to pack in as much delicious filling as possible, overfilling can lead to tortillas bursting or making them difficult to roll. Aim for about 1/4 to 1/3 cup of filling per tortilla, depending on its size, allowing enough room to roll them snugly. Warming your tortillas is another crucial step; it makes them pliable and prevents cracking during rolling. A quick zap in the microwave or a few seconds in a dry skillet makes all the difference. When shredding your chicken, aim for a consistency that’s not too fine, as you want some texture in your filling. If you’re short on time, a pre-cooked rotisserie chicken is a fantastic shortcut for the shredded chicken component.
For variations, the possibilities are endless! You can easily swap out the cheese for different flavors. Monterey Jack will give you a milder, very melty result, while Pepper Jack adds a subtle kick. A Mexican blend cheese is always a safe and delicious bet. To sneak in some extra vegetables, consider sautéing diced bell peppers (any color), corn, or even finely chopped zucchini with the onions and garlic at the beginning. This adds color, nutrition, and another layer of flavor to your filling. If you prefer a different sauce profile, instead of the creamy chicken soup base, you could use a high-quality canned red enchilada sauce or even a vibrant salsa verde for a tangier, brighter flavor. Just remember to adjust the liquid content if using a thinner sauce. For those who love heat, diced jalapeños (fresh or canned) can be added to the filling, or a dash of your favorite hot sauce can be stirred into the creamy base. Finally, if you or someone you’re cooking for has a gluten intolerance, this recipe can easily be made gluten-free by simply using corn tortillas instead of flour. Just be extra gentle when warming and rolling corn tortillas as they tend to be a bit more fragile.
Storage and Reheating
Proper storage is key to enjoying your delicious chicken enchiladas for days to come. Once cooled, transfer any leftover enchiladas to an airtight container. If you have a large amount, you can store them directly in the baking dish, tightly covered with plastic wrap and then aluminum foil. Stored this way, they will keep fresh in the refrigerator for up to 3-4 days. For longer storage, enchiladas freeze remarkably well. You can freeze individual portions or the entire dish. To freeze, ensure they are completely cooled, then wrap tightly in plastic wrap and then aluminum foil. They can be frozen for up to 2-3 months. If freezing the entire pan, consider assembling them in a disposable aluminum pan for easy freezer-to-oven transfer.
Reheating is simple, whether from the fridge or freezer. From the refrigerator, you can reheat individual portions in the microwave for 2-3 minutes, or until heated through. For a crispier texture and to reheat a larger batch, place the enchiladas in an oven-safe dish, cover loosely with foil, and bake at 350°F (175°C) for 20-30 minutes, or until hot and bubbly. If reheating from frozen, it’s best to thaw them in the refrigerator overnight first, then follow the oven reheating instructions. If you’re reheating directly from frozen, expect to bake them for 45-60 minutes, still covered with foil for the initial part of baking, then uncovered for the last 15-20 minutes to allow the cheese to crisp up. Add a splash of milk or chicken broth to the dish before reheating if the sauce seems a bit dry to help maintain moisture.
Frequently Asked Questions
What kind of chicken is best for enchiladas?
Boneless, skinless chicken breasts or thighs work equally well for enchiladas. Chicken breasts will give you a leaner, milder flavor, while chicken thighs offer a richer, juicier texture. The key is to cook the chicken until tender and then shred it, as shredded chicken integrates best with the creamy filling and rolls easily into the tortillas.
Can I make these enchiladas ahead of time?
Absolutely! Chicken enchiladas are an excellent make-ahead meal. You can assemble them completely, cover them tightly with plastic wrap and foil, and store them in the refrigerator for up to 24 hours before baking. When ready to bake, add an extra 10-15 minutes to the baking time since they will be starting from a chilled state. You can also prepare the chicken filling ahead of time and store it separately in the fridge for up to 2 days, then assemble and bake on the day you plan to serve.
How do I prevent my tortillas from getting soggy?
To prevent soggy tortillas, there are a few tricks. First, don’t over-saturate the tortillas with sauce before baking; most of the sauce goes on top. Second, warming the tortillas slightly before rolling helps them absorb less moisture from the filling and sauce. Some people also quickly dip each tortilla in hot oil or a thin layer of sauce before filling, which creates a slight barrier, but with a creamy, thicker sauce like this one, it’s often not necessary. Baking them covered for the initial period and then uncovered helps to cook them through without drying them out or making them too mushy.



