
Follow Me On Social Media!
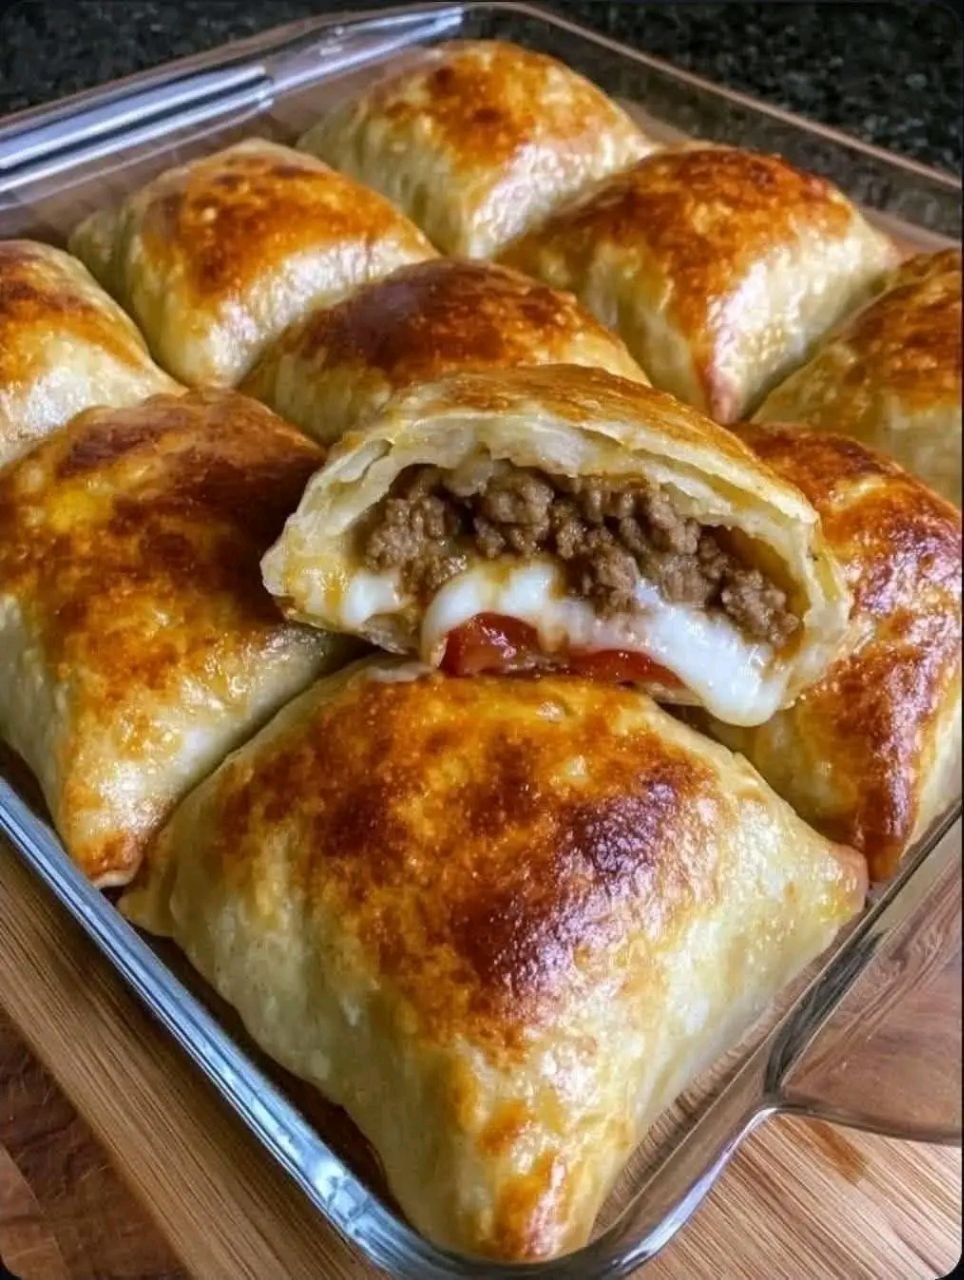
Cheesy Beef Pocket Pastries

Introduction
Get ready to sink your teeth into a savory sensation that’s as comforting as it is delicious: Cheesy Beef Pocket Pastries! These golden, flaky parcels are packed with a rich, seasoned ground beef filling and gooey, melted cheese, making them an instant crowd-pleaser. Imagine a miniature, handheld version of your favorite hearty beef dish, encased in a buttery, crisp pastry shell – that’s exactly what these pocket pastries deliver. They’re perfect for a quick snack, a delightful appetizer at your next gathering, or even a fun, light meal on the go. The best part? They look impressive but are surprisingly simple to make, especially when you leverage the magic of store-bought puff pastry.
What makes these Cheesy Beef Pocket Pastries truly special is the irresistible combination of textures and flavors. You get the satisfying crunch of the outer pastry, followed by the tender, savory beef seasoned to perfection, all complemented by the stretchy, warm cheese that ties everything together. They’re incredibly versatile too; you can spice them up, add vegetables, or even experiment with different types of cheese to suit your palate. Whether you’re feeding a hungry family, preparing for a party, or simply craving a delicious treat, these pocket pastries are guaranteed to hit the spot and leave everyone asking for more.
Beyond their incredible taste, the convenience factor of these pastries cannot be overstated. Using pre-made puff pastry cuts down significantly on prep time, allowing you to whip up a batch of these delectable pockets without spending hours in the kitchen. This recipe is designed for ease, ensuring that even novice bakers can achieve beautifully golden and perfectly cooked results. So, roll up your sleeves and prepare to impress yourself and your loved ones with these utterly irresistible Cheesy Beef Pocket Pastries!
Nutritional Information
Per serving (approximate values, based on 10 servings):
- Calories: 380
- Protein: 22g
- Carbohydrates: 18g
- Fat: 24g
- Fiber: 2g
- Sodium: 450mg
Ingredients
- 1 tablespoon olive oil
- 1 pound lean ground beef (85/15 or 90/10)
- 1 medium yellow onion, finely chopped
- 2 cloves garlic, minced
- 1/2 cup tomato paste
- 1/4 cup beef broth
- 1 teaspoon dried oregano
- 1 teaspoon dried basil
- 1/2 teaspoon salt, or to taste
- 1/4 teaspoon black pepper, or to taste
- 1/4 teaspoon red pepper flakes (optional, for a little heat)
- 2 sheets (17.3 ounces total) frozen puff pastry, thawed according to package directions
- 1 1/2 cups shredded mozzarella cheese
- 1/2 cup shredded sharp cheddar cheese
- 1 large egg, beaten (for egg wash)
- 1 tablespoon water (for egg wash)
- Sesame seeds or poppy seeds (optional, for topping)
Instructions
- Prepare the Beef Filling: Heat the olive oil in a large skillet over medium-high heat. Add the ground beef and cook, breaking it up with a spoon, until browned and no longer pink. Drain any excess fat from the skillet.
- Sauté Aromatics: Add the finely chopped onion to the skillet with the browned beef. Cook for 5-7 minutes, or until the onion softens and becomes translucent. Add the minced garlic and cook for another minute until fragrant.
- Build the Flavor: Stir in the tomato paste, beef broth, dried oregano, dried basil, salt, black pepper, and red pepper flakes (if using). Mix well to combine all ingredients. Reduce the heat to medium-low and let the mixture simmer for 5-7 minutes, allowing the flavors to meld and the sauce to thicken slightly. Remove from heat and let the beef filling cool slightly while you prepare the pastry.
- Preheat Oven and Prepare Pastry: Preheat your oven to 400°F (200°C). Line two large baking sheets with parchment paper. Unfold one sheet of thawed puff pastry onto a lightly floured surface. Gently roll it out slightly with a rolling pin to smooth out any creases and make it a bit larger, about 10×12 inches.
- Cut the Pastry: Using a sharp knife or a pizza cutter, cut the puff pastry sheet into 4 equal squares. Repeat with the second sheet of puff pastry, giving you a total of 8 squares.
- Assemble the Pockets: In a medium bowl, combine the shredded mozzarella cheese and cheddar cheese. Divide the beef filling evenly among the 8 pastry squares, placing a spoonful in the center of each square, leaving about a 1-inch border around the edges. Top the beef filling with a generous sprinkle of the mixed cheeses.
- Fold and Seal: Carefully fold one corner of the pastry over to the opposite corner, forming a triangle. Gently press down around the edges to seal the filling inside. Use a fork to crimp the edges firmly, ensuring they are well-sealed to prevent the filling from leaking out during baking. Alternatively, you can fold the pastry into a rectangle, bringing one side over to meet the other.
- Prepare Egg Wash: In a small bowl, whisk together the beaten egg and 1 tablespoon of water to create an egg wash.
- Bake the Pastries: Place the assembled pocket pastries on the prepared baking sheets. Brush the tops of each pastry generously with the egg wash. If desired, sprinkle with sesame seeds or poppy seeds for an added touch.
- Bake until Golden: Bake for 18-22 minutes, or until the pastries are puffed up, golden brown, and cooked through. The exact baking time may vary depending on your oven.
- Cool and Serve: Once baked, remove the Cheesy Beef Pocket Pastries from the oven and let them cool on the baking sheets for a few minutes before transferring them to a wire rack. Serve warm and enjoy!
Cooking Tips and Variations
To ensure your Cheesy Beef Pocket Pastries are nothing short of spectacular, here are some essential tips and exciting variations:
Tips for Best Results:
- Thaw Puff Pastry Properly: Always thaw your puff pastry according to package directions, usually in the refrigerator overnight or at room temperature for about 30-40 minutes. If it’s too cold, it will crack when you unfold it; if it’s too warm, it will be sticky and difficult to work with.
- Don’t Overfill: While tempting to pack in as much filling as possible, overfilling can lead to pastries bursting open during baking. Stick to the recommended amount to ensure a good seal.
- Seal Tightly: A good seal is crucial. Press firmly around the edges of your folded pastry, then use a fork to crimp them securely. This creates a decorative edge and helps prevent any delicious filling from escaping.
- Cool the Filling: Make sure your beef filling is cooled down before putting it into the puff pastry. Hot filling can cause the pastry to become soggy and difficult to handle, and it can also melt the cheese prematurely.
- Egg Wash is Key: Don’t skip the egg wash! It’s what gives these pastries their beautiful golden-brown color and a lovely, slightly crisp finish.
- Don’t Crowd the Baking Sheet: Give your pastries enough space on the baking sheet (at least an inch between each) to allow for even air circulation and browning.
- Use Lean Ground Beef: Using lean ground beef will result in less grease, which means less draining and a less soggy pastry. If you do use fattier beef, be sure to drain all excess fat thoroughly after browning.
Recipe Variations:
- Spice it Up: For a spicier kick, increase the red pepper flakes in the beef mixture or add a pinch of cayenne pepper. A dash of hot sauce in the filling can also add a nice zing.
- Add Vegetables: Finely diced bell peppers (any color), mushrooms, or even spinach can be sautéed with the onions and garlic to add more nutrition and flavor. Just be sure to cook out any excess moisture from the vegetables before adding them to the beef.
- Different Cheeses: Experiment with different cheese combinations. Provolone, Monterey Jack, or even a smoked gouda can add unique flavors. A sprinkle of Parmesan cheese on top of the filling before folding can also be delicious.
- Herb Garden: Fresh herbs can elevate the flavor significantly. Instead of dried oregano and basil, use a tablespoon of fresh chopped oregano and basil, adding them at the end of the cooking process for maximum aroma. Fresh thyme or rosemary would also be excellent.
- Mediterranean Twist: Add some crumbled feta cheese, Kalamata olives, and a pinch of za’atar to the beef mixture for a Mediterranean-inspired pocket.
- BBQ Beef Pockets: Replace the tomato paste and beef broth with 1/2 cup of your favorite barbecue sauce for a smoky, sweet, and savory twist.
- Mini Appetizers: Instead of cutting each pastry sheet into 4 squares, cut them into 6 or 8 smaller squares for bite-sized appetizers, perfect for parties. Adjust baking time accordingly (likely 15-18 minutes).
- Gluten-Free Option: If you have dietary restrictions, look for gluten-free puff pastry readily available in many grocery stores to make this recipe accessible.
- Sauce on the Side: Serve these pastries with a side of marinara sauce for dipping, a spicy aioli, or even a cool ranch dressing.
Storage and Reheating
Proper storage and reheating ensure your Cheesy Beef Pocket Pastries remain delicious for days after baking. They’re excellent for meal prepping or enjoying leftovers.
Storage:
- Room Temperature: If you plan to consume them within a few hours, the pastries can be left at room temperature on a wire rack to prevent sogginess. However, due to the meat and cheese filling, it’s best not to leave them out for more than 2 hours.
- Refrigerator: Once completely cooled, store the Cheesy Beef Pocket Pastries in an airtight container in the refrigerator for up to 3-4 days. Layer them with parchment paper if stacking to prevent sticking.
- Freezer (Baked): For longer storage, cooked and cooled pastries can be frozen. Arrange them in a single layer on a baking sheet and freeze until solid. Once frozen, transfer them to a freezer-safe bag or airtight container, separating layers with parchment paper. They will keep well for up to 2-3 months.
- Freezer (Unbaked): You can also freeze unbaked pastries. Assemble them up to the point of brushing with egg wash. Place them on a parchment-lined baking sheet and freeze until solid. Once frozen, transfer to a freezer-safe bag or container. When ready to bake, you can bake them directly from frozen; just add about 5-10 minutes to the baking time and apply the egg wash just before baking.
Reheating:
- Oven (Recommended for best results): This method will help restore the pastry’s crispness. Preheat your oven to 350°F (175°C). Place the pastries on a baking sheet and heat for 10-15 minutes (if refrigerated) or 20-25 minutes (if frozen), or until heated through and the pastry is crisp.
- Toaster Oven: A toaster oven is perfect for reheating a few pastries. Set it to 350°F (175°C) and heat for 5-10 minutes until warm and crispy.
- Air Fryer: For a quick and crispy reheat, place the pastries in a single layer in your air fryer basket. Air fry at 325°F (160°C) for 5-8 minutes, checking periodically, until hot and crispy.
- Microwave (Not Recommended for Crispness): While the microwave will heat the pastries quickly, it will likely make the pastry soft and potentially soggy. If you must use a microwave, heat for 30-60 seconds per pastry, just until warmed through, then consider a quick finish in a toaster oven or air fryer to regain some crispness if desired.
Frequently Asked Questions
Can I make the beef filling ahead of time?
Absolutely! The beef filling can be prepared 1-2 days in advance. Cook the filling completely, let it cool, and store it in an airtight container in the refrigerator. When you’re ready to assemble the pastries, simply take the filling out of the fridge and proceed with the recipe. This is a great way to save time on busy days.
What if my puff pastry cracks when I unfold it?
If your puff pastry cracks, it’s likely still too cold. Let it sit at room temperature for another 10-15 minutes to soften slightly. You can also try gently pressing the cracks together with your fingers or a rolling pin; the layers will usually meld back together during baking.
Can I use ground turkey or chicken instead of beef?
Yes, you can! Ground turkey or chicken makes for a lighter alternative. Just ensure you season it well, as poultry can be milder in flavor than beef. You may also want to add a tablespoon of olive oil when browning to prevent it from drying out, as ground poultry tends to be leaner.
Why are my pastries soggy on the bottom?
Soggy bottoms can be caused by a few factors. Ensure your beef filling is completely cooled before assembling the pastries, as hot filling can steam and make the pastry wet. Also, make sure you’ve drained all excess fat from the beef. Finally, baking on a parchment-lined baking sheet and not overcrowding the oven can help with proper air circulation and crisping.



