
Follow Me On Social Media!
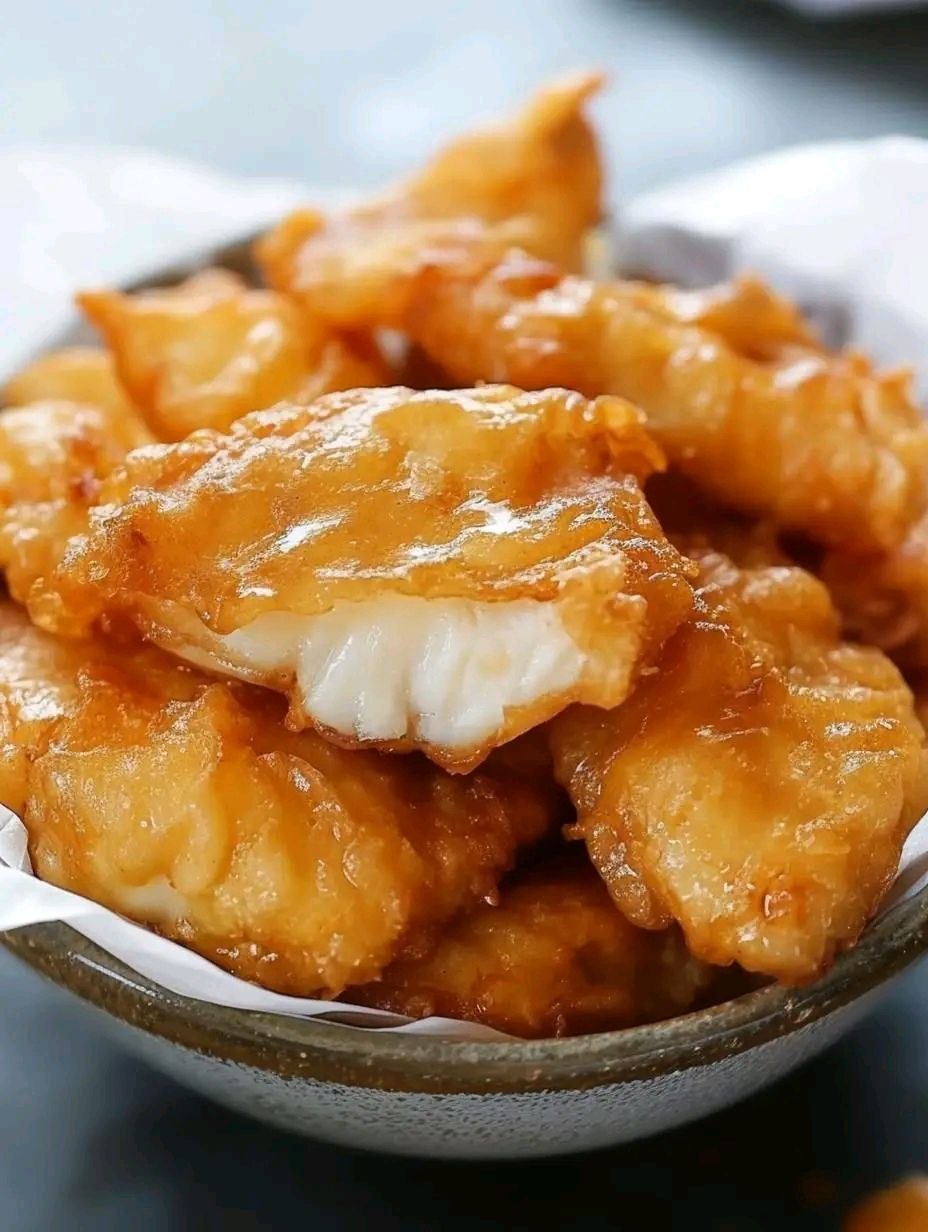
Copycat Long John Silvers Chicken

Introduction
There’s a certain magic to the crispy, golden-brown chicken from Long John Silver’s. For many, it evokes a wave of nostalgia, transporting them back to childhood family dinners or quick stops after a day of errands. That distinctive, slightly sweet, and incredibly crunchy batter coating tender chicken pieces is a flavor profile that’s hard to forget, and even harder to find outside of their iconic blue-and-white striped boxes. If you’ve ever found yourself craving that unique taste, wishing you could whip it up in your own kitchen, then you’re in the right place.
Long John Silver’s, a fast-food chain synonymous with seafood, has also quietly perfected a chicken recipe that stands out from the crowd. Unlike typical fried chicken, their version boasts a lighter, almost tempura-like batter that shatters with every bite, revealing juicy meat within. It’s not just about the crispiness; there’s a subtle seasoning in that batter that makes it utterly addictive, a secret blend that we’re aiming to unlock and recreate today. Get ready to banish those drive-thru cravings because we’re about to embark on a culinary adventure to bring the taste of Long John Silver’s right to your dining table.
This copycat recipe is designed to help you achieve that signature Long John Silver’s chicken experience at home. We’ve meticulously studied the components that make their chicken so special – from the perfect batter consistency to the ideal frying temperature – to deliver a recipe that’s as close to the original as possible. Prepare to impress your family and friends with this homemade version that captures all the crispy, flavorful goodness you remember. Say goodbye to long lines and hello to delicious, perfectly fried chicken whenever the craving strikes!
Nutritional Information
Per serving (approximate values):
- Calories: 350-400
- Protein: 25-30g
- Carbohydrates: 20-25g
- Fat: 20-25g
- Fiber: 1-2g
- Sodium: 600-800mg
Ingredients
- 2 pounds boneless, skinless chicken breasts, cut into 1-inch pieces
- 2 cups all-purpose flour, divided
- 1 cup cornstarch
- 1 tablespoon baking powder
- 1 teaspoon salt
- 1/2 teaspoon black pepper
- 1/2 teaspoon garlic powder
- 1/2 teaspoon onion powder
- 1/4 teaspoon paprika
- 1/4 teaspoon cayenne pepper (optional, for a little kick)
- 1 1/2 cups cold water
- 1 large egg
- 1 tablespoon yellow mustard
- Vegetable oil or peanut oil for deep frying (approximately 6-8 cups, depending on fryer size)
Instructions
- Prepare the Chicken: Pat the chicken pieces thoroughly dry with paper towels. This is crucial for achieving a crispy crust. Set aside.
- Create the Dry Dredge: In a shallow dish or bowl, combine 1 cup of the all-purpose flour with 1/2 teaspoon salt and 1/4 teaspoon black pepper.
- Dredge the Chicken: Lightly coat each piece of chicken in the dry dredge, shaking off any excess. Place the dredged chicken on a wire rack set over a baking sheet. This helps the coating adhere better.
- Prepare the Wet Batter: In a large mixing bowl, whisk together the remaining 1 cup all-purpose flour, cornstarch, baking powder, remaining 1/2 teaspoon salt, remaining 1/4 teaspoon black pepper, garlic powder, onion powder, paprika, and cayenne pepper (if using).
- Add Wet Ingredients: In a separate small bowl, whisk together the cold water, egg, and yellow mustard until well combined.
- Combine Batter: Gradually pour the wet mixture into the dry ingredients, whisking constantly until a smooth batter forms. The batter should be the consistency of pancake batter – thick enough to coat a spoon but still pourable. Do not overmix; a few small lumps are fine.
- Heat the Oil: Pour enough vegetable or peanut oil into a heavy-bottomed pot, Dutch oven, or deep fryer to reach a depth of about 3-4 inches. Heat the oil over medium-high heat until it reaches 350°F (175°C). Use a candy or deep-fry thermometer to monitor the temperature accurately.
- Batter the Chicken: Working in batches, dip the dredged chicken pieces into the wet batter, ensuring they are fully coated. Allow any excess batter to drip off.
- Fry the Chicken: Carefully lower the battered chicken into the hot oil, one piece at a time. Do not overcrowd the pot; fry only 4-6 pieces at a time to maintain oil temperature.
- Cook Until Golden: Fry for 4-6 minutes, or until the chicken is golden brown, crispy, and cooked through. The internal temperature should reach 165°F (74°C). Flip the chicken occasionally to ensure even browning.
- Drain and Season: Using a slotted spoon or spider, remove the cooked chicken from the oil and transfer it to a clean wire rack set over a baking sheet lined with paper towels to drain excess oil. Immediately sprinkle with a pinch of salt.
- Repeat: Continue frying the remaining chicken in batches, ensuring the oil returns to 350°F (175°C) before adding the next batch.
- Serve: Serve hot with your favorite sides and dipping sauces.
Cooking Tips and Variations
Achieving that signature Long John Silver’s crispiness relies heavily on proper technique. First and foremost, oil temperature is paramount. Invest in a good deep-fry thermometer; maintaining a consistent 350°F (175°C) is key to preventing soggy, greasy chicken or burnt exteriors with raw insides. If the oil is too cool, the batter will absorb too much oil, resulting in a heavy, greasy product. If it’s too hot, the outside will burn before the inside cooks through. When you add the chicken, the temperature will drop, so be patient and allow it to come back up to temp between batches.
Another crucial tip is to avoid overcrowding the fryer. This is a common mistake that significantly lowers the oil temperature and leads to uneven cooking and less crispy results. Fry in small batches, giving each piece enough space to cook freely. Once fried, always drain the chicken on a wire rack, not directly on paper towels. A wire rack allows air circulation around all sides, preventing condensation and helping to maintain crispiness. Paper towels laid flat can trap steam, making the bottom soggy.
For variations, you can experiment with the spices in the batter. To make it spicier, increase the cayenne pepper or add a pinch of smoked paprika for a deeper flavor. For a gluten-free option, you can substitute the all-purpose flour with a 1:1 gluten-free all-purpose flour blend that contains xanthan gum. The texture might be slightly different, but it can still yield delicious results. You can also try this batter with other proteins like fish fillets (cod, pollock, or tilapia work well) to truly mimic the Long John Silver’s experience, or even with shrimp. Just adjust cooking times accordingly for smaller items.
Consider a double-fry method for ultimate crispiness. Fry the chicken for about 3-4 minutes until lightly golden, remove, let it rest for 5-10 minutes, then fry again for 1-2 minutes until deeply golden and extra crunchy. This two-step process can create an even more satisfying crunch, similar to some restaurant-style fries. Lastly, ensure your chicken pieces are a uniform size. This guarantees even cooking, so all your pieces are perfectly done at the same time.
Storage and Reheating
Proper storage is essential to maintain the quality and safety of your homemade fried chicken. Once the chicken has cooled completely to room temperature, transfer it to an airtight container. You can place a layer of paper towels at the bottom of the container to absorb any residual moisture, and another layer on top before sealing. Store the chicken in the refrigerator for up to 3-4 days. While it won’t be as crispy as freshly made, it will still be delicious.
For best results when reheating, avoid the microwave, as it will inevitably make the chicken soggy. The goal is to bring back that delightful crispiness. The best method for reheating fried chicken is in an oven or air fryer. Preheat your oven to 375°F (190°C). Place the chicken pieces on a wire rack set over a baking sheet. This allows air to circulate around the chicken and helps to recrisp the exterior. Heat for 10-15 minutes, or until the chicken is heated through and the crust is crispy again. For an air fryer, preheat to 350°F (175°C) and cook for 5-8 minutes, flipping halfway, until hot and crispy.
If you prefer a quicker method, you can also reheat it in a skillet on the stovetop. Heat a small amount of oil (about 1 tablespoon) in a non-stick skillet over medium heat. Add the chicken and cook for 3-5 minutes per side, until heated through and crispy. Be careful not to overcrowd the pan. Remember, the key to successful reheating is gentle, even heat that helps to re-crisp the batter without drying out the chicken inside.
Frequently Asked Questions
What kind of oil is best for frying this chicken?
For deep frying, high smoke point oils are best. Vegetable oil, canola oil, or peanut oil are excellent choices because they can withstand the high temperatures needed for frying without breaking down or imparting undesirable flavors. Peanut oil, in particular, can offer a slightly cleaner taste and higher smoke point.
Can I make the batter ahead of time?
While it’s best to make the batter fresh just before frying for optimal crispiness and leavening action from the baking powder, you can prepare the dry ingredients ahead of time and store them in an airtight container. When you’re ready to fry, simply whisk in the cold water, egg, and mustard. If you absolutely need to make the full wet batter a little in advance, keep it covered in the refrigerator for no more than an hour or two, but expect a slight decrease in the batter’s lightness.
Why is cold water used in the batter?
Using cold water in the batter is a common technique, especially in tempura-style batters. The cold temperature helps to slow down gluten development in the flour, resulting in a more tender and less chewy crust. When the cold batter hits the hot oil, it creates a more dramatic temperature shock, which contributes to a lighter, crispier, and more airy texture.
How do I know if my chicken is cooked through without a thermometer?
While a meat thermometer is always the most reliable way to ensure chicken is cooked to a safe internal temperature of 165°F (74°C), you can also check for doneness by cutting into the thickest part of a piece. The juices should run clear, and the meat should be opaque white with no pink. However, for food safety and best results, a thermometer is highly recommended.



