
Follow Me On Social Media!
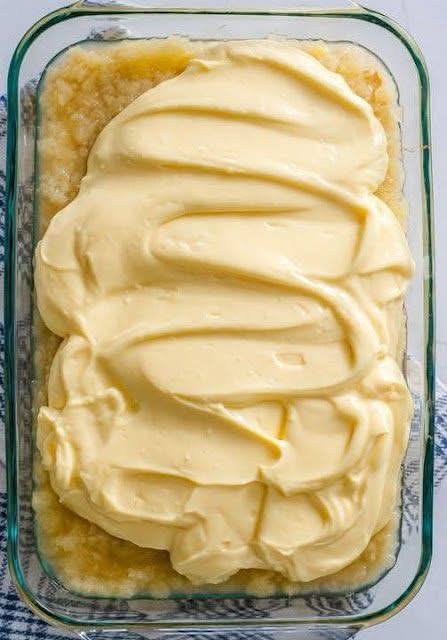
Classic Church Cake

Introduction
There are some desserts that just feel like home, like a warm hug from a dear friend, or the comforting murmur of a Sunday afternoon gathering. For many, that dessert is the Classic Church Cake. This isn’t just any cake; it’s a timeless tradition, a potluck superstar, and a guaranteed crowd-pleaser that evokes memories of community, celebration, and simple, unadulterated joy. Often found gracing tables at church functions, family reunions, and neighborhood get-togethers, the Church Cake earns its name not just from its popularity at such events, but from its universally appealing, humble, and utterly delicious nature.
What exactly makes a “Church Cake” so special? It’s typically characterized by its incredible moistness, its ease of preparation, and its ability to feed a hungry crowd without breaking the bank or requiring advanced pastry skills. Our Classic Church Cake recipe captures all of these beloved qualities. We’re talking about a tender, golden cake base, generously topped with a bright, tangy crushed fruit layer – often pineapple, the undisputed king of church cake fillings – all crowned with a luxuriously creamy, dreamy topping that melts in your mouth. This isn’t a fussy, over-the-top dessert; it’s pure, unpretentious comfort food at its finest, designed to be easily transported and shared with love.
This particular recipe delves into the heart of what makes a Church Cake truly classic. We’ll guide you through creating a perfectly balanced cake that’s moist enough to stand up to its delicious layers, a vibrant fruit filling that adds a delightful burst of flavor and texture, and a creamy, cloud-like topping that brings everything together in perfect harmony. Get ready to bake a dessert that’s not just a treat for the taste buds, but a nostalgic journey back to simpler times, where good food and good company were always at the center of every gathering. This is more than just a cake; it’s a slice of tradition, waiting to be rediscovered and savored.
Nutritional Information
Per serving (approximate values):
- Calories: 380
- Protein: 4g
- Carbohydrates: 55g
- Fat: 16g
- Fiber: 1g
- Sodium: 280mg
Ingredients
- For the Cake Base:
- 1 ½ cups (180g) all-purpose flour
- 1 cup (200g) granulated sugar
- 1 teaspoon baking soda
- ½ teaspoon salt
- 1 cup (240ml) buttermilk, at room temperature
- ½ cup (113g) unsalted butter, melted and cooled slightly
- 1 large egg, at room temperature
- 1 teaspoon vanilla extract
- For the Pineapple Layer:
- 1 (20-ounce) can crushed pineapple in juice, undrained
- ½ cup (100g) granulated sugar
- 2 tablespoons cornstarch
- 1 tablespoon lemon juice
- For the Creamy Topping:
- 1 (8-ounce) package cream cheese, softened
- ½ cup (113g) unsalted butter, softened
- 3-4 cups (360-480g) powdered sugar, sifted
- 1 teaspoon vanilla extract
- ¼ cup (60ml) heavy cream or milk
- Optional: Toasted coconut flakes for garnish
Instructions
- Prepare the Cake Base:
- Preheat your oven to 350°F (175°C). Grease and flour a 9×13 inch baking pan.
- In a large bowl, whisk together the flour, granulated sugar, baking soda, and salt.
- In a separate medium bowl, whisk together the buttermilk, melted butter, egg, and vanilla extract until well combined.
- Pour the wet ingredients into the dry ingredients and mix with a spatula or electric mixer on low speed until just combined. Be careful not to overmix; a few lumps are okay.
- Pour the batter into the prepared baking pan and spread evenly.
- Bake for 25-30 minutes, or until a wooden skewer inserted into the center comes out clean.
- Remove the cake from the oven and let it cool completely in the pan on a wire rack. This is crucial before adding the pineapple layer.
- Create the Pineapple Layer:
- While the cake is cooling, prepare the pineapple layer. In a medium saucepan, combine the undrained crushed pineapple, granulated sugar, and cornstarch.
- Cook over medium heat, stirring constantly, until the mixture thickens and comes to a boil. Continue to boil gently for 1 minute, stirring.
- Remove from heat and stir in the lemon juice.
- Transfer the pineapple mixture to a bowl and let it cool completely to room temperature. This can be done in the refrigerator to speed up the process, stirring occasionally.
- Whip Up the Creamy Topping:
- In a large bowl, using an electric mixer, beat the softened cream cheese and softened butter together on medium speed until light and fluffy, about 2-3 minutes. Make sure there are no lumps of cream cheese.
- Gradually add the sifted powdered sugar, one cup at a time, beating well after each addition.
- Beat in the vanilla extract.
- Slowly add the heavy cream or milk, a tablespoon at a time, until the frosting reaches a smooth, spreadable consistency. If it’s too thick, add a little more cream; if it’s too thin, add a little more powdered sugar. Beat until light and fluffy.
- Assemble the Cake:
- Once the cake is completely cool, spread the cooled pineapple mixture evenly over the top of the cake.
- Carefully spread the creamy topping over the pineapple layer, covering it completely. You can use an offset spatula to create decorative swirls if desired.
- Cover the cake loosely with plastic wrap or aluminum foil.
- Refrigerate the Classic Church Cake for at least 2-4 hours, or preferably overnight, to allow the layers to set and the flavors to meld beautifully. Chilling makes it much easier to cut and serve.
Cooking Tips and Variations
To ensure your Classic Church Cake is nothing short of perfection, attention to a few key details can make all the difference. For the cake base, make sure your buttermilk and egg are at room temperature. This helps them emulsify better with the melted butter, resulting in a smoother batter and a more tender, consistent crumb. Avoid overmixing the cake batter; mix only until the dry ingredients are just incorporated. Overmixing develops gluten, which can lead to a tough cake. When preparing the pineapple layer, the key is to cook it until it’s thick enough to hold its shape when spread, but not so thick that it becomes gelatinous. Always let it cool completely before spreading it on the cake, as warm pineapple can melt the cake or create a soggy layer. For the creamy topping, ensure both your cream cheese and butter are thoroughly softened to room temperature. This is critical for achieving a smooth, lump-free frosting. If they’re too cold, your topping will be lumpy and difficult to spread. Sifting your powdered sugar is also a small but mighty step that prevents lumps and ensures a silky-smooth finish.
This recipe is wonderfully adaptable, allowing for delightful variations to suit your taste or what you have on hand. While crushed pineapple is the classic choice, you could experiment with other canned fruits. Well-drained crushed mandarin oranges or finely diced peaches (canned or fresh, cooked down slightly) could offer a different, yet equally delicious, fruit layer. For the creamy topping, consider adding a touch of coconut extract alongside the vanilla for a tropical twist, or a hint of almond extract for a more sophisticated flavor profile. If you prefer a lighter topping, you could fold in some whipped cream into the cream cheese mixture after it’s fully beaten. For an extra textural element, sprinkle some toasted coconut flakes, chopped pecans, or walnuts over the top of the finished cake before chilling. If you’re short on time, some recipes use instant vanilla pudding mix for the creamy layer, but our cream cheese frosting offers a richer, more decadent experience. You could also make this cake in a smaller square pan (like an 8×8 inch) for a thicker cake, but adjust baking times accordingly.
Storage and Reheating
The Classic Church Cake is at its best when served chilled, making it an ideal make-ahead dessert. To store, cover the baking pan tightly with plastic wrap or aluminum foil. This prevents the cake from drying out and absorbing odors from the refrigerator. Store the cake in the refrigerator for up to 3-4 days. Because of its creamy topping and fruit layer, it’s not recommended to leave this cake out at room temperature for extended periods, especially in warm climates. Always return leftovers to the fridge promptly.
Freezing this cake is also an option, though the texture of the creamy topping might change slightly upon thawing. To freeze, ensure the cake is thoroughly chilled and set. You can freeze it directly in the baking pan, tightly wrapped in several layers of plastic wrap and then aluminum foil to prevent freezer burn. Alternatively, cut the cake into individual servings, wrap each piece tightly, and place them in an airtight freezer-safe container. Frozen cake can be stored for up to 1-2 months. To thaw, transfer the frozen cake (either whole or individual slices) to the refrigerator and let it thaw overnight. Do not attempt to reheat this cake, as the creamy topping and fruit layer are meant to be enjoyed cold. Reheating would cause the topping to melt and the cake to become soggy. Simply enjoy it chilled straight from the refrigerator.
Frequently Asked Questions
Can I use fresh pineapple instead of canned?
While canned crushed pineapple is traditionally used for its convenience and consistent texture, you can use fresh pineapple. If using fresh, you’ll need to finely dice or crush it, then cook it down with the sugar and cornstarch as directed, ensuring it’s tender and the liquid has thickened appropriately. Be aware that fresh pineapple can sometimes contain enzymes that prevent dairy from setting properly, but cooking it thoroughly should neutralize these enzymes.
My creamy topping is too thin/thick. How can I fix it?
If your creamy topping is too thin, gradually add more sifted powdered sugar, a tablespoon at a time, beating well after each addition until it reaches the desired consistency. If it’s too thick, add a very small amount (half a teaspoon at a time) of heavy cream or milk, beating until smooth and spreadable. The goal is a light, fluffy, yet stable frosting.
Can I make this cake gluten-free?
Yes, you can adapt this recipe to be gluten-free. Simply substitute the all-purpose flour with a 1:1 gluten-free baking flour blend that contains xanthan gum. Follow the rest of the instructions as written. The texture might be slightly different, but it should still be a delicious and moist cake.
How far in advance can I make this cake?
This Classic Church Cake is an excellent make-ahead dessert. You can assemble the entire cake up to 2 days in advance and keep it covered in the refrigerator. In fact, many people find that the flavors meld and deepen even further after a day or two, making it taste even better. Just ensure it’s well-covered to prevent drying out.



