
Follow Me On Social Media!
Cuppa Cuppa Cake

Introduction
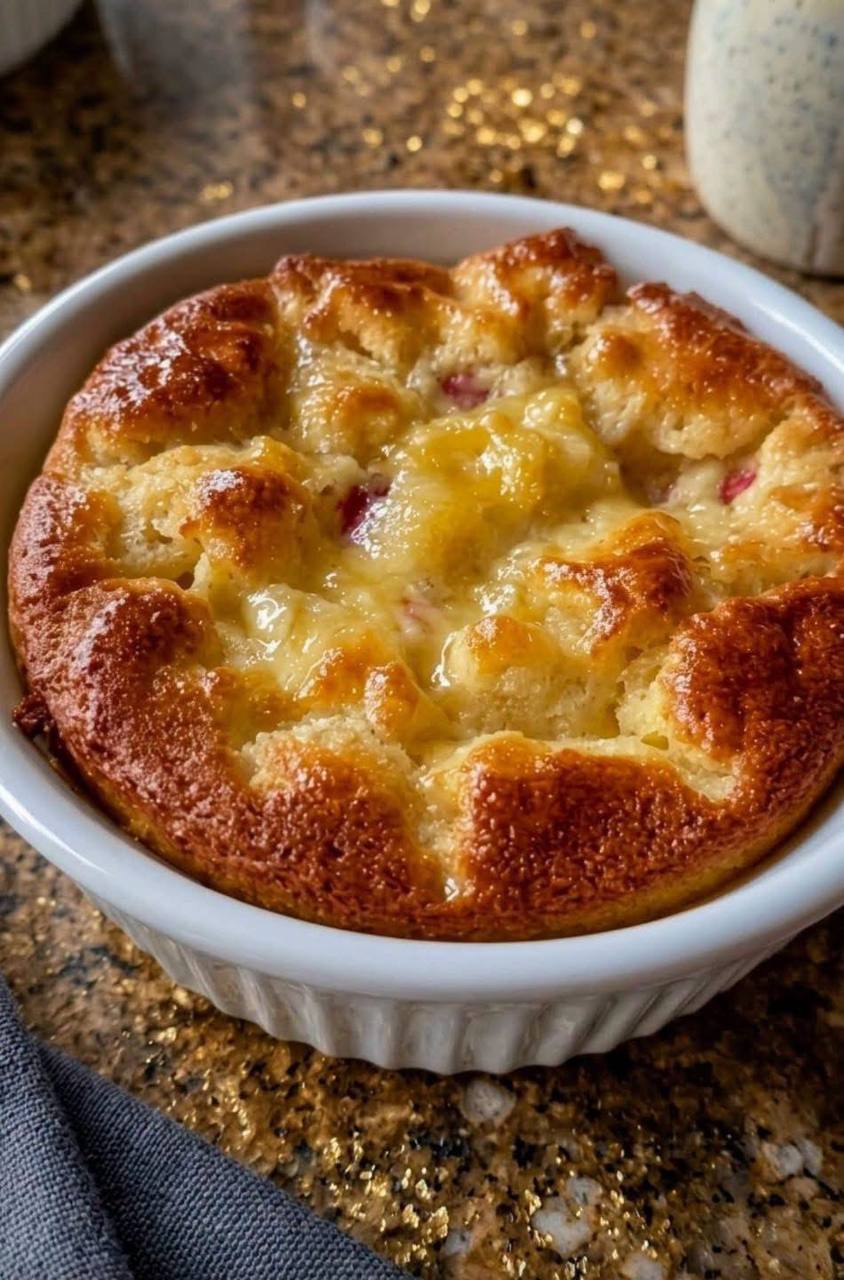
There’s a special kind of magic that happens in the kitchen when simplicity meets incredible flavor. And nowhere is that magic more evident than with our “Cuppa Cuppa Cake.” This isn’t just any dessert; it’s a heartwarming, fuss-free delight that promises a moist, tender crumb bursting with juicy fruit, all topped with a perfectly golden and slightly crisp crust. The very name, “Cuppa Cuppa Cake,” whispers tales of easy measurements and pantry staples, making it the ideal recipe for both seasoned bakers and complete novices alike. Forget complicated techniques and obscure ingredients; this cake is all about accessible deliciousness, designed to bring a smile to your face with minimal effort.
What makes the Cuppa Cuppa Cake truly shine is its comforting nature. Imagine a cool evening, a warm mug in hand, and a slice of this heavenly cake, still slightly warm from the oven. It’s the kind of dessert that feels like a hug in every bite – soft, sweet, and incredibly satisfying. Its versatility is another major draw; whether you’re looking for a quick weeknight treat, a charming addition to a potluck, or a cozy indulgence for a lazy Sunday afternoon, this cake fits the bill perfectly. The charm lies in its unpretentious appeal and the sheer joy it delivers.
In this recipe, we’ll guide you through creating a Cuppa Cuppa Cake that boasts a delightful balance of sweet and tart, thanks to a vibrant medley of fruits. You can expect a cake that’s wonderfully moist on the inside, with tender pockets of fruit, and a top that achieves that coveted golden-brown hue, offering a subtle chewiness that contrasts beautifully with the soft interior. Get ready to discover your new favorite go-to dessert – one that’s as easy to make as it is utterly delicious.
Nutritional Information
Per serving (approximate values):
- Calories: 380
- Protein: 4g
- Carbohydrates: 55g
- Fat: 16g
- Fiber: 3g
- Sodium: 280mg
Ingredients
- 1 ½ cups all-purpose flour
- 1 cup granulated sugar, plus 2 tablespoons for topping
- 1 teaspoon baking powder
- ½ teaspoon baking soda
- ¼ teaspoon salt
- ½ cup (1 stick) unsalted butter, melted and cooled slightly
- 1 large egg, at room temperature
- ½ cup buttermilk (or regular milk with 1/2 tablespoon lemon juice or white vinegar, let sit 5 minutes)
- 1 teaspoon vanilla extract
- 1 cup chopped fresh or frozen strawberries (if frozen, do not thaw)
- 1 cup diced canned pineapple (drained well) or fresh pineapple, diced
- Optional: ¼ teaspoon ground cinnamon or nutmeg for topping
Instructions
- Preheat your oven to 375°F (190°C). Lightly grease and flour an 8×8 inch baking dish, or eight individual ramekins (approximately 4-6 ounce capacity). If using ramekins, place them on a baking sheet for easier handling.
- In a large mixing bowl, whisk together the all-purpose flour, 1 cup of granulated sugar, baking powder, baking soda, and salt until well combined. Ensure there are no lumps.
- In a separate medium bowl, whisk together the slightly cooled melted butter, large egg, buttermilk, and vanilla extract until smooth and fully incorporated.
- Pour the wet ingredients into the dry ingredients. Stir with a spatula or wooden spoon until just combined. Be careful not to overmix; a few small lumps are fine. Overmixing can lead to a tough cake.
- Gently fold in the chopped strawberries and diced pineapple until evenly distributed throughout the batter.
- If using an 8×8 inch baking dish, pour the batter evenly into the prepared dish. If using individual ramekins, divide the batter equally among them.
- In a small bowl, combine the remaining 2 tablespoons of granulated sugar with the optional ¼ teaspoon of ground cinnamon or nutmeg, if using. Sprinkle this mixture evenly over the top of the cake batter in the dish or ramekins. This will create a delightful, slightly crisp and caramelized crust.
- Bake for 25-30 minutes for individual ramekins, or 35-45 minutes for an 8×8 inch baking dish, or until the cake is golden brown on top and a wooden skewer or toothpick inserted into the center comes out clean. The fruit juices may cause some moisture, so ensure it’s cake batter, not just fruit liquid.
- Once baked, remove the dish or ramekins from the oven and place them on a wire rack to cool. For best results, allow the cake to cool for at least 15-20 minutes before serving. This allows the cake to set and the flavors to meld.
- Serve warm or at room temperature.
Cooking Tips and Variations
For the ultimate Cuppa Cuppa Cake experience, a few simple tips can make all the difference. Firstly, ensure your ingredients are at room temperature, especially the egg and buttermilk. This helps them emulsify better with the melted butter, creating a smoother batter and a more tender cake. When mixing, remember the golden rule of cake baking: do not overmix. Stirring until just combined prevents gluten from overdeveloping, which can lead to a tough, rubbery texture. A few lumps in the batter are perfectly acceptable. For that irresistible golden crust, don’t skip the sugar sprinkle before baking; it caramelizes beautifully, adding both flavor and texture.
The beauty of the Cuppa Cuppa Cake lies in its adaptability. While strawberries and pineapple offer a fantastic sweet and tangy combination, feel free to experiment with other fruits. Peaches, blueberries, raspberries, or even a mix of apples and cranberries would be delicious. If using frozen fruit, there’s no need to thaw it beforehand; simply fold it directly into the batter. However, be aware that frozen fruit might release more moisture, so your baking time might be slightly extended. For an added layer of flavor, consider incorporating citrus zest into the batter, such as lemon or orange, which brightens the fruit notes beautifully. A pinch of cardamom or ginger can also elevate the spice profile. If you’re a fan of nuts, a handful of chopped pecans or walnuts folded into the batter or sprinkled on top with the sugar crust adds a delightful crunch. For an extra rich and moist cake, some bakers like to substitute a portion of the buttermilk with sour cream or Greek yogurt. Finally, for a decadent touch, you can add a simple glaze made from powdered sugar and a splash of milk or lemon juice after the cake has cooled.
Storage and Reheating
Storing your Cuppa Cuppa Cake properly will ensure it stays fresh and delicious for as long as possible. Once the cake has completely cooled to room temperature, cover it tightly with plastic wrap or place it in an airtight container. It will keep well on the countertop at room temperature for up to 2-3 days. If you live in a particularly warm or humid climate, or if you prefer to extend its shelf life, you can store the cake in the refrigerator for up to 5 days. Just be aware that refrigeration can sometimes alter the texture slightly, making the cake a bit denser.
For longer storage, the Cuppa Cuppa Cake freezes beautifully. Once completely cooled, wrap individual slices or the entire cake (if baked in an 8×8 dish) tightly in plastic wrap, then an additional layer of aluminum foil. This double layer helps prevent freezer burn. The cake can be frozen for up to 2-3 months. To thaw, simply transfer it from the freezer to the refrigerator overnight, or let it sit at room temperature for a few hours. When it comes to reheating, the best method depends on how you stored it. For a whole cake or larger slices, a preheated oven at 300°F (150°C) for 10-15 minutes will warm it through and revive the crust. Individual slices can also be gently warmed in the microwave for 20-40 seconds, though this might soften the crust. Serving it warm with a scoop of ice cream or a dollop of whipped cream is always a delightful experience, especially after reheating.
Frequently Asked Questions
What does “Cuppa Cuppa Cake” mean?
The term “Cuppa Cuppa Cake” typically refers to a simple, old-fashioned, or Southern-style recipe where the ingredients are measured in “cups,” making it incredibly easy to remember and prepare without precise weighing. It implies a straightforward, comforting dessert often made with pantry staples and fruit, designed for ease and deliciousness.
Can I use different fruits than strawberries and pineapple?
Absolutely! The Cuppa Cuppa Cake is wonderfully versatile. You can substitute the strawberries and pineapple with an equal amount of other fruits like peaches, blueberries, raspberries, mixed berries, or even diced apples. If using frozen fruit, there’s no need to thaw it; simply fold it into the batter as is.
My cake came out dry. What went wrong?
A dry cake is often a result of overbaking or overmixing the batter. Ensure you’re baking it for the recommended time and checking for doneness with a toothpick. Overmixing develops the gluten in the flour too much, leading to a tough, dry texture. Also, make sure your liquid ingredients (like buttermilk) are fresh and measured accurately.
Can I bake this in a different size pan?
Yes, while individual ramekins or an 8×8 inch baking dish are recommended, you can certainly use other pan sizes. If you use a larger pan, like a 9×13 inch, the cake will be thinner, and the baking time will likely be shorter. For a smaller, deeper pan, the baking time will increase. Always keep an eye on the cake and use the toothpick test for doneness when adjusting pan sizes.



