
Follow Me On Social Media!
Hawaiian Banana Bread

Introduction
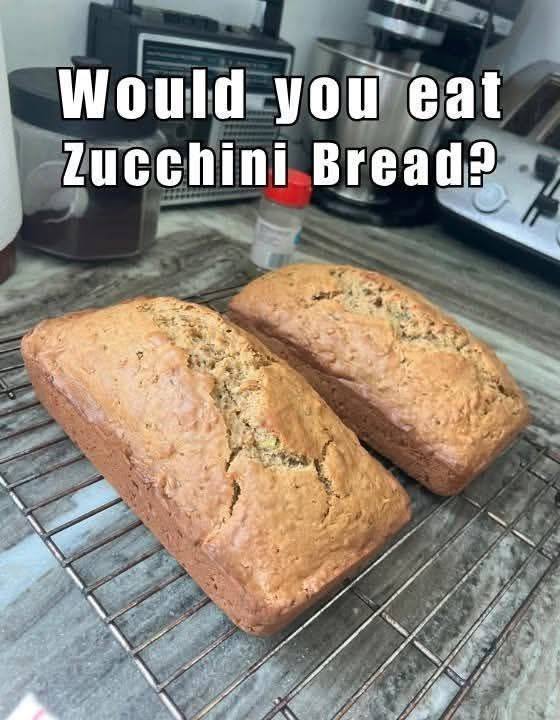
There’s something undeniably comforting about a warm slice of banana bread. The sweet aroma wafting through the kitchen, the tender crumb melting in your mouth – it’s a classic for a reason. But what if we told you this beloved treat could get an exotic, sun-kissed makeover? Welcome to our Hawaiian Banana Bread, a tropical twist that elevates the familiar to an extraordinary island escape. While some quick breads, like the equally delicious zucchini bread, share a similar comforting appearance, this recipe promises a distinct flavor journey, transporting your taste buds straight to the shores of paradise with every bite.
Our Hawaiian Banana Bread isn’t just a simple banana bread; it’s an experience. We infuse the traditional recipe with the vibrant flavors of the tropics: the juicy sweetness of crushed pineapple, the delicate chewiness of shredded coconut, and the buttery crunch of macadamia nuts. This combination creates a loaf that is incredibly moist, bursting with flavor, and possesses a texture that’s both rich and light. It’s the perfect way to transform those overripe bananas on your counter into a truly special treat, whether you’re enjoying it for breakfast, as an afternoon snack with your coffee, or even as a delightful dessert.
This recipe celebrates the joy of baking with simple, wholesome ingredients, resulting in a bread that’s not just delicious but also incredibly easy to make. The tropical additions don’t complicate the process; instead, they enhance the inherent goodness of banana bread, making it even more irresistible. Get ready to embark on a culinary mini-vacation, right from your own kitchen, with a loaf that’s guaranteed to be a crowd-pleaser and a new family favorite.
Nutritional Information
Per serving (approximate values, based on 12 servings per loaf):
- Calories: 320
- Protein: 4g
- Carbohydrates: 45g
- Fat: 15g
- Fiber: 2g
- Sodium: 250mg
Ingredients
- 2 cups all-purpose flour
- 1 teaspoon baking soda
- 1/2 teaspoon salt
- 1 teaspoon ground cinnamon
- 1/4 teaspoon ground nutmeg
- 1/2 cup (1 stick) unsalted butter, melted
- 3/4 cup granulated sugar
- 1/4 cup packed light brown sugar
- 2 large eggs, at room temperature
- 1 teaspoon vanilla extract
- 1 1/2 cups very ripe mashed bananas (about 3-4 medium bananas)
- 1/2 cup crushed pineapple, well-drained
- 1/2 cup shredded unsweetened coconut (or sweetened, adjust sugar if using sweetened)
- 1/2 cup chopped macadamia nuts, lightly toasted (optional)
Instructions
- Preheat your oven to 350°F (175°C). Grease and flour a 9×5-inch loaf pan, or line with parchment paper, leaving an overhang on the long sides for easy removal.
- In a medium bowl, whisk together the all-purpose flour, baking soda, salt, ground cinnamon, and ground nutmeg. Set aside.
- In a large bowl, whisk together the melted butter, granulated sugar, and brown sugar until well combined and smooth.
- Add the eggs one at a time to the butter and sugar mixture, whisking well after each addition until fully incorporated. Stir in the vanilla extract.
- Gently fold in the mashed bananas until just combined. Be careful not to overmix.
- Gradually add the dry ingredients to the wet ingredients, mixing with a spatula or wooden spoon until just combined. A few lumps are okay; overmixing will result in tough bread.
- Fold in the well-drained crushed pineapple, shredded coconut, and chopped macadamia nuts (if using) until evenly distributed throughout the batter.
- Pour the batter into the prepared loaf pan, spreading it evenly.
- Bake for 50-60 minutes, or until a wooden skewer or toothpick inserted into the center of the loaf comes out clean or with moist crumbs attached. If the top starts to brown too quickly, you can loosely tent it with aluminum foil.
- Once baked, remove the loaf pan from the oven and let it cool in the pan on a wire rack for 10-15 minutes.
- After cooling in the pan, carefully lift the loaf out using the parchment paper overhang or invert it onto the wire rack. Allow the banana bread to cool completely on the wire rack before slicing and serving. This allows the internal structure to set and prevents it from becoming gummy.
Cooking Tips and Variations
For the ultimate Hawaiian Banana Bread experience, paying attention to a few key details can make all the difference. Always use very ripe bananas; the browner and spottier they are, the sweeter and more flavorful your bread will be. Their natural sugars intensify as they ripen, contributing to both the taste and the moistness of the loaf. When mashing your bananas, you can leave a few small chunks for added texture, or mash them completely smooth, depending on your preference. Another crucial tip is to avoid overmixing the batter. Once you add the dry ingredients to the wet, mix only until just combined. Overmixing develops gluten, which can lead to a tough, dense bread instead of the tender, fluffy crumb we’re aiming for. For the pineapple, ensure it is thoroughly drained. Excess moisture from the pineapple can make your bread soggy, so press out as much liquid as possible before adding it to the batter.
To enhance the flavor of your macadamia nuts, consider toasting them lightly in a dry pan over medium heat for a few minutes, or in a 350°F (175°C) oven for 5-7 minutes, until fragrant. This brings out their natural oils and nutty aroma. If you’re a fan of extra coconut flavor, you can toast some of the shredded coconut as well before adding it to the batter or sprinkling it on top before baking. For a beautiful golden crust and to prevent the top from browning too quickly, you can brush the top of the batter with a little milk or sprinkle with a tiny bit of granulated sugar just before baking.
This recipe is also wonderfully versatile for variations. If you prefer a richer bread, you can substitute half of the granulated sugar with brown sugar, which adds moisture and a deeper, caramel-like flavor. For an even more indulgent treat, consider adding 1/2 cup of white chocolate chips or dark chocolate chunks along with the macadamia nuts and coconut. If you want to add a zesty brightness, a teaspoon of lime or orange zest can be folded into the batter. For those who enjoy a glaze, a simple drizzle of a powdered sugar and pineapple juice glaze (1 cup powdered sugar mixed with 2-3 tablespoons pineapple juice) once the bread has completely cooled can add an extra layer of sweetness and tropical flair. If you can’t find macadamia nuts, pecans or walnuts make a decent substitute, though they won’t provide the distinct Hawaiian flavor profile.
Storage and Reheating
Proper storage is key to keeping your Hawaiian Banana Bread fresh and delicious. Once the bread has completely cooled to room temperature, wrap it tightly in plastic wrap or aluminum foil. You can also place it in an airtight container. Stored this way, it will remain fresh at room temperature for up to 3-4 days. If you live in a particularly warm or humid climate, or if you want to extend its freshness, you can store the wrapped bread in the refrigerator for up to a week. However, refrigerated banana bread can sometimes dry out slightly, so allow it to come to room temperature before serving for the best texture.
Hawaiian Banana Bread freezes beautifully, making it an excellent option for meal prep or enjoying a slice whenever a craving strikes. To freeze, ensure the loaf is completely cool. You can freeze the whole loaf, half a loaf, or individual slices. Wrap the bread tightly in plastic wrap, then an additional layer of aluminum foil, or place it in a freezer-safe bag or container. Frozen banana bread will maintain its quality for up to 2-3 months. To thaw, simply remove it from the freezer and let it sit at room temperature for a few hours (for slices) or overnight (for a whole loaf). You can also gently reheat individual slices in the microwave for 15-30 seconds, or in a toaster oven until warm.
For reheating a whole loaf or larger portions, preheat your oven to 300°F (150°C). Wrap the bread loosely in aluminum foil and warm it in the oven for about 10-15 minutes, or until heated through. This method helps to retain moisture and brings out the freshly baked aroma and flavor. Avoid overheating, as this can dry out the bread. Whether enjoyed at room temperature, slightly warmed, or toasted, this Hawaiian Banana Bread promises a delightful treat every time.
Frequently Asked Questions
What makes this “Hawaiian” banana bread?
The “Hawaiian” designation comes from the incorporation of classic tropical ingredients commonly associated with the islands: crushed pineapple, shredded coconut, and macadamia nuts. These additions infuse the traditional banana bread with a distinct sweet, tangy, and nutty flavor profile, giving it an exotic, island-inspired twist.
Can I use fresh pineapple instead of canned?
Yes, you can use fresh pineapple, but it’s crucial to ensure it is very finely diced and thoroughly drained. Fresh pineapple tends to contain more moisture than canned, so pressing out as much liquid as possible is even more important to prevent the bread from becoming too wet or soggy. You might even pat it dry with a paper towel after draining.
My banana bread came out dry. What went wrong?
A dry banana bread can be caused by several factors. The most common culprits are overbaking (baking for too long or at too high a temperature), not using ripe enough bananas (which contribute significant moisture), or overmixing the batter. Overmixing develops gluten, leading to a tough and dry texture. Ensure you measure your flour accurately (spooning it into the measuring cup and leveling off, rather than scooping directly from the bag) and always check for doneness with a toothpick rather than relying solely on baking time.
Can I make this recipe into muffins?
Absolutely! This Hawaiian Banana Bread batter is perfect for muffins. Simply line a 12-cup muffin tin with paper liners or grease it well. Fill each muffin cup about two-thirds full. Bake at 375°F (190°C) for approximately 20-25 minutes, or until a toothpick inserted into the center of a muffin comes out clean. Muffin baking times are typically shorter and often at a slightly higher temperature to encourage a good rise.



