
Follow Me On Social Media!
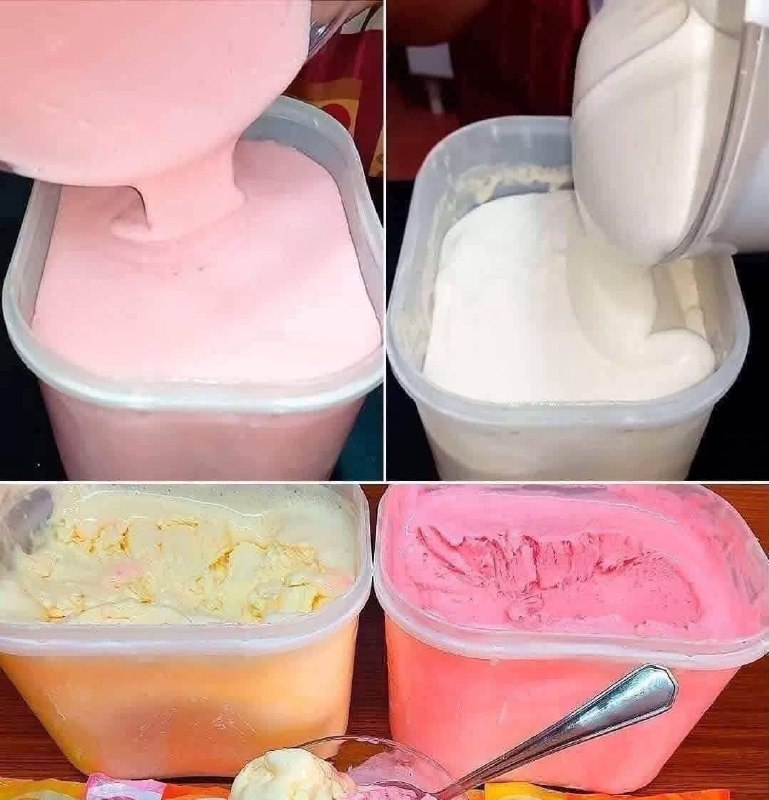
Simple Ice Cream Recipe

Introduction
There’s nothing quite like the pure, unadulterated joy of a scoop of creamy, homemade ice cream. Forget the long lines at the ice cream parlor or the mystery ingredients in store-bought tubs. Today, we’re diving into the delightful world of DIY frozen treats with a recipe so simple, you’ll wonder why you haven’t been making your own all along. This isn’t just about dessert; it’s about the experience – the rich, fresh taste, the endless possibilities for customization, and the sheer fun of creating something truly special in your own kitchen. Imagine the smiles when you present a dessert that’s been crafted with love, tailored exactly to your cravings.
Our “Simple Ice Cream Recipe” embraces the magic of the no-churn method, meaning you won’t need any fancy equipment like an ice cream maker. This technique relies on just a few core ingredients that, when combined correctly, transform into a remarkably smooth and decadent ice cream texture. It’s perfect for beginners, busy parents, or anyone looking for a delicious escape without the fuss. The beauty of this approach lies in its accessibility and versatility; once you master the basic technique, a world of flavors opens up before you.
Get ready to impress yourself and your loved ones with a dessert that tastes gourmet but requires minimal effort. From the moment you whip up the base to that first glorious spoonful, you’ll be treated to a creamy, dreamy confection that far surpasses anything you can buy. Whether you’re craving classic vanilla, a vibrant fruit swirl, or something entirely unique, this recipe is your gateway to homemade ice cream bliss. Let’s get scooping!
Nutritional Information
Per serving (approximate values):
- Calories: 350
- Protein: 4g
- Carbohydrates: 30g
- Fat: 25g
- Fiber: 0g
- Sodium: 60mg
Ingredients
- 2 cups (480ml) heavy cream (cold)
- 1 (14-ounce/397g) can sweetened condensed milk (cold)
- 1 teaspoon pure vanilla extract
- Optional flavorings (choose one or a combination):
- For Strawberry Swirl: 1 cup fresh strawberries, hulled and pureed, then gently cooked down with 1 tablespoon sugar until slightly thickened (about 5 minutes).
- For Chocolate: 1/2 cup unsweetened cocoa powder, sifted, or 1/2 cup melted and cooled dark chocolate.
- For Coffee: 2 tablespoons instant espresso powder dissolved in 1 tablespoon hot water, then cooled.
- For Lemon: 1 tablespoon lemon zest and 2 tablespoons fresh lemon juice.
- Optional mix-ins (choose one or a combination, 1/2 to 1 cup total):
- Chocolate chips
- Chopped nuts (pecans, walnuts, almonds)
- Cookie pieces (Oreos, chocolate chip cookies)
- Fresh fruit pieces (berries, peaches, mango)
- Caramel or fudge sauce for swirling
Instructions
- Ensure your heavy cream and sweetened condensed milk are well chilled. This is crucial for achieving the best texture. Place a large mixing bowl and your whisk attachments (if using an electric mixer) in the freezer for 10-15 minutes to chill them as well.
- In the chilled mixing bowl, pour the cold heavy cream. Using an electric mixer on medium-high speed, whip the cream until stiff peaks form. This means when you lift the whisk, the cream holds its shape firmly. Be careful not to over-whip, or it will turn grainy. This step usually takes 3-5 minutes.
- Once the heavy cream is whipped, gently fold in the cold sweetened condensed milk and vanilla extract. Use a spatula and a light hand to combine them thoroughly but without deflating the whipped cream. Continue folding until no streaks of condensed milk remain and the mixture is uniform and creamy.
- Now is the time to add your chosen flavorings. If you’re making classic vanilla, you’re all set after step 3. For other flavors:
- For strawberry swirl: Gently fold in about half of the cooled strawberry puree into the base mixture. Pour half of the ice cream base into a freezer-safe container (a loaf pan or shallow metal pan works well). Drizzle the remaining strawberry puree over the top, then add the rest of the ice cream base. Use a knife or skewer to gently swirl the puree through the ice cream for a marbled effect.
- For chocolate: Sift the cocoa powder directly over the cream mixture and gently fold until fully incorporated. If using melted chocolate, fold it in slowly until no streaks remain.
- For coffee: Gently fold in the cooled espresso mixture until evenly distributed.
- For lemon: Gently fold in the lemon zest and lemon juice.
- If you’re adding any optional mix-ins like chocolate chips, nuts, or cookie pieces, gently fold them into the ice cream base at this stage. Be careful not to overmix, as this can deflate the cream.
- Pour the finished ice cream mixture into your freezer-safe container. Smooth the top with a spatula. For best results in preventing ice crystals, press a piece of plastic wrap directly onto the surface of the ice cream, ensuring it touches the entire surface. Then, cover the container with its lid or another layer of plastic wrap or foil.
- Place the container in the freezer for at least 6 hours, or preferably overnight, until the ice cream is firm and scoopable. The longer it freezes, the firmer it will become.
- When ready to serve, remove the ice cream from the freezer and let it sit at room temperature for about 5-10 minutes. This allows it to soften slightly, making it easier to scoop and giving it a creamier texture.
- Scoop and enjoy your homemade, simple ice cream!
Cooking Tips and Variations
For the creamiest texture, always start with well-chilled heavy cream and sweetened condensed milk. Chilling your mixing bowl and whisk attachments also helps the cream whip up faster and more stably. When whipping the heavy cream, aim for stiff peaks – the cream should hold its shape firmly when the whisk is lifted. Over-whipping can lead to a grainy texture, while under-whipping will result in a less airy and icy ice cream. Gently folding in the sweetened condensed milk and any flavorings or mix-ins is key to maintaining the airiness of the whipped cream, which contributes to the no-churn ice cream’s creamy consistency.
To prevent ice crystals from forming, ensure your container is airtight. Pressing plastic wrap directly onto the surface of the ice cream before sealing the container creates an extra barrier against freezer burn and ice formation. If you find your ice cream is too hard straight from the freezer, let it sit on the counter for 5-10 minutes before scooping; this brief softening period makes it much easier to serve and enhances the creamy mouthfeel.
The beauty of this recipe lies in its endless customization. For a rich chocolate flavor, you can also melt 1/2 cup of good quality dark chocolate and fold it into the base once cooled. For a vibrant berry flavor, gently cook down fresh berries with a tablespoon of sugar until slightly thickened, cool completely, then swirl into the base as described for strawberry. For a tropical twist, fold in 1/2 cup of pureed mango or passion fruit. Coffee lovers can dissolve 2 tablespoons of instant espresso powder in a tablespoon of hot water, cool it, and then fold it in. You can also add a variety of mix-ins like crushed cookies, chopped candy bars, toasted nuts, or mini marshmallows. For a salted caramel ice cream, swirl in a good quality store-bought or homemade salted caramel sauce just before freezing. Feel free to experiment with extracts beyond vanilla, such as almond, peppermint, or coconut, to create unique flavor profiles.
Storage and Reheating
Homemade no-churn ice cream stores beautifully in the freezer for up to 2-3 weeks. To maintain its optimal texture and prevent ice crystals, always store it in an airtight container. As mentioned in the tips, pressing a layer of plastic wrap directly onto the surface of the ice cream before putting on the lid provides an extra layer of protection against freezer burn. This minimizes exposure to air, which is the primary cause of ice crystal formation.
While ice cream doesn’t “reheat” in the traditional sense, you can easily revive its scoopable texture if it has become too hard. Simply remove the container from the freezer and let it sit at room temperature for 5-15 minutes before serving. The exact time will depend on how cold your freezer is and how full the container is. This brief softening period allows the ice cream to reach the perfect consistency for easy scooping and a delightful, creamy mouthfeel. Avoid microwaving or rapidly thawing the ice cream, as this can lead to an uneven texture, with some parts melting too quickly and others remaining too firm, and can also introduce more ice crystals once refrozen. Always aim for a gradual softening process for the best results.
Frequently Asked Questions
Why is my homemade ice cream icy?
Icy ice cream usually occurs due to too much water content or insufficient fat, or improper freezing. In no-churn recipes, it can happen if the heavy cream isn’t whipped to stiff peaks (which incorporates air and prevents large ice crystals), or if the sweetened condensed milk isn’t fully incorporated. Ensure all ingredients are very cold, whip the cream properly, and store in an airtight container with plastic wrap directly on the surface to minimize air exposure.
Can I make this recipe dairy-free?
While this specific recipe relies heavily on dairy for its rich texture, you can experiment with dairy-free alternatives. Look for full-fat coconut cream (chilled, scoop out only the thick cream) for whipping and a dairy-free sweetened condensed coconut milk. The texture might be slightly different, potentially a bit denser or with a more pronounced coconut flavor, but it can still yield a delicious frozen treat.
How long does it take for the ice cream to freeze completely?
For a firm, scoopable consistency, your homemade ice cream will need at least 6 hours in the freezer. However, for the best results and a truly solid set, it’s highly recommended to freeze it overnight (8-12 hours). The exact time can vary depending on the temperature of your freezer and the size and material of your container.
What is the best way to swirl in sauces or purees?
To achieve a beautiful swirl, pour about half of your prepared ice cream base into the freezer-safe container. Drizzle about half of your sauce or puree over this layer. Then, add the remaining ice cream base and drizzle the rest of the sauce/puree on top. Use a butter knife or a skewer to gently swirl through the layers a few times, creating a marbled effect. Avoid over-swirling, as this will fully incorporate the flavor rather than creating distinct swirls.



