
Follow Me On Social Media!
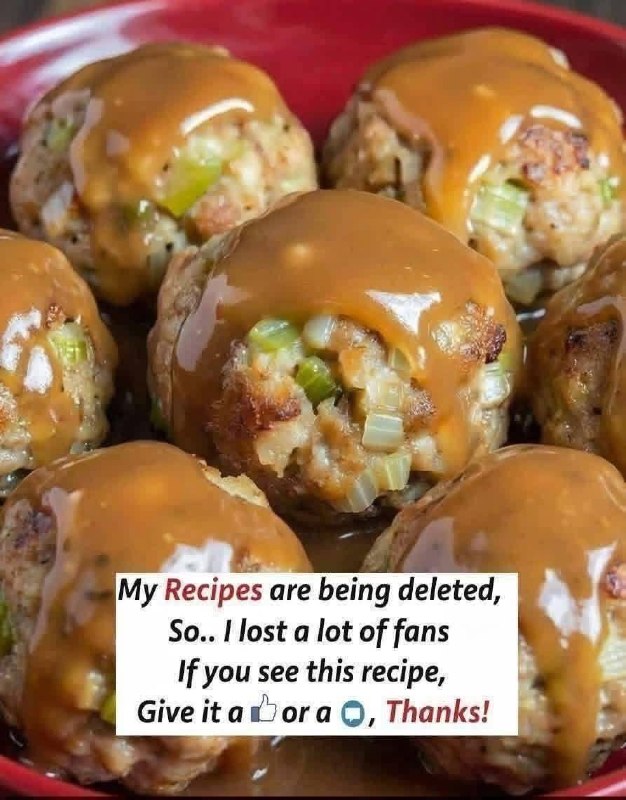
Stuffing Balls

Introduction
Tired of the same old, often mushy, Thanksgiving leftover stuffing? Prepare to revolutionize your holiday table with a dish that’s as delightful to look at as it is to eat: Stuffing Balls! Imagine perfectly portioned, golden-brown spheres, boasting a wonderfully crispy exterior that gives way to a moist, savory, and aromatic interior. These aren’t just any stuffing balls; they are a culinary celebration, transforming a beloved classic into an easy-to-serve, crowd-pleasing masterpiece. Whether you’re looking to reinvent your Thanksgiving leftovers, elevate your holiday side dish game, or simply whip up a fantastic appetizer for any gathering, Stuffing Balls are your new go-to.
What makes Stuffing Balls so special? It’s the ingenious combination of convenience and gourmet appeal. They take the comforting flavors of traditional stuffing – rich butter, fragrant herbs like sage and thyme, tender bread, and savory broth – and package them into a delightful, bite-sized format. This means no more struggling to scoop out shapeless stuffing from a casserole dish; instead, each guest gets their own perfectly formed ball, often drizzled generously with warm, luscious gravy. They’re incredibly versatile, allowing for endless customization with your favorite additions like sausage, cranberries, or mushrooms, making them a dish that truly caters to every palate. Plus, their make-ahead potential makes holiday meal prep a breeze, giving you more time to enjoy the festivities.
Stuffing Balls are more than just a side; they’re an experience. They bring a touch of elegance and fun to any meal, inviting everyone to enjoy the familiar flavors of home in a fresh, exciting way. Perfect for Thanksgiving leftovers, a festive Christmas side, or even as a unique appetizer for a dinner party, these savory morsels are guaranteed to disappear quickly. Get ready to impress your family and friends with this delicious reinvention, promising crispy edges, tender centers, and a burst of savory goodness in every bite. Let’s dive into crafting these irresistible spheres of holiday cheer!
Nutritional Information
Per serving (approximate values, based on 3 stuffing balls without gravy):
- Calories: 280
- Protein: 8g
- Carbohydrates: 35g
- Fat: 12g
- Fiber: 3g
- Sodium: 650mg
Ingredients
For the Stuffing Balls:
- 1 pound day-old bread, cut into 1/2-inch cubes (about 8-10 cups)
- 1 cup unsalted chicken or vegetable broth, plus more if needed
- 1 large egg, lightly beaten
- 1/2 cup (1 stick) unsalted butter
- 1 large yellow onion, finely diced
- 2 stalks celery, finely diced
- 2 cloves garlic, minced
- 2 teaspoons dried sage
- 1 teaspoon dried thyme
- 1/2 teaspoon dried rosemary, crushed
- 1/2 teaspoon poultry seasoning
- 1 teaspoon salt
- 1/2 teaspoon black pepper
- Optional Add-ins: 1/2 cup cooked crumbled sausage, 1/4 cup dried cranberries, 1/4 cup chopped pecans, or 1/2 cup sautéed mushrooms
For the Gravy (Optional, but highly recommended):
- 2 tablespoons unsalted butter
- 2 tablespoons all-purpose flour
- 2 cups chicken or turkey broth
- 1/2 teaspoon dried sage (optional)
- Salt and black pepper to taste
Instructions
- Prepare the Bread: If your bread isn’t day-old, you can lightly toast the cubes in a 300°F (150°C) oven for 10-15 minutes until slightly dry but not browned. Place the bread cubes in a large mixing bowl.
- Sauté the Aromatics: In a large skillet or Dutch oven, melt the 1/2 cup unsalted butter over medium heat. Add the finely diced onion and celery and cook, stirring occasionally, until softened and translucent, about 8-10 minutes. Add the minced garlic and cook for another 1-2 minutes until fragrant.
- Combine and Season: Pour the sautéed onion, celery, and garlic (including all the butter from the pan) over the bread cubes in the mixing bowl. Add the dried sage, thyme, crushed rosemary, poultry seasoning, salt, and black pepper. Toss gently to combine all ingredients, ensuring the bread is evenly coated with the butter and seasonings.
- Add Liquid and Binder: In a separate small bowl, whisk together the 1 cup chicken or vegetable broth and the lightly beaten egg. Gradually pour this liquid mixture over the bread mixture, mixing gently with your hands or a large spoon until the bread cubes are moistened but not soggy. The mixture should hold together when squeezed. If it feels too dry, add a tablespoon or two more broth until the desired consistency is reached.
- Incorporate Optional Add-ins: If using any optional add-ins like cooked sausage, cranberries, pecans, or mushrooms, gently fold them into the stuffing mixture at this stage.
- Form the Stuffing Balls: Preheat your oven to 375°F (190°C). Lightly grease a large baking sheet or line it with parchment paper. Using your hands, gently roll the stuffing mixture into golf-ball sized spheres, about 1 1/2 to 2 inches in diameter. Don’t pack them too tightly, as this can make them dense. Place the formed balls on the prepared baking sheet, leaving a little space between each.
- Bake the Stuffing Balls: Bake for 20-30 minutes, or until the stuffing balls are golden brown on the outside and heated through in the center. If you desire extra crispiness, you can broil them for the last 2-3 minutes, watching carefully to prevent burning.
- Prepare the Gravy (Optional): While the stuffing balls are baking, prepare the gravy. In a medium saucepan, melt 2 tablespoons unsalted butter over medium heat. Whisk in 2 tablespoons all-purpose flour and cook for 1-2 minutes, stirring constantly, to create a roux. Gradually whisk in 2 cups chicken or turkey broth, ensuring there are no lumps. Bring the mixture to a simmer, stirring occasionally, until the gravy thickens to your desired consistency. Stir in 1/2 teaspoon dried sage (if using) and season with salt and black pepper to taste.
- Serve: Remove the stuffing balls from the oven. Serve them immediately, either as a side dish or appetizer, with warm gravy drizzled generously over the top or served on the side for dipping.
Cooking Tips and Variations
Achieving the Perfect Texture: For truly crispy exteriors and moist interiors, don’t overcrowd your baking sheet. Give each stuffing ball space to breathe and brown evenly. A slightly higher oven temperature (like 400°F/200°C) for the last 10 minutes can also help achieve a deeper golden crust. If you have an air fryer, you can air fry them at 375°F (190°C) for 10-15 minutes, shaking the basket halfway through, for ultimate crispiness.
Make-Ahead Magic: Stuffing balls are fantastic for meal prep! You can prepare the mixture and form the balls up to 2 days in advance. Arrange them on a baking sheet, cover loosely with plastic wrap, and refrigerate. When ready to bake, add an extra 5-10 minutes to the baking time since they’ll be cold. You can also freeze unbaked stuffing balls on a baking sheet until solid, then transfer them to a freezer-safe bag for up to 3 months. Bake from frozen, adding about 15-20 minutes to the cooking time, or until heated through and golden.
Customization is Key: Don’t be afraid to make this recipe your own! For a richer flavor profile, try adding a pinch of nutmeg or a dash of smoked paprika. Experiment with different fresh herbs like chopped fresh parsley, marjoram, or even a hint of fresh thyme. If you love a bit of heat, a pinch of red pepper flakes can add a subtle kick. For a touch of sweetness and tang, consider adding finely diced apple or dried apricots along with the cranberries.
Protein Power-Ups: Beyond sausage, cooked and crumbled bacon or pancetta can add incredible depth of flavor and a salty crunch. For a unique twist, try shredded cooked turkey or chicken for an even more “leftover” feel. Ensure any meat additions are fully cooked before mixing them into the stuffing base.
Vegetarian and Vegan Options: To make these vegetarian, simply use vegetable broth and ensure your bread is egg-free if needed (though the egg is a binder). For a fully vegan version, use vegetable broth, a plant-based butter substitute, and a flax egg (1 tablespoon ground flaxseed mixed with 3 tablespoons water, let sit for 5 minutes) or other egg replacer as a binder. You can also incorporate plant-based sausage crumbles for extra flavor.
Gluten-Free Goodness: Easily adapt this recipe by using your favorite gluten-free bread. Ensure it’s day-old or lightly toasted to prevent the stuffing balls from becoming too dense or crumbly.
Serving Suggestions Beyond the Side: While perfect as a holiday side, consider serving Stuffing Balls as an appetizer with a cranberry dipping sauce or a spicy aioli. They also make a fantastic addition to a “Thanksgiving Leftover Bowl” layered with mashed potatoes, turkey, and gravy. For a creative brunch item, serve them alongside fried eggs and a drizzle of maple syrup for a sweet and savory experience.
Preventing Dryness: The key to a moist interior is not over-mixing the stuffing base once the liquid is added. Mix just until moistened. Also, avoid over-baking. Keep an eye on them, and remove them from the oven as soon as they’re golden brown and heated through.
Storage and Reheating
Storage: Cooked Stuffing Balls can be stored in an airtight container in the refrigerator for up to 3-4 days. For longer storage, they can be frozen. Arrange cooled stuffing balls in a single layer on a baking sheet and freeze until solid. Once frozen, transfer them to a freezer-safe bag or container, removing as much air as possible, and store for up to 2-3 months.
Reheating from Refrigerator: To reheat refrigerated stuffing balls, preheat your oven to 350°F (175°C). Place the stuffing balls on a baking sheet and bake for 10-15 minutes, or until heated through and crispy. You can also reheat them in a microwave, but they may lose some crispiness. For microwave reheating, place on a microwave-safe plate and heat for 30-60 seconds per ball, or until warm.
Reheating from Freezer: There’s no need to thaw frozen stuffing balls before reheating. Preheat your oven to 375°F (190°C). Place the frozen stuffing balls on a baking sheet and bake for 20-30 minutes, or until heated through and golden brown. If they start to brown too quickly, you can loosely cover them with foil. For air frying, preheat your air fryer to 350°F (175°C) and cook for 10-15 minutes, shaking the basket occasionally, until hot and crispy.
Frequently Asked Questions
Can I use fresh bread instead of day-old bread?
While day-old bread is ideal because it’s slightly drier and absorbs liquids better without becoming mushy, you can absolutely use fresh bread. If using fresh bread, it’s highly recommended to cut it into cubes and spread it on a baking sheet, then toast it in a 300°F (150°C) oven for 10-15 minutes until it’s lightly dried out but not browned. This prevents the stuffing balls from being too dense or soggy.
My stuffing balls are falling apart. What went wrong?
If your stuffing balls are not holding their shape, it usually means there isn’t enough binder or moisture. Ensure you’ve added the egg, which acts as a crucial binder. If the mixture still feels too dry after adding the initial broth, add an extra tablespoon or two of broth until the mixture holds together when gently squeezed in your hand. Conversely, if they’re too wet, they might also struggle to hold shape; in that case, you can try adding a few more dried breadcrumbs to absorb excess moisture.
Can I fry these instead of baking?
Yes, you can pan-fry or air fry stuffing balls for an even crispier exterior! To pan-fry, heat a tablespoon or two of oil or butter in a skillet over medium heat. Cook the stuffing balls in batches, turning occasionally, until golden brown and heated through, about 5-8 minutes. For air frying, preheat your air fryer to 375°F (190°C) and cook for 10-15 minutes, shaking the basket halfway through, until golden and crispy. Frying methods typically produce a crispier crust than baking.
What kind of bread is best for stuffing balls?
For the best texture and flavor, a sturdy, dense bread like sourdough, challah, brioche, or a good quality white sandwich bread works wonderfully. Avoid very soft or airy breads, as they can become too mushy when moistened. The key is a bread that can absorb liquid without disintegrating, providing a good base for the stuffing’s texture.



