Follow Me On Social Media!
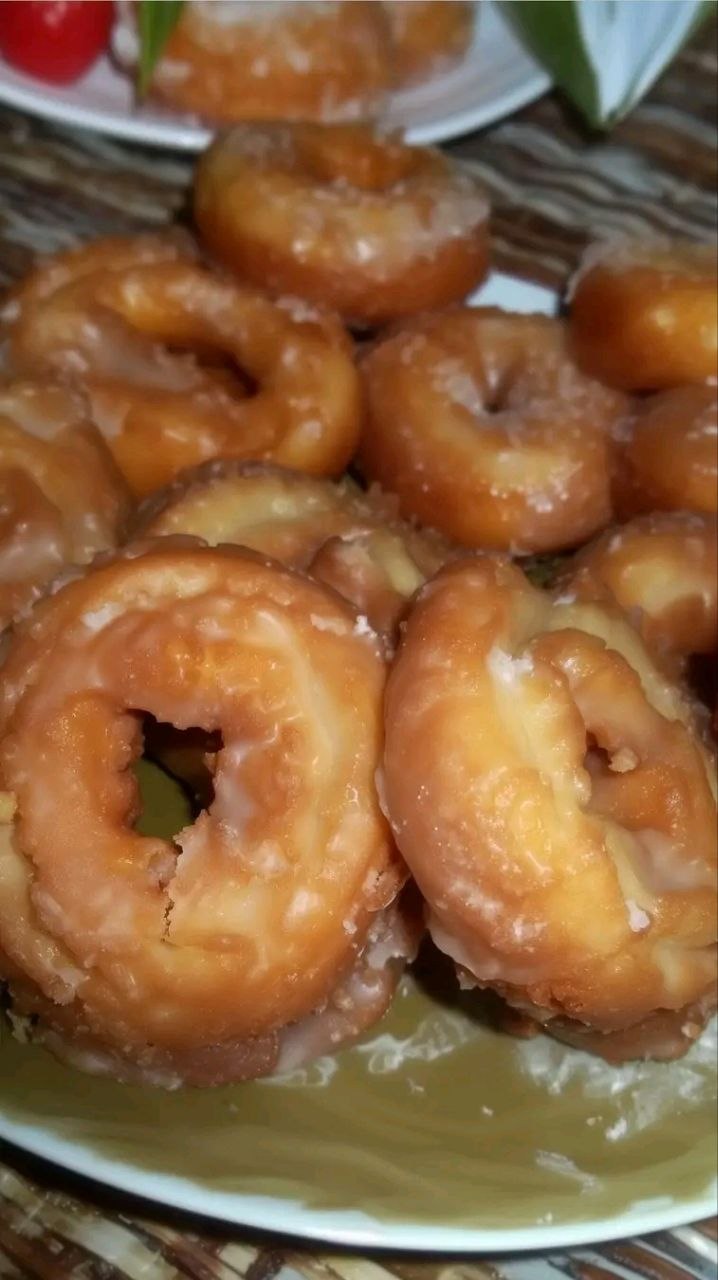
Old-Fashionеd Sour Crеam Donuts

Introduction
Step right up, sweet tooths and nostalgia seekers! Today, we’re diving into a culinary classic that whispers tales of grandmother’s kitchens and simpler times: Old-Fashioned Sour Cream Donuts. These aren’t just any donuts; they’re a testament to the magic that happens when humble ingredients come together to create something truly extraordinary. Imagine a donut with a beautifully craggy, golden-brown exterior, hinting at a tender, cake-like interior that practically melts in your mouth. Each bite delivers a delicate balance of sweetness and a subtle, irresistible tang, all enveloped in a shimmering, sweet glaze. It’s comfort food at its finest, a warm embrace in donut form, and a guaranteed crowd-pleaser.
What makes these donuts so incredibly special? It’s the sour cream, our secret weapon, that elevates them far beyond your average fried dough. The sour cream doesn’t just add moisture; it imbues the dough with an unparalleled tenderness and a nuanced flavor that’s both rich and slightly bright. This unique ingredient contributes to that signature, slightly dense yet unbelievably soft crumb, making these donuts deeply satisfying without being heavy. The “old-fashioned” moniker isn’t just a quaint term; it speaks to a traditional method of preparation, resulting in those characteristic cracks and crevices that perfectly cradle the glaze, ensuring every bite is a burst of sweet delight. Prepare to fall in love with the timeless charm and irresistible taste of these homemade treasures.
For many, the aroma of fresh donuts frying conjures up vivid memories of childhood, Saturday mornings, or special treats. Our Old-Fashioned Sour Cream Donut recipe aims to capture that very essence, bringing the comforting warmth and rich flavor of a classic donut shop right into your kitchen. While the idea of frying at home might seem daunting, rest assured, we’ll guide you through every step with clear, concise instructions and helpful tips. By the end of this culinary journey, you’ll not only have a batch of incredibly delicious donuts but also the confidence to recreate this beloved classic whenever the craving strikes. So, dust off your apron, gather your ingredients, and let’s embark on the delightful adventure of making the best old-fashioned sour cream donuts you’ve ever tasted!
Nutritional Information
Per serving (approximate values):
- Calories: 320
- Protein: 4g
- Carbohydrates: 45g
- Fat: 15g
- Fiber: 1g
- Sodium: 220mg
Ingredients
- 3 cups (360g) all-purpose flour, plus more for dusting
- 1 cup (200g) granulated sugar
- 2 teaspoons baking powder
- 1 teaspoon baking soda
- 1 teaspoon salt
- 1 teaspoon ground nutmeg
- 1 cup (240g) full-fat sour cream, at room temperature
- 2 large eggs, at room temperature
- 2 tablespoons (28g) unsalted butter, melted and cooled
- 1 teaspoon vanilla extract
- 6-8 cups vegetable oil, canola oil, or peanut oil, for frying
For the Glaze:
- 2 cups (240g) powdered sugar, sifted
- 1/4 cup (60ml) milk (whole or 2%)
- 1 teaspoon vanilla extract
- Pinch of salt
Instructions
- Prepare the Dry Ingredients: In a large mixing bowl, whisk together the all-purpose flour, granulated sugar, baking powder, baking soda, salt, and ground nutmeg. Ensure all ingredients are well combined and there are no lumps.
- Combine Wet Ingredients: In a separate medium bowl, whisk together the sour cream, large eggs, melted and cooled unsalted butter, and vanilla extract until smooth and fully incorporated. Ensure your sour cream and eggs are at room temperature for better emulsification and a smoother dough.
- Combine Wet and Dry: Pour the wet ingredients into the dry ingredients. Using a wooden spoon or a spatula, mix until just combined. Be careful not to overmix the dough; overmixing can lead to tough donuts. The dough will be thick and somewhat sticky.
- Chill the Dough: Cover the bowl with plastic wrap and refrigerate the dough for at least 1 hour, or preferably 2-3 hours. Chilling the dough makes it much easier to handle and cut, and helps prevent it from absorbing too much oil during frying.
- Prepare for Frying: While the dough is chilling, set up your frying station. In a large, heavy-bottomed pot or Dutch oven, pour 6-8 cups of vegetable oil (or your preferred frying oil). Attach a deep-fry thermometer to the side of the pot, ensuring the tip is submerged but not touching the bottom. Heat the oil over medium heat to 350°F (175°C). Line a baking sheet with several layers of paper towels, and place a wire rack over it. This will be for draining the fried donuts.
- Roll and Cut the Dough: Lightly flour a clean work surface. Turn the chilled dough out onto the floured surface. Lightly flour the top of the dough and a rolling pin. Roll the dough to about 1/2-inch thickness. Using a 3-inch donut cutter (or two concentric biscuit cutters/cups for the donut shape, and a smaller cutter for the hole), cut out the donuts and their centers. Gather the scraps, gently re-roll them, and cut out more donuts until you’ve used most of the dough. Avoid overworking the dough scraps.
- Fry the Donuts: Carefully lower 2-3 donuts (and a few donut holes, if desired) into the hot oil using a slotted spoon or spider. Do not overcrowd the pot, as this will lower the oil temperature and result in greasy donuts. Fry for 1-2 minutes per side, or until golden brown and cooked through. The donut holes will cook faster, about 30-60 seconds per side. Use your slotted spoon to gently flip the donuts.
- Drain the Donuts: Once golden brown, remove the donuts from the oil with the slotted spoon and transfer them to the prepared wire rack to drain excess oil. Continue frying the remaining donuts, ensuring the oil temperature remains consistently at 350°F (175°C) between batches. Adjust heat as necessary.
- Prepare the Glaze: While the donuts are cooling slightly, prepare the glaze. In a medium bowl, whisk together the sifted powdered sugar, milk, vanilla extract, and a pinch of salt until smooth and pourable. If the glaze is too thick, add a tiny bit more milk; if too thin, add a little more powdered sugar.
- Glaze the Donuts: Once the donuts have cooled for a few minutes (they should still be warm, but not hot enough to melt the glaze completely), dip each donut into the glaze, turning to coat both sides. Alternatively, you can drizzle the glaze over the donuts. Place them back on the wire rack over the paper towels to allow any excess glaze to drip off and the glaze to set.
- Serve: These old-fashioned sour cream donuts are best enjoyed fresh and warm!
Cooking Tips and Variations
Achieving the perfect old-fashioned sour cream donut is all about precision and a few key techniques. Firstly, the oil temperature is paramount. Invest in a reliable deep-fry thermometer and maintain the oil at a consistent 350°F (175°C). If the oil is too hot, the donuts will brown too quickly on the outside and remain raw inside. If it’s too cool, they’ll absorb too much oil and become greasy. Fry in small batches to prevent the oil temperature from dropping excessively. For the best texture, use full-fat sour cream; its higher fat content contributes significantly to the donut’s moistness and tender crumb. Ensure all your cold ingredients, like eggs and sour cream, are at room temperature before mixing, as this helps create a smoother, more uniform dough. Don’t overmix the dough once the wet and dry ingredients are combined; a light hand will yield a more tender donut. Chilling the dough for at least an hour is crucial – it makes the dough easier to handle, reduces stickiness, and helps it hold its shape during frying.
When it comes to rolling and cutting, a lightly floured surface is key. Avoid adding too much flour, which can make the donuts dry. If you don’t have a donut cutter, use two different sized biscuit cutters or even glasses to create the donut shape and the hole. Gently re-roll dough scraps only once or twice; overworking them will develop the gluten too much, resulting in tougher donuts. As for frying, always remove the donuts to a wire rack set over paper towels. This allows air to circulate, preventing the bottoms from getting soggy, and also drains off excess oil. For a simple and delicious variation, consider a cinnamon-sugar coating instead of a glaze. Immediately after frying and while still warm, toss the donuts in a mixture of 1/2 cup granulated sugar and 1 tablespoon ground cinnamon. You can also experiment with different glaze flavors by adding a touch of maple extract, almond extract, or even a citrus zest (lemon or orange) to the basic powdered sugar glaze. For a chocolate glaze, melt 1/2 cup chocolate chips with 2 tablespoons butter and 2 tablespoons milk, then whisk in 1 cup powdered sugar until smooth. These small tweaks can add a delightful twist to the classic recipe.
Storage and Reheating
Old-fashioned sour cream donuts are undeniably at their absolute best when enjoyed fresh and still slightly warm, ideally within a few hours of frying. The tender crumb and delicate crunch of the exterior are truly unparalleled when just made. However, if you find yourself with leftovers, proper storage can help preserve their deliciousness for a little longer, though they will lose some of their initial crispness.
To store glazed donuts, arrange them in a single layer in an airtight container. If you need to stack them, place a piece of parchment paper between the layers to prevent them from sticking together and smudging the glaze. Store the container at room temperature for up to 1-2 days. Keeping them in the refrigerator can cause them to dry out and become firm more quickly, so it’s generally not recommended unless you live in a very warm and humid climate.
If you have unglazed donuts, you can store them similarly in an airtight container at room temperature for up to 2 days. You can also freeze unglazed donuts. Place them in a single layer on a baking sheet and freeze until solid, then transfer them to a freezer-safe bag or container for up to 1 month. When ready to enjoy, thaw them at room temperature.
Reheating glazed donuts is best done gently. For a quick refresh, you can pop them into a microwave for 10-15 seconds. Be careful not to overheat, as this can make them tough and chewy. The microwave will soften them but won’t restore the crisp exterior. For a slightly better result, you can place them on a baking sheet in a preheated oven at 300°F (150°C) for about 5-7 minutes. This will warm them through and slightly crisp up the exterior, though they won’t be as fresh as newly fried. Unglazed donuts can be reheated in the oven for a similar duration to regain some of their warmth and texture. Enjoying them with a fresh cup of coffee or tea is always a wonderful way to savor these delightful treats, even if they’re not straight out of the fryer.
Frequently Asked Questions
Why did my donuts turn out greasy?
Greasy donuts are almost always a result of the oil temperature being too low. When the oil isn’t hot enough, the dough absorbs too much oil instead of cooking quickly and forming a barrier. Ensure your frying oil is consistently maintained at 350°F (175°C) using a deep-fry thermometer. Also, avoid overcrowding the pot, as this will drop the oil temperature significantly.
Can I bake these donuts instead of frying?
While you can certainly bake a donut-shaped dough, these “old-fashioned” donuts are specifically designed for frying. The unique texture, with its craggy exterior and tender, cake-like interior, is a direct result of the frying process. Baking would yield a cake-like donut, but it would lack the signature characteristics that make these particular donuts so special. For true old-fashioned sour cream donuts, frying is essential.
What’s the best oil for frying donuts?
For frying donuts, you want an oil with a high smoke point and a neutral flavor. Vegetable oil, canola oil, and peanut oil are all excellent choices. Avoid oils with strong flavors like olive oil. Make sure you use enough oil so the donuts can float and cook evenly, typically 3-4 inches deep in your pot.
My dough is too sticky to handle. What should I do?
If your dough is too sticky, first ensure you’ve chilled it for the recommended time. Cold dough is much easier to work with. If it’s still excessively sticky after chilling, you can lightly flour your hands and the rolling surface. You can also add a tablespoon or two more of flour to the dough, mixing it in gently until it’s more manageable, but be careful not to add too much, as this can make the donuts tough.