
Follow Me On Social Media!
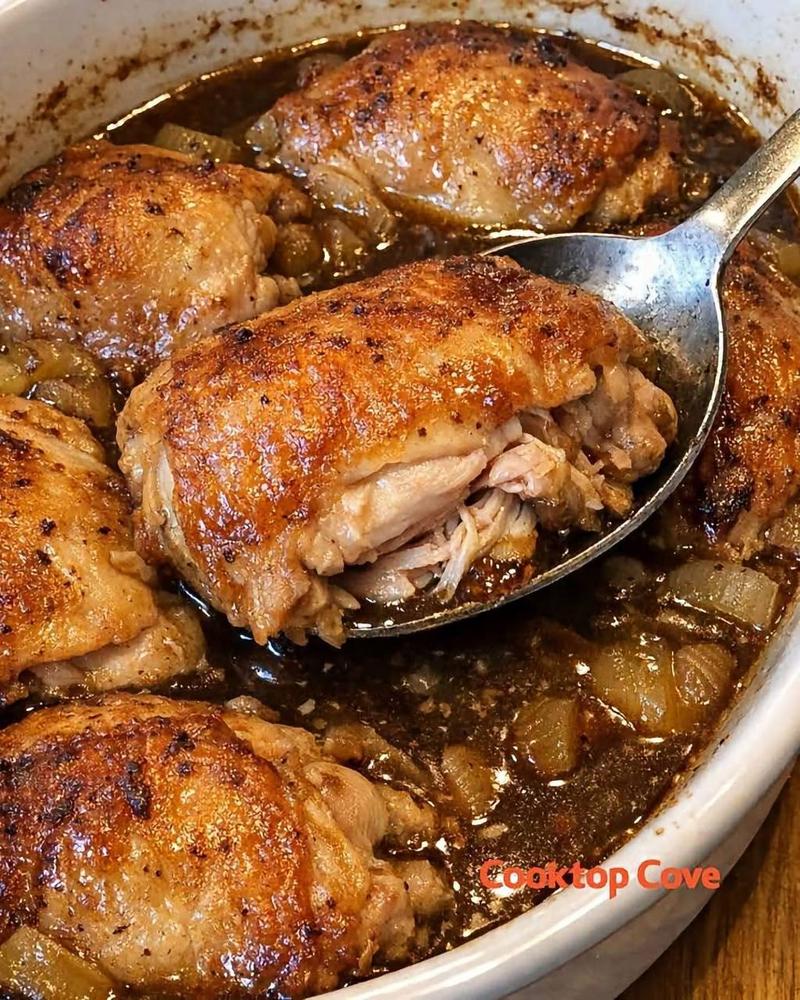
Juicy Oven-Braised Chicken Thighs with Rich Garlic Gravy – So Tender, Flavorful, and Delicious

Introduction
Imagine walking into your kitchen, greeted by the irresistible aroma of savory herbs, tender chicken, and rich garlic. That’s precisely the experience you’ll have with these Juicy Oven-Braised Chicken Thighs with Rich Garlic Gravy – a dish that embodies comfort, flavor, and pure culinary satisfaction. This isn’t just another chicken recipe; it’s a culinary hug, a promise of a deeply satisfying meal that will leave everyone at your table asking for seconds. We’re talking about chicken so tender it practically melts in your mouth, enveloped in a luscious, deeply flavored gravy that is utterly spoon-worthy.
What makes this dish truly special is its ability to deliver maximum flavor with minimal fuss. By harnessing the power of oven-braising, we transform simple bone-in, skin-on chicken thighs into golden-brown perfection, ensuring every bite is incredibly juicy and succulent. The magic happens slowly in the oven, allowing the rich garlic gravy to permeate the chicken, infusing it with layers of aromatic goodness. This recipe is designed to be approachable enough for a weeknight dinner, yet elegant and impressive enough for a special occasion, making it a versatile staple in any home cook’s repertoire.
Get ready for fall-off-the-bone tenderness, incredibly crispy skin that crackles with flavor, and a deeply savory, aromatic gravy that you’ll want to drizzle over everything. This dish promises to deliver on all fronts: juicy, tender, flavorful, and undeniably delicious. It’s the kind of meal that warms you from the inside out, creating cherished memories around the dinner table.
Nutritional Information
Per serving (approximate values):
- Calories: 580
- Protein: 45g
- Carbohydrates: 15g
- Fat: 38g
- Fiber: 2g
- Sodium: 850mg
Ingredients
- 8 bone-in, skin-on chicken thighs (about 3-3.5 lbs total)
- 1 tablespoon olive oil
- 1 large yellow onion, finely diced
- 8-10 cloves garlic, minced (about 3-4 tablespoons)
- 1 teaspoon dried thyme
- 1 teaspoon dried rosemary, crushed
- 1/2 teaspoon smoked paprika
- 1/4 teaspoon black pepper, freshly ground, plus more for seasoning
- 1 teaspoon salt, plus more for seasoning
- 2 cups chicken broth, low sodium
- 1/2 cup dry white wine (such as Sauvignon Blanc or Pinot Grigio), optional, or additional chicken broth
- 1 tablespoon all-purpose flour (for gravy thickening, optional)
- 2 tablespoons fresh parsley, chopped, for garnish
Instructions
- Prepare the Chicken: Pat the chicken thighs thoroughly dry with paper towels. This is crucial for achieving crispy skin. Season generously on both sides with 1 teaspoon of salt, 1/4 teaspoon of black pepper, smoked paprika, dried thyme, and dried rosemary.
- Sear the Chicken: Heat the olive oil in a large Dutch oven or oven-safe pot with a heavy bottom over medium-high heat until shimmering. Carefully place the chicken thighs, skin-side down, into the hot pot. Do not overcrowd the pot; sear in batches if necessary. Cook for 6-8 minutes, or until the skin is deeply golden brown and crispy. Remove the chicken from the pot and set aside on a plate, skin-side up.
- Sauté Aromatics: Reduce the heat to medium. Add the diced onion to the pot, scraping up any browned bits (fond) from the bottom. Sauté for 5-7 minutes, or until the onion is softened and translucent. Add the minced garlic and cook for another 1-2 minutes until fragrant, being careful not to burn it.
- Deglaze and Build Gravy Base: Pour in the white wine (if using) and scrape the bottom of the pot vigorously with a wooden spoon to loosen all the flavorful browned bits. Let the wine simmer for 2-3 minutes until it has reduced by about half. If not using wine, skip this step and go directly to adding the broth.
- Add Braising Liquid: Pour in the chicken broth. Bring the liquid to a gentle simmer, stirring to combine all the flavors. If you plan to thicken the gravy with flour later, you can whisk in 1 tablespoon of flour now, cooking for 1 minute to remove the raw flour taste, then add the broth.
- Return Chicken to Pot: Carefully nestle the seared chicken thighs back into the pot, skin-side up, ensuring the skin remains mostly above the liquid.
- Oven Braising: Preheat your oven to 350°F (175°C). Cover the Dutch oven with a tight-fitting lid and transfer it to the preheated oven. Braise for 45-60 minutes, or until the chicken is fork-tender and reaches an internal temperature of 175°F (80°C).
- Finish Gravy (Optional Thickening): Carefully remove the Dutch oven from the oven. Transfer the cooked chicken thighs to a clean plate and loosely tent with foil to keep warm.
- Reduce and Thicken Gravy: Place the Dutch oven back on the stovetop over medium-high heat. Bring the liquid to a vigorous simmer. If you want a thicker gravy, you can reduce it by simmering uncovered for 5-10 minutes, stirring occasionally, until it reaches your desired consistency. Alternatively, if you didn’t add flour earlier, you can create a cornstarch slurry (1 tablespoon cornstarch mixed with 2 tablespoons cold water) and whisk it into the simmering gravy. Cook for 1-2 minutes until thickened. Taste the gravy and adjust seasoning with additional salt and pepper if needed.
- Serve: Spoon the rich garlic gravy generously over the tender chicken thighs. Garnish with fresh chopped parsley. Serve immediately with your favorite sides.
Cooking Tips and Variations
Crispy Skin Secret: The key to truly crispy skin lies in two steps: thoroughly patting the chicken dry before searing, and ensuring the skin is exposed (not submerged in liquid) during the braising process. If you find the skin isn’t as crisp as you’d like after braising, you can remove the lid for the last 15-20 minutes of cooking, or even place the chicken under a broiler for 2-3 minutes (watching carefully!) until perfectly golden and crisp.
Flavor Boosters: For an even deeper flavor profile, consider adding a bay leaf or two to the braising liquid. A parmesan rind, if you have one, can also be added to the pot during braising for an umami-rich depth that’s truly exceptional. For a touch of heat, a pinch of red pepper flakes can be added with the garlic.
Make Ahead Magic: Braised dishes are famously even better the next day! The flavors have more time to meld and deepen. You can prepare this dish entirely in advance, refrigerate it, and gently reheat it on the stovetop or in the oven when ready to serve. Just be sure to remove any solidified fat from the top of the gravy before reheating for a lighter texture.
Serving Suggestions: This dish is incredibly versatile. It pairs beautifully with creamy mashed potatoes, allowing the rich gravy to soak into every spoonful. Other excellent options include fluffy white rice, egg noodles, or a crusty baguette to sop up all the delicious sauce. For a complete meal, serve alongside roasted vegetables like asparagus, green beans, or broccoli.
Variations for Extra Goodness: Don’t hesitate to customize this recipe! Add sliced mushrooms to the pot along with the onions for an earthy flavor. Diced carrots and celery can also be sautéed with the onions to create a classic mirepoix base. For an extra luxurious gravy, stir in a tablespoon or two of heavy cream or a pat of butter at the very end, just before serving.
Don’t Overcrowd the Pan: When searing the chicken, it’s crucial to sear in batches if your Dutch oven isn’t large enough to accommodate all thighs in a single layer without touching. Overcrowding will steam the chicken instead of browning it, preventing that beautiful crispy skin.
Scraping Fond: That browned residue at the bottom of the pot after searing the chicken and sautéing the onions is pure flavor gold! Make sure to thoroughly scrape it up when deglazing with wine or broth. This “fond” is essential for a rich and complex gravy.
Resting the Chicken: While tempting to dive right in, allowing the chicken to rest for 5-10 minutes after it comes out of the oven, tented with foil, allows the juices to redistribute throughout the meat. This ensures your chicken remains incredibly juicy and tender.
Adjusting Gravy Consistency: If your gravy is too thin, simply simmer it longer on the stovetop to reduce it. If it becomes too thick, whisk in a little more chicken broth until it reaches your desired consistency. Always taste and adjust seasoning after any adjustments to thickness.
Seasoning in Layers: Remember to season the chicken, then the aromatics, and finally taste and adjust the gravy at the end. Layering your seasonings ensures every component of the dish is flavorful, leading to a more cohesive and delicious end result.
Storage and Reheating
Storage: Leftover Juicy Oven-Braised Chicken Thighs with Rich Garlic Gravy can be stored in an airtight container in the refrigerator for up to 3-4 days. Ensure the chicken and gravy are completely cooled before transferring them to the container. For longer storage, this dish freezes beautifully. Place the chicken and gravy in a freezer-safe container or heavy-duty freezer bag, leaving a little headspace. It can be frozen for up to 3 months.
Reheating from Refrigerator:
- Stovetop: The best method for reheating. Transfer the chicken and gravy to a pot or Dutch oven. Heat over medium-low heat, stirring occasionally, until warmed through. If the gravy has thickened too much, you can add a splash of chicken broth or water to thin it out.
- Oven: Preheat oven to 325°F (160°C). Place chicken and gravy in an oven-safe dish, cover tightly with foil, and heat for 20-25 minutes, or until warmed through.
- Microwave: For individual portions, place chicken and gravy in a microwave-safe dish. Heat on medium power for 2-3 minutes, stirring halfway through, until hot. Be careful not to overheat, as this can dry out the chicken.
Reheating from Frozen:
- Thawing: For best results, thaw the frozen chicken and gravy overnight in the refrigerator.
- Stovetop (from thawed): Follow the stovetop instructions above.
- Oven (from frozen, not recommended for best texture): If you must reheat from frozen, place in an oven-safe dish, cover tightly with foil, and bake at 325°F (160°C) for 45-60 minutes, or until heated through. The chicken may not be as moist as when reheated from thawed.
When reheating, always ensure the internal temperature of the chicken reaches 165°F (74°C).
Frequently Asked Questions
Can I use boneless, skinless chicken thighs instead?
While bone-in, skin-on chicken thighs are highly recommended for this recipe due to the flavor and moisture they provide, you can use boneless, skinless thighs. However, adjust the cooking time as they will cook faster, likely around 30-40 minutes of braising. Be aware that the flavor of the gravy might be slightly less rich without the bones, and you won’t achieve the crispy skin.
My gravy isn’t thick enough. What can I do?
There are a few ways to thicken your gravy. The easiest is to continue simmering it on the stovetop over medium-high heat, uncovered, allowing it to reduce and naturally thicken. Alternatively, you can create a cornstarch slurry by whisking together 1 tablespoon of cornstarch with 2 tablespoons of cold water until smooth. Slowly whisk this slurry into the simmering gravy and cook for 1-2 minutes until it thickens to your desired consistency. A roux (equal parts butter and flour cooked together) can also be used, but it’s best added earlier in the cooking process.
Can I make this dish in a slow cooker?
Yes, you can adapt this recipe for a slow cooker, but you’ll miss out on the crispy skin and some of the intense browned flavors from searing. To adapt: sear the chicken thighs and sauté the aromatics on the stovetop first. Then, transfer them to the slow cooker, add the braising liquid, and cook on low for 3-4 hours or on high for 2-3 hours, until the chicken is tender. You’ll likely need to transfer the liquid to a saucepan to thicken the gravy separately at the end.
What can I do if my gravy is too salty?
If your gravy turns out too salty, there are a few tricks to help balance the flavor. You can add a splash more unsalted chicken broth or water to dilute it. A small amount of sugar (a pinch) or a squeeze of lemon juice can also help counteract the saltiness by adding another flavor dimension. If you have a potato, you can cut it into chunks and simmer it in the gravy for 15-20 minutes; the potato will absorb some of the excess salt, then remove it before serving.