Follow Me On Social Media!
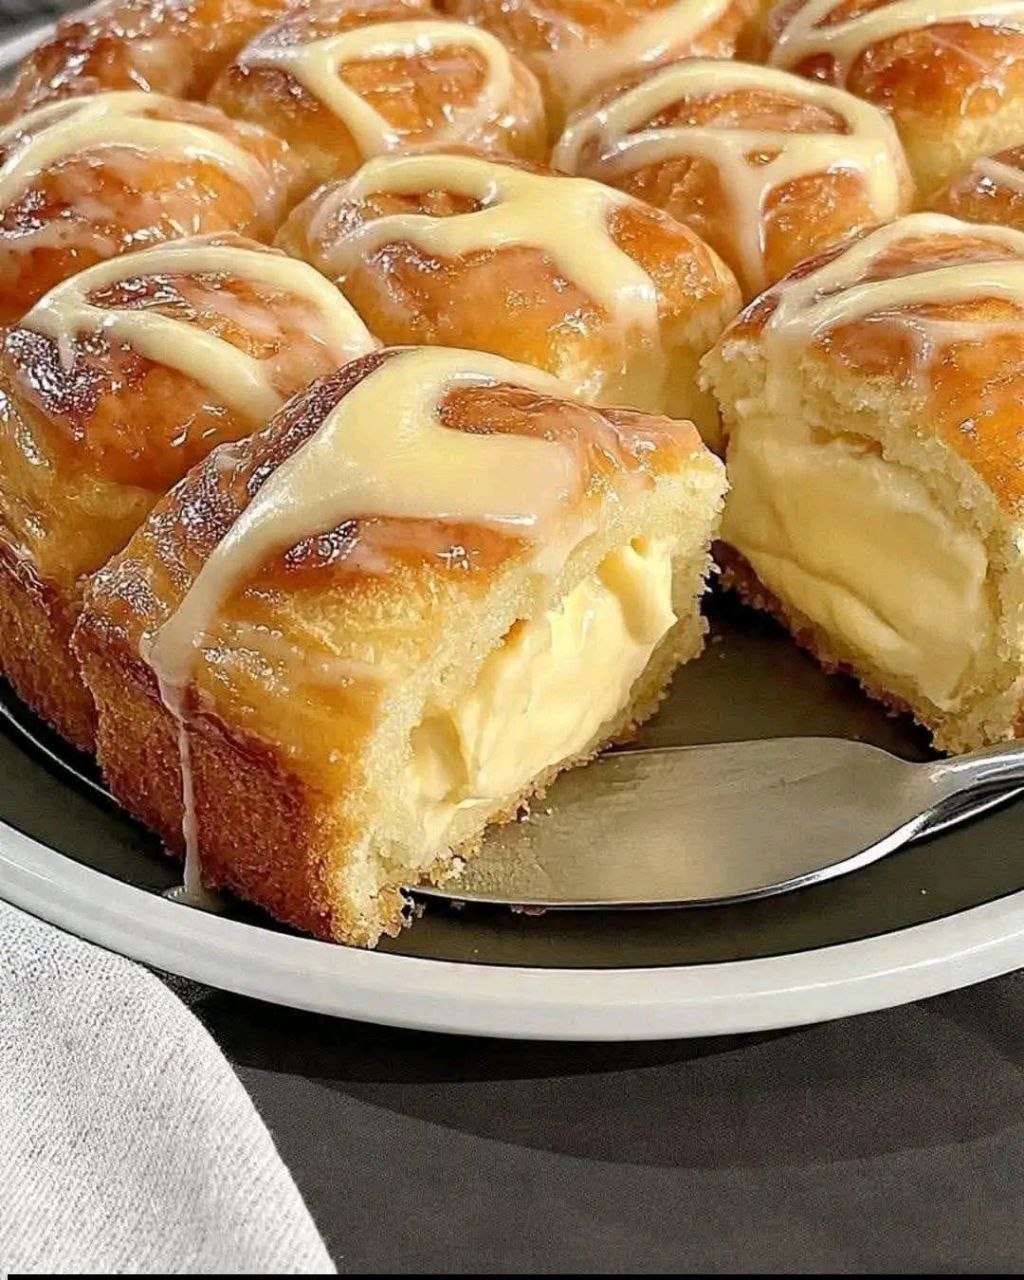
Cream Filled Buns

Introduction
There’s something undeniably comforting and utterly delightful about a perfectly baked, soft bun generously filled with a creamy, sweet surprise. Today, we’re diving into the wonderful world of Cream Filled Buns – a classic sweet treat that transcends cultures and generations. Whether you know them as cream buns, custard buns, or simply sweet rolls with a luscious secret, these tender pastries are a testament to simple pleasures done right. Imagine biting into a cloud-like dough, yielding to a rich, velvety filling that melts in your mouth – pure bliss in every bite.
Our recipe for Cream Filled Buns isn’t just another rendition; it’s designed to be approachable yet incredibly satisfying, ensuring a soft, enriched dough that’s a joy to work with, paired with a decadent, vanilla-infused cream filling that strikes the perfect balance of sweetness and texture. We’ll guide you through creating a dough that stays tender for days, a filling that’s smooth and stable, and an optional glaze that adds that final touch of bakery-quality sheen. This isn’t just about baking; it’s about creating moments of warmth and homemade goodness, perfect for a cozy morning, an afternoon tea, or as a delightful dessert.
What makes these particular cream-filled buns special is the emphasis on achieving an incredibly soft and slightly sweet dough that acts as the perfect vehicle for our rich, homemade pastry cream. We’ll demystify the art of proofing and shaping, ensuring even novice bakers can achieve impressive results. The pastry cream itself is a star – thick enough to hold its shape but utterly silky, with a beautiful vanilla aroma. Forget dry, crumbly buns or runny fillings; this recipe promises an elevated experience that will have everyone asking for more. Get ready to fill your kitchen with the irresistible aroma of freshly baked goods and create a batch of these unforgettable cream-filled delights!
Nutritional Information
Per serving (approximate values):
- Calories: 380
- Protein: 8g
- Carbohydrates: 55g
- Fat: 15g
- Fiber: 2g
- Sodium: 220mg
Ingredients
For the Dough:
- 1 cup (240ml) warm milk (105-115°F / 40-46°C)
- 2 teaspoons active dry yeast
- 1/4 cup (50g) granulated sugar, divided
- 1 large egg, at room temperature
- 1/4 cup (56g) unsalted butter, melted and cooled
- 1 teaspoon vanilla extract
- 3 to 3 1/2 cups (360-420g) all-purpose flour, plus more for dusting
- 1/2 teaspoon salt
For the Pastry Cream Filling:
- 2 cups (480ml) whole milk
- 1/2 cup (100g) granulated sugar
- 1/4 cup (30g) cornstarch
- 4 large egg yolks
- 2 tablespoons unsalted butter, softened
- 1 teaspoon vanilla extract
- Pinch of salt
For the Glaze (Optional):
- 1 cup (120g) powdered sugar
- 2-3 tablespoons milk or heavy cream
- 1/2 teaspoon vanilla extract
For Egg Wash:
- 1 large egg, beaten with 1 tablespoon water
Instructions
- Activate the Yeast: In a large bowl, combine the warm milk, yeast, and 1 tablespoon of the granulated sugar. Stir gently and let sit for 5-10 minutes, or until foamy. This indicates the yeast is active.
- Prepare the Dough Wet Ingredients: To the yeast mixture, add the remaining granulated sugar, egg, melted butter, and vanilla extract. Whisk well until combined.
- Combine Dry Ingredients: In a separate bowl, whisk together 3 cups of the all-purpose flour and salt.
- Mix Dough: Gradually add the dry ingredients to the wet ingredients, mixing with a wooden spoon or stand mixer with a dough hook until a shaggy dough forms.
- Knead the Dough: Turn the dough out onto a lightly floured surface. Knead for 8-10 minutes, adding more flour a tablespoon at a time if the dough is too sticky, until it’s smooth, elastic, and no longer sticky. Alternatively, use a stand mixer with a dough hook on medium-low speed for 6-8 minutes.
- First Proof: Lightly grease a clean bowl with oil. Place the dough in the bowl, turning once to coat. Cover the bowl with plastic wrap or a clean kitchen towel and let it rise in a warm, draft-free place for 1 to 1 1/2 hours, or until doubled in size.
- Prepare the Pastry Cream: While the dough is proofing, make the pastry cream. In a medium saucepan, heat 1 1/2 cups of the milk over medium heat until simmering.
- Whisk Yolks and Sugar: In a separate bowl, whisk together the egg yolks and remaining 1/2 cup of granulated sugar until pale and creamy. Add the cornstarch and whisk until smooth.
- Temper the Egg Mixture: Slowly pour the hot milk into the egg yolk mixture, whisking constantly to temper the eggs and prevent scrambling.
- Cook the Pastry Cream: Pour the tempered mixture back into the saucepan. Add the remaining 1/2 cup of milk and cook over medium heat, whisking constantly, until the mixture thickens considerably and comes to a boil. Boil for 1 minute, still whisking, to ensure the cornstarch is cooked out.
- Finish the Pastry Cream: Remove from heat. Stir in the softened butter, vanilla extract, and pinch of salt until smooth and fully incorporated.
- Cool the Pastry Cream: Transfer the pastry cream to a clean bowl. Press plastic wrap directly onto the surface of the cream to prevent a skin from forming. Refrigerate for at least 2-3 hours, or until thoroughly chilled and firm.
- Punch Down and Divide Dough: Once the dough has doubled, gently punch it down to release the air. Turn it out onto a lightly floured surface and divide it into 12 equal pieces (approximately 60-70g each).
- Shape the Buns: Roll each piece of dough into a tight, smooth ball. Place the shaped buns on a baking sheet lined with parchment paper, leaving about 2 inches between them.
- Second Proof: Cover the baking sheet loosely with plastic wrap or a clean kitchen towel and let the buns rise in a warm, draft-free place for 30-45 minutes, or until visibly puffy and almost doubled in size.
- Preheat Oven: While the buns are proofing for the second time, preheat your oven to 375°F (190°C).
- Egg Wash and Bake: Gently brush the tops of the proofed buns with the egg wash. Bake for 12-15 minutes, or until golden brown on top and cooked through.
- Cool Buns: Transfer the baked buns to a wire rack to cool completely before filling.
- Fill the Buns: Once the buns are completely cool and the pastry cream is thoroughly chilled, use a sharp knife to make a horizontal slit about two-thirds of the way through each bun, creating a pocket.
- Pipe Filling: Spoon the chilled pastry cream into a piping bag fitted with a wide round or star tip. Pipe a generous amount of filling into each bun’s pocket.
- Prepare Glaze (Optional): In a small bowl, whisk together the powdered sugar, milk (or cream), and vanilla extract until smooth and pourable.
- Glaze the Buns (Optional): Drizzle or brush the glaze over the filled buns.
- Serve: Serve immediately or refrigerate until ready to enjoy.
Cooking Tips and Variations
Achieving bakery-quality cream-filled buns at home is entirely within reach with a few key tips and a willingness to experiment. The secret to a truly soft bun lies in the dough’s hydration and proper kneading. Don’t be afraid to adjust the flour amount slightly; humidity can affect how much flour your dough needs. You’re looking for a dough that’s soft and pliable, but not overly sticky. Over-kneading can make the buns tough, while under-kneading won’t develop enough gluten for that airy texture. For proofing, a warm, draft-free spot is crucial. If your kitchen is cool, you can turn your oven on to its lowest setting for a few minutes, then turn it off and let the dough rise inside (with the oven door ajar to cool slightly). Always cover your dough to prevent it from drying out and forming a skin.
When it comes to the pastry cream, patience is a virtue. Whisk constantly, especially as it thickens, to prevent lumps and scorching. The tempering step (slowly adding hot milk to egg yolks) is vital to avoid scrambling the eggs. Ensure the pastry cream is completely chilled before filling the buns; warm or even slightly cool cream will be too runny and won’t hold its shape. Pressing plastic wrap directly onto the surface of the cream while it cools prevents a skin from forming, ensuring a silky-smooth texture. If your cream seems too thick after chilling, you can whisk it vigorously for a minute or two to loosen it up slightly, or even add a tablespoon of milk if needed.
For variations, the possibilities are endless! For a different flavor profile, consider adding a teaspoon of almond extract to the dough or the filling. You could also infuse the milk for the pastry cream with a vanilla bean pod, lemon zest, or even a cinnamon stick for a subtle spice. For chocolate lovers, melt in a few ounces of dark chocolate into the hot pastry cream for a rich chocolate custard. Fruit variations are also delicious; fold in some finely diced fresh berries or a spoonful of fruit compote into the cooled pastry cream. The glaze can also be customized: a lemon glaze (lemon juice instead of milk) adds a zesty tang, or a maple glaze (maple syrup instead of some of the milk) offers a warm, comforting note. For a simpler finish, a dusting of powdered sugar is always elegant. If you prefer a less sweet bun, you can reduce the sugar in the dough by a tablespoon or two, but remember it also aids in browning and texture.
Storage and Reheating
Cream filled buns are best enjoyed fresh on the day they are made, when the dough is at its softest and the cream at its silkiest. However, if you have leftovers, proper storage is key to maintaining their deliciousness and ensuring food safety, especially with a dairy-based filling. Due to the pastry cream, these buns must be stored in the refrigerator. Place the cream filled buns in an airtight container to prevent them from drying out and absorbing odors from other foods in the fridge. They will keep well for up to 2-3 days when stored this way. Beyond that, the quality of the bun and the filling may start to decline.
For reheating, while cream-filled buns are often enjoyed cold, a slightly warmed bun can be a delightful experience. To gently warm them, you can place them in a preheated oven at 300°F (150°C) for about 5-7 minutes. Be careful not to overheat, as this can dry out the bun or cause the filling to become too runny. Alternatively, you can microwave them for 10-15 seconds per bun on a low setting. The microwave method is quicker but can sometimes make the bun a bit chewier. If reheating, it’s best to warm only the amount you plan to eat immediately. Reheating multiple times is not recommended as it can compromise the texture of both the bun and the cream.
Frequently Asked Questions
How do I know if my yeast is active?
When you combine warm milk, yeast, and a little sugar, the mixture should become foamy and bubbly within 5-10 minutes. If it doesn’t, your yeast might be old or the milk temperature was too hot or cold, and it’s best to start with a fresh batch of yeast to ensure your dough rises properly.
Can I make the dough ahead of time?
Yes, you can! After the first rise, punch down the dough, cover it tightly with plastic wrap, and refrigerate it overnight (up to 24 hours). The cold temperature will slow down the yeast activity. When you’re ready to bake, take the dough out of the fridge, let it come to room temperature for about 30-60 minutes, then proceed with shaping and the second proofing as instructed.
My pastry cream is lumpy, what went wrong?
Lumpy pastry cream usually results from not whisking constantly during the cooking process, or not properly tempering the eggs. If your cream has small lumps, you can try passing it through a fine-mesh sieve or blending it with an immersion blender once it’s cooled slightly to achieve a smoother consistency before chilling.
How can I prevent the buns from getting soggy after filling?
The key is to ensure both the buns and the pastry cream are completely cooled before assembly. Warm buns will create condensation, making them soggy, and warm cream will be too thin. Also, store the filled buns in an airtight container in the refrigerator to protect them from moisture and air. If you’re planning to serve them later, you can bake the buns and make the cream ahead of time, then fill them closer to serving.