Follow Me On Social Media!

Search Results for Turkish bread

Introduction
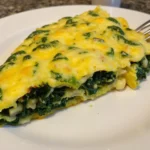
You searched for “Turkish bread,” and while that phrase covers a vast and delicious culinary landscape, the golden, flaky masterpiece pictured here points to a truly special treat: a layered sweet flatbread, most famously known in Turkey as Katmer. Imagine a delicate pastry, pan-fried to a perfect golden crispness, with countless thin, buttery layers that practically melt in your mouth. This isn’t your everyday sandwich bread; this is an experience, a delightful dance of textures and subtle sweetness that captivates from the very first bite.
This particular style of flatbread, with its intricate layering and often sweet finish, is a culinary marvel found in various forms across many cultures, from the Indian subcontinent’s paratha to Malaysia’s roti canai. However, Turkish Katmer holds a special place, particularly in the southeastern region of Gaziantep, where it’s revered as a breakfast delicacy or a decadent dessert. What makes it so utterly irresistible is the meticulous process of folding and re-folding the dough with generous applications of fat, creating an astonishingly flaky texture that’s both light and satisfying. When drizzled with honey or syrup, as seen in our inviting image, it transforms into a breakfast fit for royalty or a comforting end to any meal.
The allure of this flatbread lies not just in its exquisite taste and texture, but also in the simple magic of its creation. Starting with humble ingredients like flour and water, and through a bit of patience and technique, you can conjure a dish that looks incredibly impressive yet is surprisingly approachable for the home cook. The reward is a warm, aromatic flatbread that’s crispy on the outside, tender and ethereal within, ready to be enjoyed with a cup of strong tea, a dollop of clotted cream, or simply on its own, savoring every sweet, buttery layer.
Nutritional Information
Per serving (approximate values):
- Calories: 380
- Protein: 7g
- Carbohydrates: 55g
- Fat: 15g
- Fiber: 2g
- Sodium: 250mg
Ingredients
- 2 ½ cups (300g) all-purpose flour, plus more for dusting
- ¾ teaspoon salt
- 1 cup (240ml) warm water (about 100-110°F / 38-43°C)
- 2 tablespoons olive oil, plus more for greasing
- ½ cup (113g) unsalted butter, melted (or ghee)
- ¼ cup (60ml) honey or simple syrup, for drizzling
- Optional: 2 tablespoons finely chopped pistachios or walnuts, for garnish
Instructions
- Prepare the Dough: In a large mixing bowl, combine the all-purpose flour and salt. Gradually add the warm water and 2 tablespoons of olive oil. Mix with a spoon until a shaggy dough forms.
- Knead the Dough: Turn the dough out onto a lightly floured surface. Knead for 8-10 minutes until the dough is smooth, elastic, and no longer sticky. It should feel soft and pliable.
- First Rest: Lightly grease a clean bowl with olive oil. Place the dough in the bowl, turning it to coat. Cover the bowl with plastic wrap or a damp cloth and let it rest at room temperature for at least 1 hour. This resting period is crucial for developing gluten and making the dough easier to roll.
- Divide the Dough: After resting, gently punch down the dough. Divide it into 4 equal portions. Roll each portion into a smooth ball.
- Second Rest: Lightly oil a baking sheet or a clean surface. Place the dough balls on it, ensuring they are lightly coated with oil to prevent drying. Cover them with plastic wrap and let them rest for another 30 minutes. This second rest will make the dough incredibly pliable and easy to stretch.
- Prepare Your Workspace: Lightly oil a large, clean countertop or a large pastry mat. Have your melted butter (or ghee) ready in a small bowl, along with a pastry brush.
- Stretch the Dough (The Key Step): Take one dough ball. Using your hands, gently press and stretch the dough from the center outwards. The goal is to get it as thin as possible, almost transparent, without tearing. You can also lift the dough and gently stretch it over your knuckles, allowing gravity to help thin it out. Aim for a large, irregular rectangle or circle, about 18-24 inches in diameter. Don’t worry if it tears a little; you can patch it up.
- Butter and Fold: Generously brush the entire surface of the stretched dough with melted butter.
- First Fold: Fold one-third of the dough from one side towards the center. Brush this folded section with more melted butter.
- Second Fold: Fold the opposite side over the first fold, creating a long, rectangular strip. Brush the top of this strip with more melted butter.
- Third Fold: Fold one end of the strip towards the center, then fold the other end over it, creating a smaller, square-like packet. Brush the top with a final layer of melted butter.
- Repeat for Remaining Dough: Repeat steps 7-11 for the remaining three dough balls, creating 4 layered dough packets.
- Final Rest: Place the folded dough packets on an oiled surface, cover with plastic wrap, and let them rest for 15-20 minutes. This allows the gluten to relax again, making them easier to roll out without resistance.
- Roll Out the Katmer: Take one folded dough packet. On a lightly floured or oiled surface, gently roll it out into a circle or square about 8-10 inches in diameter and about ¼ inch thick. Be gentle to maintain the layers.
- Cook the Katmer: Heat a large, heavy-bottomed skillet or a non-stick pan over medium heat. Do not add oil to the pan.
- Pan-Fry: Carefully place one rolled-out Katmer into the hot, dry pan. Cook for 2-3 minutes per side, or until golden brown, puffed, and cooked through. The layers should separate and become flaky. You might see some beautiful blisters forming on the surface.
- Serve Immediately: Transfer the cooked Katmer to a serving plate. Drizzle generously with honey or simple syrup while still warm. If desired, sprinkle with chopped pistachios or walnuts.
- Repeat: Cook the remaining Katmer, serving each one warm as it comes off the pan.
Cooking Tips and Variations
Dough Consistency is Key: The dough should be soft, pliable, and slightly tacky but not sticky after kneading. If it’s too stiff, it will be hard to stretch. If it’s too wet, add a little more flour, a tablespoon at a time. A well-hydrated and properly kneaded dough is the secret to a super-flaky flatbread.
Don’t Skimp on Resting Time: Resting the dough multiple times allows the gluten to relax, making it incredibly elastic and easy to stretch paper-thin. Rushing this step will result in a tough, resistant dough that tears easily and won’t develop those beautiful layers.
Stretch, Don’t Roll (Initially): While you’ll use a rolling pin for the final shaping, the initial thinning of the dough is best done by hand stretching. This preserves the delicate gluten structure better than a rolling pin, which can compress the dough too much. Imagine you’re making phyllo dough – aim for transparency.
Butter, Butter, Butter: Generously brush melted butter (or ghee) between every fold. This fat creates steam during cooking, which forces the layers apart, resulting in that signature flakiness. Don’t be shy!
Medium Heat is Your Friend: Cook the Katmer over medium heat. If the heat is too high, the outside will burn before the inside layers cook and puff. If it’s too low, it will dry out and become tough. You want enough heat to create a golden crust and puff the layers without scorching.
Savory Katmer Variation: For a savory twist, omit the honey drizzle. Instead, spread a thin layer of crumbled feta cheese, finely chopped fresh herbs (like parsley or dill), or a sprinkle of za’atar before the first fold. You can also add a thin layer of spiced ground meat (cooked) or even a fried egg on top after cooking.
Sweet Fillings: Before the final fold, you can add a thin layer of finely crushed pistachios, walnuts, or a mixture of sugar and cinnamon. For an extra decadent treat, a thin spread of clotted cream (kaymak) or mascarpone can be added before folding, creating a creamy, sweet interior.
Ghee vs. Butter: While melted butter works wonderfully, using clarified butter (ghee) can enhance the flavor and flakiness even further, as it has a higher smoke point and pure butterfat content.
Make Ahead Tip: You can prepare the dough up to the point of creating the folded square packets (step 11). Wrap them tightly in plastic wrap and refrigerate for up to 24 hours. Let them come to room temperature for about 30 minutes before proceeding with step 12.
Storage and Reheating
Layered sweet flatbreads like Katmer are truly at their best when enjoyed fresh and warm, straight off the pan. The crispy exterior and tender, flaky interior are unparalleled in this state. However, if you find yourself with leftovers, they can be stored and reheated while still maintaining a good portion of their deliciousness.
To store, allow the cooked Katmer to cool completely to room temperature. Once cooled, stack them with a piece of parchment paper between each flatbread to prevent sticking. Place them in an airtight container or wrap them tightly in plastic wrap. They can be stored at room temperature for up to 1 day, or in the refrigerator for up to 3 days. Beyond that, the texture tends to degrade significantly.
For reheating, the best method to recapture some of that initial crispness is using a dry skillet or a toaster oven. Preheat a non-stick skillet over medium heat. Place the Katmer directly in the pan and heat for 1-2 minutes per side, or until warmed through and the exterior begins to crisp up again. Be careful not to overheat, as this can make the flatbread tough or dry. Alternatively, a toaster oven set to a medium-low temperature (around 300°F / 150°C) for 5-7 minutes works well. Avoid using a microwave, as it will make the Katmer soft and chewy, losing all its delightful flakiness.
Once reheated, you can refresh the flavor by drizzling with a little more honey or syrup, or adding a fresh sprinkle of nuts, if desired. While it won’t be exactly like fresh, a properly reheated Katmer can still be a very satisfying treat.
Frequently Asked Questions
What makes this flatbread so flaky?
The incredible flakiness comes from a specific technique of layering and folding the dough with fat, typically melted butter or ghee. As the dough is stretched thin, brushed with fat, and then folded multiple times, it creates numerous distinct layers. When cooked, the fat between these layers melts and creates steam, which forces the layers to separate and puff up, resulting in that signature light and airy, crispy texture.
Can I make this recipe gluten-free?
While traditional Katmer relies heavily on the gluten in all-purpose flour for its elasticity and ability to stretch paper-thin, it is challenging to make a truly authentic gluten-free version. Gluten-free flours lack the necessary elasticity for the stretching and layering technique, making it difficult to achieve the same delicate flakiness. Some recipes attempt gluten-free versions using a blend of gluten-free flours and binders, but the result will likely have a different texture and may not stretch as thinly or develop as many layers.
What is the difference between Katmer and other layered flatbreads like Paratha or Roti Canai?
While Katmer, Paratha (from the Indian subcontinent), and Roti Canai (from Malaysia/Singapore) all share the common characteristic of being layered, pan-fried flatbreads, they differ in their specific dough recipes, folding techniques, and typical accompaniments. Katmer often has a slightly softer, more elastic dough, and its sweet versions are typically served with clotted cream and pistachios. Paratha can be plain or stuffed, and is usually savory, served with curries or pickles. Roti Canai is known for being incredibly thin and airy, often served with dhal or curry. Each flatbread has evolved within its own culinary tradition, leading to subtle but distinct differences in flavor, texture, and serving customs.
Can I prepare the dough in advance?
Yes, you can prepare the dough in advance, which can actually enhance its flavor and elasticity. After completing step 11 (creating the folded square packets), wrap each packet tightly in plastic wrap and refrigerate for up to 24 hours. When you’re ready to cook, remove the packets from the refrigerator and let them sit at room temperature for about 30 minutes to an hour before proceeding with step 12. This allows the dough to relax and become pliable again, making it easier to roll out.