Follow Me On Social Media!
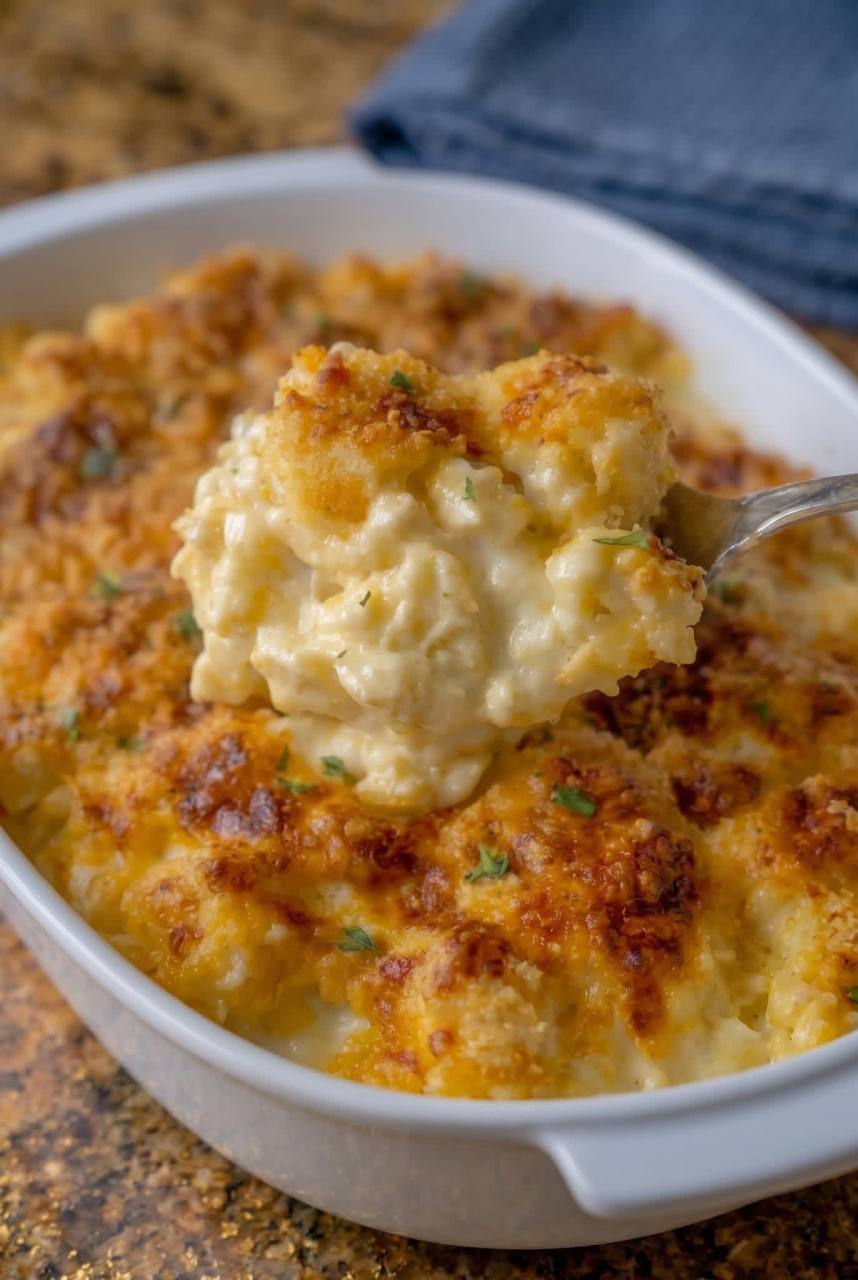
My mother clipped this from a magazine in 1965 and it became her signature for every holiday gathering. Still the first thing to disappear from the table

Introduction
There are some recipes that transcend mere sustenance and become woven into the very fabric of family history. For my mother, and for everyone lucky enough to pull up a chair at her holiday table, this casserole was one such dish. Clipped from a magazine back in 1965, long before the internet made recipes instantly accessible, this humble-looking printout became her culinary signature. It wasn’t just a side dish; it was a cornerstone of every festive gathering, a comforting presence that signaled the start of celebration. And without fail, year after year, it was always the first thing to disappear from the table, often with folks sneaking spoonfuls even before dinner was officially served.
This isn’t some overly complicated, fussy gourmet creation. No, this is pure, unadulterated comfort food, perfected over decades. It’s the kind of dish that speaks to the soul, with its creamy, dreamy interior, rich cheesy flavor, and that utterly irresistible golden, crispy topping. It’s a testament to the power of simple, good ingredients, combined with a little love, to create something truly extraordinary. My mother’s holiday casserole isn’t just a recipe; it’s a warm hug, a memory in every bite, and a tradition that has brought joy to countless meals. Now, I’m thrilled to share this timeless treasure with you, so it can become a beloved tradition in your home too.
What makes this casserole so universally adored? It starts with the perfect balance of textures and flavors. Imagine tender macaroni, perfectly cooked to absorb all the creamy goodness, enveloped in a luscious, velvety cheese sauce that’s both savory and incredibly satisfying. Then, there’s that incredible topping – a golden-brown crown of crunchy breadcrumbs and bubbly melted cheese that provides the most delightful contrast to the soft, rich interior. Every scoop offers a symphony of creamy, cheesy, and crispy, making it impossible to stop at just one serving. It’s hearty enough to be a main, yet versatile enough to complement any holiday spread or weeknight dinner. Prepare to fall in love with a classic that truly stands the test of time.
Nutritional Information
Per serving (approximate values):
- Calories: 450
- Protein: 20g
- Carbohydrates: 35g
- Fat: 25g
- Fiber: 2g
- Sodium: 650mg
Ingredients
- 1 pound elbow macaroni
- 1/2 cup (1 stick) unsalted butter, plus extra for greasing the dish
- 1/2 cup all-purpose flour
- 4 cups whole milk, warmed
- 1 teaspoon salt, plus more for pasta water
- 1/2 teaspoon black pepper
- 1/4 teaspoon ground mustard (optional, but highly recommended for depth)
- 1/8 teaspoon cayenne pepper (optional, for a subtle kick)
- 4 cups (about 16 ounces) shredded sharp cheddar cheese, divided
- 1 cup (about 4 ounces) shredded Gruyere or Monterey Jack cheese
- 1 1/2 cups panko breadcrumbs
- 2 tablespoons melted unsalted butter
- 2 tablespoons fresh parsley, chopped, for garnish (optional)
Instructions
- Preheat your oven to 375°F (190°C). Lightly grease a 9×13-inch baking dish with butter.
- Cook the macaroni according to package directions in generously salted water until al dente. It’s crucial not to overcook it, as it will continue to cook in the oven. Drain well and set aside.
- While the pasta cooks, prepare the cheese sauce. In a large, heavy-bottomed saucepan or Dutch oven, melt 1/2 cup of butter over medium heat.
- Once the butter is melted and bubbling, whisk in the flour. Cook, stirring constantly, for 1-2 minutes to create a roux. It should be a pale golden color and smell slightly nutty. Do not let it brown too much.
- Gradually whisk in the warmed milk, a little at a time, ensuring each addition is fully incorporated before adding more. Continue whisking until the sauce is smooth and thickened, about 5-7 minutes. Bring it to a gentle simmer, stirring constantly, then reduce the heat to low.
- Stir in the salt, black pepper, ground mustard (if using), and cayenne pepper (if using).
- Remove the saucepan from the heat. Add 3 cups of the shredded sharp cheddar cheese and all of the Gruyere or Monterey Jack cheese to the sauce. Stir continuously until the cheeses are completely melted and the sauce is smooth and creamy. Taste and adjust seasonings if necessary.
- Add the cooked and drained macaroni to the cheese sauce. Stir gently until the macaroni is evenly coated.
- Pour the macaroni and cheese mixture into the prepared baking dish, spreading it evenly.
- In a small bowl, combine the panko breadcrumbs with the 2 tablespoons of melted butter. Stir until the breadcrumbs are evenly coated.
- Sprinkle the remaining 1 cup of shredded sharp cheddar cheese over the macaroni and cheese. Then, evenly scatter the buttered panko breadcrumbs over the cheese layer.
- Bake for 25-30 minutes, or until the casserole is bubbly around the edges and the topping is golden brown and crispy.
- Remove from the oven and let it rest for 5-10 minutes before serving. This allows the sauce to set slightly, making it easier to serve.
- Garnish with fresh chopped parsley, if desired, and serve warm.
Cooking Tips and Variations
To truly master this classic, there are a few insider tips that can elevate your casserole from good to unforgettable. First, for the cheese sauce, always use freshly shredded cheese. Pre-shredded cheeses often contain anti-caking agents that can make your sauce gritty or prevent it from melting smoothly. A blend of cheeses is key for complexity: sharp cheddar provides that classic tang, while Gruyere or Monterey Jack adds a lovely creaminess and nutty undertone. When making your roux, cook it just long enough to remove the raw flour taste, but don’t let it get too dark, as this can affect the color and flavor of your sauce. Gradually adding warmed milk to the roux helps prevent lumps and ensures a silky-smooth sauce. Keep the heat low once the cheese is added to avoid it seizing or becoming oily.
For that irresistible crispy topping, don’t skimp on the butter for the breadcrumbs. Tossing panko with melted butter before sprinkling ensures a consistently golden and crunchy crust. If you’re looking for an extra-crispy finish, you can pop the casserole under the broiler for a minute or two at the very end, but watch it carefully as it can burn quickly. Cooking the macaroni slightly al dente is crucial because it will continue to absorb moisture and cook in the oven, preventing a mushy texture. A good rule of thumb is to shave a minute or two off the package cooking time.
This recipe is also incredibly versatile and open to delicious variations. For a different flavor profile, experiment with other cheeses like smoked gouda, fontina, or even a touch of Parmesan. To add more substance, consider stirring in cooked, crumbled bacon or ham, roasted chicken, or even sautéed mushrooms. For a vegetarian twist, roasted vegetables like broccoli florets, caramelized onions, or even a purée of butternut squash can be folded into the sauce. A pinch of nutmeg in the cheese sauce can add an extra layer of warmth and complexity. If you prefer a spicier kick, increase the cayenne pepper or add a dash of hot sauce to the sauce. For a different topping texture, crushed butter crackers, cornflakes, or even crushed potato chips can be used in place of panko breadcrumbs. Don’t be afraid to make this recipe your own; that’s how new family traditions are born!
Storage and Reheating
This casserole is a fantastic make-ahead dish, which is perfect for busy holiday preparations. You can assemble the entire casserole, including the topping, up to 24 hours in advance. Cover it tightly with plastic wrap and refrigerate. When ready to bake, remove it from the refrigerator about 30 minutes before baking to allow it to come closer to room temperature. You may need to add an extra 10-15 minutes to the baking time if it’s going into the oven cold. Always ensure it’s bubbly and heated through before serving.
To store leftovers, allow the casserole to cool completely before transferring it to an airtight container. It will keep well in the refrigerator for up to 3-4 days. For longer storage, you can freeze individual portions or the entire casserole. Wrap it tightly in plastic wrap and then aluminum foil to prevent freezer burn. It can be frozen for up to 2-3 months. Thaw frozen casserole in the refrigerator overnight before reheating.
Reheating is best done in the oven to preserve the texture. For refrigerated leftovers, cover the dish with foil and bake at 325°F (160°C) for 20-30 minutes, or until heated through. If the casserole seems a little dry, you can add a splash of milk or cream before reheating. For a crispy topping refresh, remove the foil for the last 5-10 minutes of reheating. You can also reheat individual portions in the microwave, but be aware that the topping may lose some of its crispness. Use a medium power setting and stir occasionally until thoroughly heated.
Frequently Asked Questions
Can I use different types of pasta?
Absolutely! While elbow macaroni is classic, you can certainly use other small pasta shapes like cavatappi, shells, rotini, or even penne. Just ensure they are cooked al dente before mixing with the sauce to prevent them from becoming mushy during baking.
My cheese sauce turned out lumpy. What did I do wrong?
Lumpy cheese sauce usually happens for a couple of reasons. Either the milk was added too quickly to the roux, not allowing it to fully incorporate, or the sauce was heated too high after adding the cheese, causing the proteins to seize. To fix a lumpy sauce, you can try whisking vigorously over low heat, or for a smoother result, pass it through a fine-mesh sieve before adding the macaroni.
Can I make this dairy-free or gluten-free?
Making this recipe dairy-free would require significant substitutions, as dairy is central to its flavor and texture. You would need to use plant-based milk, dairy-free butter, and dairy-free cheese alternatives, which may alter the taste and consistency significantly. For a gluten-free version, use gluten-free elbow macaroni and ensure your flour for the roux is a gluten-free all-purpose blend. The panko breadcrumbs would also need to be a gluten-free variety.
How can I prevent the topping from getting soggy?
To keep the topping crispy, ensure you toss the breadcrumbs thoroughly with melted butter before sprinkling them over the casserole. Also, don’t cover the casserole too tightly while baking, especially towards the end, as steam can accumulate and make the topping soft. If you’re assembling ahead of time, add the topping just before baking to maintain maximum crispness. A quick broil at the end can also revive any lost crispness.