
Follow Me On Social Media!
A 100 YearOld Pie Crust Recipe That Still Shines

Introduction
In the bustling world of modern cuisine, where trends come and go with the seasons, there’s something profoundly comforting and utterly timeless about a classic recipe. Especially when that recipe has stood the test of time, proving its worth over a century of happy diners. Today, we’re unearthing a true culinary gem: a 100-year-old pie crust recipe that, even after all this time, still shines as brightly as ever. This isn’t just any old crust; it’s a testament to the enduring power of simple, quality ingredients and time-honored techniques, delivering a flakiness and flavor that modern recipes often struggle to replicate.
What makes a pie truly exceptional? While the filling often gets all the glory, any seasoned baker will tell you that the foundation of a magnificent pie lies in its crust. A good crust provides the perfect counterpoint to a sweet or savory filling, offering a delicate crispness that melts in your mouth and a rich, buttery (or lard-infused) flavor that elevates every bite. This particular recipe, passed down through generations, embodies all these qualities and more. It’s forgiving enough for beginners to master, yet yields results that will impress even the most discerning pie connoisseurs. Prepare to discover the secret to a consistently perfect pie, every single time.
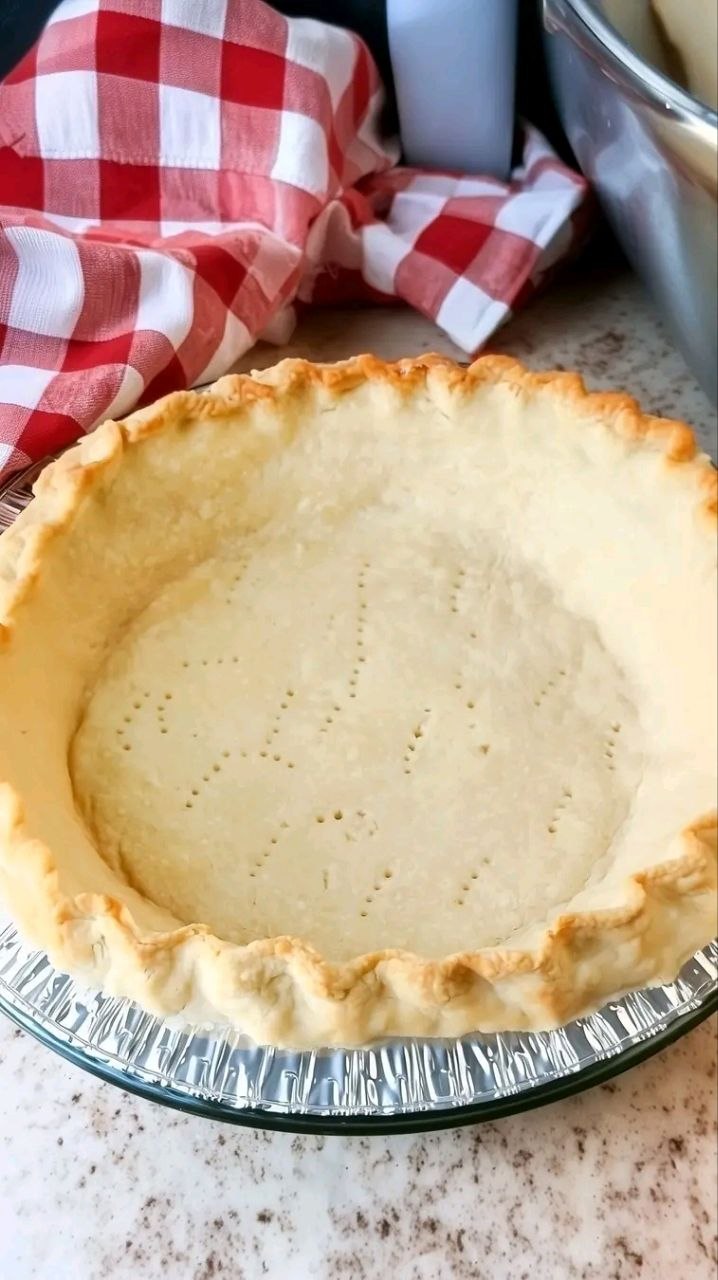
This isn’t just about making a pie crust; it’s about connecting with a culinary heritage. Imagine the countless pies this very recipe has cradled—holiday feasts, comforting weeknight desserts, celebrations big and small. Its enduring popularity stems from its reliability and its unmatched ability to produce a tender, flaky, and golden-brown crust. We’ll walk you through each step, from selecting the right ingredients to the crucial blind-baking process, ensuring your pie crust comes out looking and tasting like it’s been perfected over a hundred years – because it has!
Nutritional Information
Per serving (approximate values, based on a 9-inch single crust divided into 8 servings, using butter):
- Calories: 250-300 kcal
- Protein: 3-4g
- Carbohydrates: 25-30g
- Fat: 15-20g
- Fiber: 1-2g
- Sodium: 150-200mg
Ingredients
- 1 ¼ cups (150g) All-Purpose Flour, plus more for dusting
- ½ teaspoon Salt
- ½ cup (113g) Unsalted Butter, very cold and cut into ½-inch cubes (or use a combination of butter and shortening/lard for extra flakiness)
- ¼ cup (60ml) Ice Water, plus 1-2 tablespoons more if needed
Instructions
- Prepare Your Workspace and Ingredients: Clear a clean, cool surface for rolling. Ensure your butter is exceedingly cold; you can even pop it in the freezer for 10-15 minutes before starting. Measure out your ice water; having a few ice cubes in the water is ideal, but don’t add the ice cubes to the dough itself.
- Combine Dry Ingredients: In a large mixing bowl, whisk together the all-purpose flour and salt until well combined. This ensures even distribution of the salt throughout the crust.
- Cut in the Cold Fat: Add the cold, cubed butter to the flour mixture. Using a pastry blender, two knives, or your fingertips, cut the butter into the flour until the mixture resembles coarse crumbs with some pea-sized pieces of butter remaining. This step is crucial for flakiness; resist the urge to overmix and fully incorporate the butter. If using a food processor, pulse in 1-second intervals until you reach the desired consistency, being careful not to overprocess.
- Add Ice Water Gradually: Drizzle ¼ cup of ice water over the flour and butter mixture. Using a fork or your hands, gently mix until the dough just begins to come together. If the dough is too dry and crumbly, add the remaining 1-2 tablespoons of ice water, one teaspoon at a time, mixing gently after each addition, until the dough forms a shaggy ball. The key is to add just enough water for the dough to hold together without being sticky.
- Form and Chill the Dough: Turn the dough out onto a lightly floured surface. Gently gather it into a flat disc. Avoid kneading, as this develops gluten and will make your crust tough. Wrap the disc tightly in plastic wrap and refrigerate for at least 30 minutes, or preferably for 1-2 hours. Chilling allows the gluten to relax, makes the dough easier to roll, and solidifies the fat, which contributes to flakiness.
- Roll Out the Dough: Remove the dough from the refrigerator and let it sit at room temperature for about 5-10 minutes to soften slightly, but still remain cold. Lightly flour your work surface and your rolling pin. Roll the dough from the center outwards, rotating it frequently and dusting with a little more flour if needed, to prevent sticking. Aim for a circle about 12-13 inches in diameter and about 1/8 inch thick. If the dough starts to crack, mend it by pressing the edges together.
- Transfer to Pie Plate: Carefully transfer the rolled-out dough to a 9-inch pie plate. The easiest way is to gently roll the dough around your rolling pin and then unroll it over the pie plate. Alternatively, fold the dough into quarters, place it in the pie plate, and unfold. Gently press the dough into the bottom and sides of the plate, making sure there are no air bubbles underneath.
- Trim and Crimp the Edges: Trim the excess dough, leaving about a ½-inch overhang around the edge of the pie plate. Fold the overhang under itself, creating a thicker edge. Crimp the edges decoratively using your fingers or a fork. For a classic crimp, press your thumb on the inside of the rim and use the index finger and thumb of your other hand to pinch the dough around it.
- Dock the Crust: Using a fork, prick the bottom and sides of the pie crust all over. This “docking” prevents the crust from puffing up excessively during blind baking.
- Chill Again (Optional but Recommended): For best results and to prevent shrinking, chill the pie crust in the freezer for 15-20 minutes, or in the refrigerator for 30 minutes, before blind baking.
- Blind Bake the Crust: Preheat your oven to 400°F (200°C). Line the chilled pie crust with parchment paper or aluminum foil, making sure it covers the edges to prevent burning. Fill the liner with pie weights, dried beans, or rice, distributing them evenly up the sides.
- First Bake: Bake for 15-20 minutes, or until the edges are just starting to turn golden.
- Second Bake (Remove Weights): Carefully remove the pie weights and parchment/foil. Return the pie crust to the oven and bake for another 10-15 minutes, or until the bottom is dry and lightly golden brown. If the edges are browning too quickly, you can cover them loosely with aluminum foil.
- Cool: Let the blind-baked pie crust cool completely on a wire rack before filling.
Cooking Tips and Variations
Keep Everything Cold: This is the golden rule of pie crusts! Cold fat creates steam pockets during baking, which results in those coveted flaky layers. If your kitchen is warm, chill your flour, bowl, and even your rolling pin. Work quickly to keep the butter from melting.
Don’t Overwork the Dough: Overmixing develops gluten, leading to a tough, chewy crust instead of a tender, flaky one. Mix just until the dough comes together. Visible pieces of butter are a good sign!
Use Ice Water: The colder the water, the better. It helps keep the butter solid and prevents the dough from becoming sticky. Add it gradually; you might not need all of it, or you might need a tiny bit more, depending on the humidity and your flour.
Rest the Dough: Chilling the dough is non-negotiable. It allows the gluten to relax, making the dough easier to roll without shrinking, and it firms up the butter, which enhances flakiness.
Prevent Shrinking: To combat shrinkage during baking, ensure your dough is well-chilled before it goes into the oven. Also, make sure not to stretch the dough when fitting it into the pie plate; gently press it in. Blind baking with pie weights also helps.
Flour Your Surface Lightly: Too much flour will make your dough dry and tough, but too little will cause it to stick. Find a happy medium and dust as needed.
For a Golden Finish: If you want a richer golden color, you can brush the crust with an egg wash (1 egg yolk mixed with 1 tablespoon of water or milk) before blind baking, especially during the second bake after removing the weights.
Variations:
- All-Shortening or Lard Crust: For an incredibly tender and flaky crust, substitute all or half of the butter with vegetable shortening or lard. Lard, in particular, was very common in old recipes and yields a superior texture.
- Sweet Crust: Add 1-2 tablespoons of granulated sugar to the dry ingredients for a crust intended for sweet fillings.
- Savory Crust: Incorporate 1 teaspoon of dried herbs (like thyme or rosemary) or a pinch of garlic powder into the dry ingredients for quiches or savory pies.
- Whole Wheat: For a nuttier flavor and added fiber, substitute up to ¼ cup of the all-purpose flour with whole wheat flour.
Storage and Reheating
Unbaked Pie Dough:
- Refrigeration: Unbaked pie dough can be wrapped tightly in plastic wrap and stored in the refrigerator for up to 3 days.
- Freezing: For longer storage, wrap the disc of dough tightly in plastic wrap, then again in aluminum foil, and freeze for up to 3 months. Thaw overnight in the refrigerator before rolling out.
Blind-Baked Pie Crust:
- Room Temperature: A blind-baked pie crust can be left uncovered on the counter for a few hours if you plan to fill it the same day.
- Refrigeration: For longer storage, cool the crust completely, then cover loosely with plastic wrap or aluminum foil and refrigerate for up to 2 days.
- Freezing: Once completely cooled, wrap the blind-baked crust tightly in plastic wrap and then in aluminum foil. Freeze for up to 1 month. To use, unwrap and bake directly from frozen at 350°F (175°C) for 5-10 minutes to crisp it up before filling, or thaw at room temperature.
Baked Pie (with filling):
- Refrigeration: Most pies (especially those with custard, fruit, or cream fillings) should be covered loosely with plastic wrap or aluminum foil and stored in the refrigerator for 2-4 days, depending on the filling.
- Freezing: Many fruit pies freeze well. Once completely cooled, wrap the entire pie or individual slices tightly in plastic wrap and then in foil. Freeze for up to 2-3 months.
Reheating Baked Pie (with filling):
- From Refrigerated: For most fruit pies, reheat in a preheated oven at 350°F (175°C) for 15-20 minutes, or until warmed through. Custard or cream pies are usually served chilled.
- From Frozen: For frozen fruit pies, unwrap and bake from frozen in a preheated oven at 375°F (190°C) for about 45-60 minutes, or until the filling is bubbly and the crust is golden. Loosely tent with foil if the crust starts to brown too quickly.
Frequently Asked Questions
Why is keeping ingredients cold so important for pie crust?
Keeping the butter or other fat very cold is crucial because it prevents the fat from fully incorporating into the flour. Instead, the fat remains in small, distinct pieces. During baking, these cold fat pieces melt and release steam, which creates tiny air pockets, resulting in a wonderfully flaky and tender crust. If the fat melts and mixes too much with the flour before baking, you’ll end up with a tougher, more cookie-like crust rather than a flaky one.
My pie crust always shrinks in the oven. How can I prevent this?
Shrinking is a common issue, but it’s preventable! The main culprits are usually overworking the dough, not chilling it enough, or stretching it too much when placing it in the pie plate. To prevent shrinking, ensure you don’t overmix the dough (which develops gluten and makes it elastic). Always chill the dough for at least 30 minutes (or longer) before rolling and again after placing it in the pie plate. When fitting the dough into the plate, gently press it in rather than stretching it. Using pie weights during blind baking also helps hold the crust’s shape.
Can I make this pie crust ahead of time?
Absolutely! This recipe is excellent for making ahead. You can prepare the dough disc, wrap it tightly, and store it in the refrigerator for up to 3 days. Alternatively, you can freeze the dough for up to 3 months. Just be sure to thaw it overnight in the refrigerator before you plan to roll it out. You can also blind bake the crust a day or two in advance, cool it completely, and store it covered in the refrigerator until you’re ready to fill and bake your pie.
What is the difference between butter, shortening, and lard in a pie crust?
Each fat brings unique qualities to a pie crust. Butter provides a rich, unbeatable flavor and a beautiful golden-brown color, but it has a lower melting point, which can make it slightly harder to work with for extreme flakiness. Shortening (like Crisco) is 100% fat and has a higher melting point, leading to incredibly tender and flaky crusts with less flavor than butter. Lard, an animal fat, was traditionally used in many old recipes. It also has a high melting point and creates the most tender, super flaky crusts, often with a delicate, savory flavor. Many bakers prefer a combination of butter and shortening/lard to get the best of both worlds: great flavor and superior flakiness.



