Follow Me On Social Media!
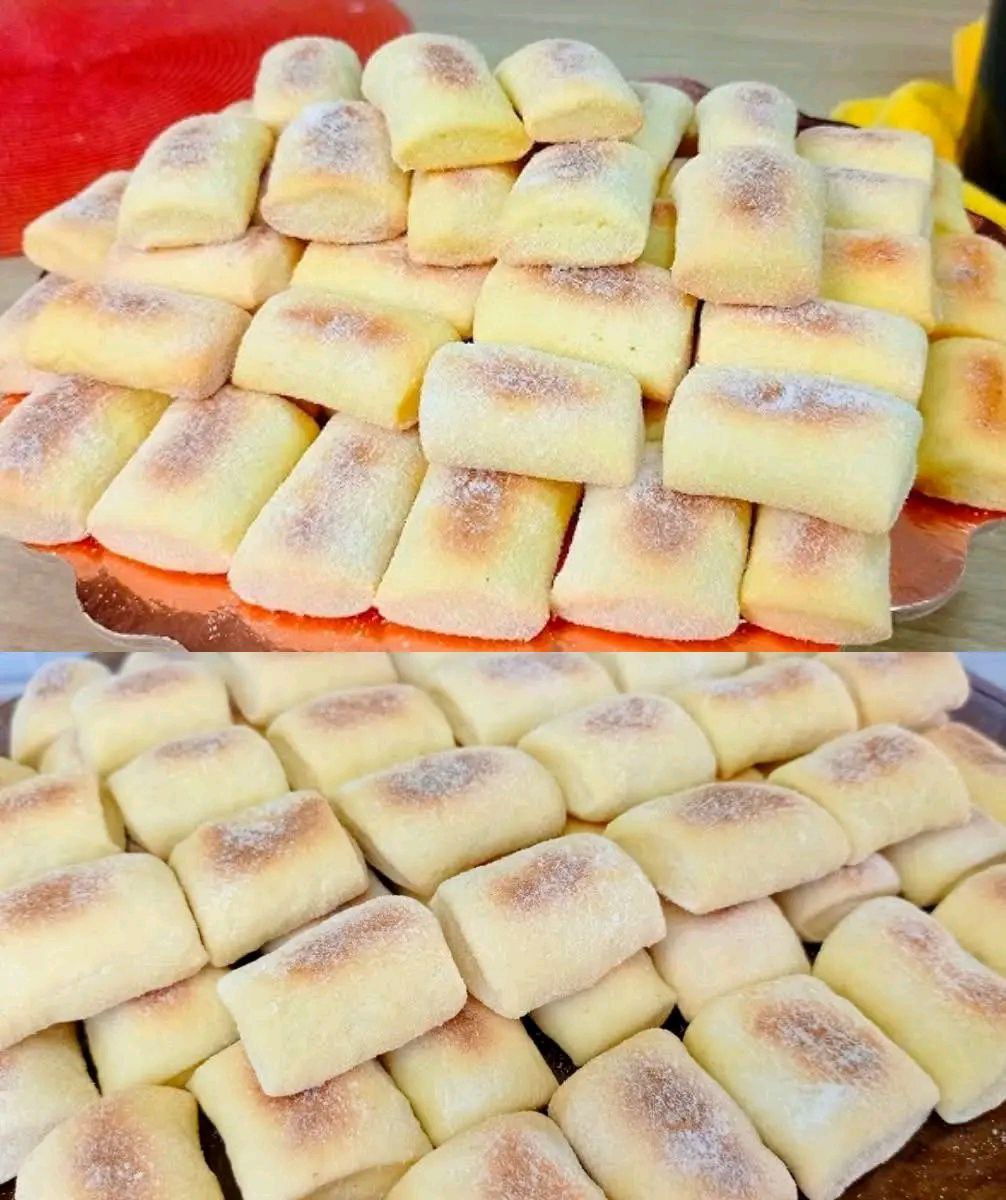
Cream sticks that melt in your mouth

Introduction
Prepare your taste buds for an experience that truly lives up to its name: Cream Sticks That Melt in Your Mouth. These delightful confections are more than just a sweet treat; they’re a little bite of pure comfort, promising a tender, buttery texture that dissolves on your tongue, leaving behind a whisper of sweetness. Imagine a soft, pillowy pastry, kissed with a light golden hue, and generously dusted with a fine layer of powdered sugar – that’s the magic we’re about to create. They’re an irresistible indulgence, perfect for elevating any coffee break, delighting guests, or simply treating yourself to a moment of blissful sweetness.
What exactly are these enchanting “Cream Sticks”? Think of them as a sophisticated cousin to shortbread, but with an even more delicate crumb and an ethereal lightness that truly sets them apart. Unlike many baked goods that require a chewy bite, these sticks are designed to surrender instantly, a testament to their rich, cream-infused dough. Their elegant, uniform shape makes them visually appealing, while their simple, honest flavor profile ensures they’re a crowd-pleaser for all ages. You’ll find yourself reaching for just one more, then another, as their subtle sweetness and unparalleled texture beckon.
You’ll absolutely adore making these cream sticks for a multitude of reasons. Firstly, the recipe is surprisingly straightforward, relying on common pantry staples and simple techniques, making it accessible even for novice bakers. They’re incredibly versatile, ideal for a cozy evening snack, a charming addition to a dessert platter, or the perfect accompaniment to your morning tea or afternoon coffee. The joy of pulling a tray of these golden-edged beauties from the oven, filling your kitchen with their sweet aroma, is unmatched. They embody homemade goodness at its finest, proving that the most exquisite treats often come from the simplest ingredients and a little love.
Nutritional Information
Per serving (approximate values):
- Calories: 180
- Protein: 2g
- Carbohydrates: 25g
- Fat: 9g
- Fiber: 0.5g
- Sodium: 80mg
Ingredients
- 1 cup (2 sticks) unsalted butter, softened
- 1/2 cup granulated sugar, plus more for dusting
- 1/4 cup heavy cream
- 1 teaspoon vanilla extract
- 2 cups all-purpose flour
- 1/2 teaspoon baking powder
- 1/4 teaspoon salt
- 1/2 cup powdered sugar, for dusting (optional, for a finer finish)
Instructions
- In a large mixing bowl, using an electric mixer, cream together the softened unsalted butter and 1/2 cup granulated sugar until light and fluffy, about 2-3 minutes. Scrape down the sides of the bowl as needed to ensure everything is well combined.
- Beat in the heavy cream and vanilla extract until fully incorporated. The mixture may look slightly curdled at this stage, but don’t worry, it will smooth out once the dry ingredients are added.
- In a separate medium bowl, whisk together the all-purpose flour, baking powder, and salt. This ensures that the leavening agent and salt are evenly distributed throughout the dough.
- Gradually add the dry ingredients to the wet ingredients, mixing on low speed until just combined. Be careful not to overmix, as this can develop the gluten in the flour and result in tough cream sticks. The dough should be soft and pliable but not overly sticky.
- Divide the dough in half. On a lightly floured surface, roll out one half of the dough to about 1/4-inch thickness. You can use a ruler to ensure even thickness, which helps with uniform baking.
- Using a sharp knife or a pastry wheel, cut the dough into strips approximately 1/2-inch wide and 2-3 inches long. The exact length can be adjusted to your preference, but consistency will help them bake evenly.
- Carefully transfer the cut cream sticks to a baking sheet lined with parchment paper, leaving about 1/2 inch of space between each stick. If the dough becomes too soft or sticky to handle, chill it in the refrigerator for 10-15 minutes before cutting.
- Preheat your oven to 350°F (175°C). While the oven preheats, repeat the rolling and cutting process with the second half of the dough.
- Bake for 12-15 minutes, or until the edges are lightly golden brown and the centers are set. The cream sticks should still look pale in the middle; overbaking will make them dry and compromise their “melt-in-your-mouth” quality.
- Remove the baking sheet from the oven and let the cream sticks cool on the sheet for 5 minutes. They will be quite delicate when warm.
- While still warm (but cool enough to handle), gently transfer the cream sticks to a wire rack. Place a sheet of parchment paper or a plate underneath the wire rack to catch any excess sugar.
- In a shallow dish, combine 1/2 cup of granulated sugar and 1/2 cup of powdered sugar (if using both). Alternatively, you can use just powdered sugar for a softer, more traditional finish.
- Roll each warm cream stick in the sugar mixture until thoroughly coated. The warmth of the sticks will help the sugar adhere beautifully, creating that signature sweet crust.
- Let the coated cream sticks cool completely on the wire rack before serving or storing. This allows the sugar coating to set and the texture to fully develop.
Cooking Tips and Variations
For the ultimate “melt-in-your-mouth” texture, ensure your butter is truly softened, but not melted. It should be pliable enough to press a finger into easily. Cold butter won’t cream properly, and melted butter will lead to a greasy dough. When mixing, avoid overworking the dough once the flour is added. Overmixing develops gluten, which can make the cream sticks tough instead of tender. Mix until just combined, and no more. The pale yellow, almost unbaked look in the center is key; resist the urge to bake them until deeply golden. This ensures they remain incredibly soft and delicate. For the best sugar coating, make sure to roll the cream sticks while they are still warm. The residual heat helps the sugar stick and slightly melt, forming a delicious, almost glazed outer layer. If they cool too much, the sugar won’t adhere as effectively. For a truly professional finish, use a fine mesh sieve to dust the powdered sugar over the cooled cream sticks, ensuring an even and elegant coating.
To infuse a bright, zesty flavor, add 1 teaspoon of fresh lemon zest or orange zest to the butter and sugar mixture. This provides a lovely counterpoint to the sweetness. For a warm, aromatic twist, incorporate 1/4 teaspoon of ground cardamom or a pinch of nutmeg along with the dry ingredients. These spices pair wonderfully with the buttery flavor. You can also experiment with different extracts; try almond extract instead of vanilla for a distinct nutty flavor, or a touch of rum extract for a sophisticated note. For a chocolate lover’s dream, dip one end of the cooled cream sticks into melted dark chocolate, then sprinkle with a few sea salt flakes before the chocolate sets. This creates a delightful contrast of sweet, salty, and rich flavors. Another fun variation is to add 1/4 cup of very finely chopped toasted nuts, like pecans or walnuts, to the dough for an added crunch and depth of flavor. Remember, quality ingredients make a difference; using good quality butter and real vanilla extract will elevate the taste of these simple delights.
Storage and Reheating
To keep your cream sticks fresh and maintain their delicate texture, store them in an airtight container at room temperature. They will stay wonderfully fresh for up to 5-7 days. If you live in a particularly humid environment, you might notice the sugar coating absorbing some moisture over time, but the flavor will remain excellent. For longer storage, you can freeze baked and cooled cream sticks in a freezer-safe airtight container or bag for up to 2-3 months. To prevent them from sticking together, you can place a piece of parchment paper between layers.
Reheating these cream sticks is generally not necessary, as they are delicious at room temperature. However, if you prefer a slightly warm treat, you can gently warm them in a preheated oven at 250°F (120°C) for about 5-7 minutes. Be careful not to overheat, as this can dry them out. Alternatively, a quick 10-15 second burst in the microwave can warm them, but watch closely to avoid making them tough. If reheating from frozen, allow them to thaw at room temperature for an hour or two before serving, or warm them as described above.
Frequently Asked Questions
What makes these cream sticks “melt in your mouth”?
The “melt-in-your-mouth” quality comes from a combination of factors: a high ratio of butter and cream to flour, which creates a rich, tender crumb; careful mixing to avoid overdeveloping gluten; and precise baking that ensures they are cooked through but not overbaked, preserving their delicate structure. The sugar coating also contributes to this sensation as it dissolves quickly on the tongue.
Can I make the dough ahead of time?
Yes, you can absolutely prepare the dough in advance. Once the dough is mixed, wrap it tightly in plastic wrap and refrigerate for up to 2-3 days. When you’re ready to bake, let the dough sit at room temperature for about 15-20 minutes to soften slightly before rolling and cutting. This makes it easier to work with and prevents cracking.
Why are my cream sticks turning out tough or crumbly?
If your cream sticks are tough, it’s likely due to overmixing the dough once the flour was added, which develops too much gluten. To avoid this, mix only until the flour streaks disappear. If they are excessively crumbly, it might be that your butter was too soft (or even melted), or there wasn’t enough liquid (cream) in the dough. Ensure ingredients are at the correct temperature and measurements are accurate.
Can I use a different type of sugar for the coating?
While granulated sugar provides a subtle crunch and powdered sugar offers a softer, more traditional finish, you can experiment. A mix of both is often ideal. You could also try cinnamon sugar for a spiced version, or even a very fine sanding sugar for an extra sparkle and slight textural difference. Just ensure the coating is applied generously while the sticks are still warm for best adhesion.