
Follow Me On Social Media!
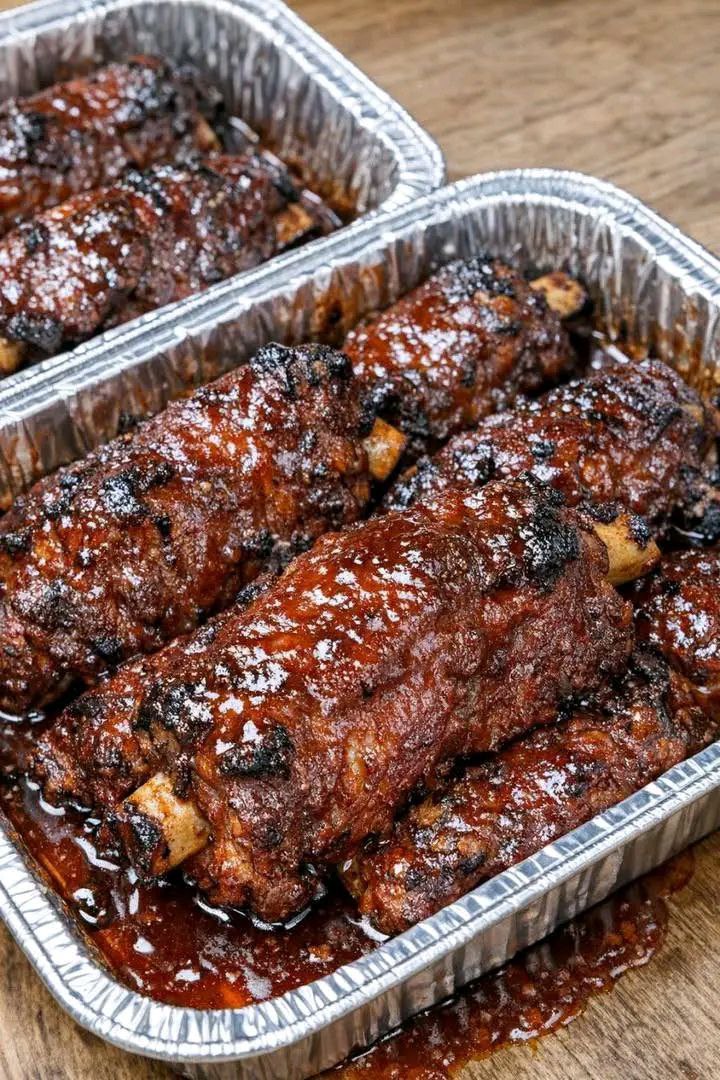
My brother begs me to make these every weekend because they are so tender and take 3 ingredients

Introduction
There are some recipes so good, so effortlessly delicious, that they become legendary in your household. For me, and especially for my brother, these 3-ingredient tender ribs are exactly that. Every single weekend, without fail, I get a text, a call, or a hopeful glance from him, asking if “those ribs” are on the menu. And honestly, who can blame him? Imagine ribs so incredibly tender they practically melt off the bone, coated in a sticky, savory-sweet glaze that hits all the right notes. Now imagine achieving that level of culinary magic with just three simple ingredients and minimal fuss. That’s the promise of this recipe, and it delivers every single time.
This isn’t just a recipe; it’s a secret weapon for busy weeknights, effortless entertaining, or simply satisfying that primal craving for perfectly cooked barbecue. The beauty lies in its deceptive simplicity. You don’t need a smoker, a complex rub, or hours of advanced prep. What you do need are three powerhouse ingredients that, when combined and cooked with a little patience, transform into ribs that taste like they came straight from a championship pitmaster. Get ready to impress your family and friends (and maybe get a few weekend requests yourself) with this unbelievably easy and utterly delicious dish.
The secret to their fall-off-the-bone tenderness and rich flavor lies not just in the ingredients, but in a cooking method that allows them to slowly braise in their own juices and the luscious sauce. This gentle, prolonged heat breaks down the connective tissues in the pork, resulting in meat that is incredibly moist and succulent. The final touch of a slightly higher heat caramelizes the barbecue sauce into a glossy, irresistible glaze that perfectly complements the tender meat. Forget complicated steps and endless ingredient lists; these ribs prove that sometimes, less truly is more when it comes to creating truly memorable food.
Nutritional Information
Per serving (approximate values):
- Calories: 650
- Protein: 45g
- Carbohydrates: 35g
- Fat: 35g
- Fiber: 1g
- Sodium: 800mg
Ingredients
- 4 pounds pork baby back ribs or spareribs, membrane removed
- 1 (18-ounce) bottle of your favorite barbecue sauce (e.g., Sweet Baby Ray’s, KC Masterpiece)
- 1 cup apple cider vinegar
Instructions
- Preheat your oven to 275°F (135°C). Line a large baking sheet with aluminum foil for easier cleanup.
- Prepare the ribs: If you haven’t already, remove the thin membrane from the back of the ribs. To do this, slide a knife under the membrane at one end of the rack. Grab the membrane with a paper towel for a better grip and pull it off. This step is crucial for tender ribs. Cut the full racks into 2-3 bone sections for easier handling and serving, if desired.
- Pat the rib sections dry thoroughly with paper towels. This helps the sauce adhere better.
- In a large bowl or directly in your lined baking sheet, combine the barbecue sauce and the apple cider vinegar. Whisk them together until well blended. The apple cider vinegar is our secret third ingredient, adding crucial moisture, a touch of acidity to cut through the richness, and acting as a tenderizer.
- Add the rib sections to the sauce mixture, ensuring each piece is thoroughly coated. You can do this in batches if your bowl isn’t large enough.
- Arrange the sauced ribs in a single layer in the prepared baking sheet. If stacking, try to ensure each piece is still generously coated. You can also cover the ribs completely with foil to create a braising environment.
- Cover the baking sheet tightly with aluminum foil. This traps the steam and moisture, ensuring the ribs become incredibly tender.
- Bake for 2.5 to 3 hours, or until the ribs are very tender and the meat is beginning to pull away from the bone. The cooking time may vary slightly depending on the thickness of your ribs.
- After 2.5-3 hours, carefully remove the foil. Increase the oven temperature to 375°F (190°C).
- Bake uncovered for another 20-30 minutes, basting occasionally with the pan juices, until the sauce has thickened, caramelized, and become sticky. Keep a close eye on them to prevent burning. If you like a little char, you can briefly broil them for 2-3 minutes at the very end, watching constantly.
- Remove the ribs from the oven and let them rest for 5-10 minutes before serving. This allows the juices to redistribute, ensuring maximum tenderness and flavor.
- Serve hot and watch them disappear!
Cooking Tips and Variations
Achieving perfectly tender, flavorful ribs with just three ingredients is surprisingly simple, but a few tips can elevate your results even further. First and foremost, don’t skip removing the membrane from the back of the ribs. This thin, silverskin layer becomes tough and chewy when cooked, preventing the meat from becoming truly fall-off-the-bone tender. A paper towel provides an excellent grip to pull it off cleanly. For an extra layer of flavor and to help tenderize the meat even more, consider rubbing the ribs with a little bit of yellow mustard before adding the sauce. The mustard acts as a binder and adds a subtle tang that complements the barbecue sauce beautifully. While the recipe calls for apple cider vinegar, experimenting with other liquids can yield interesting results. Apple juice or even a can of cola (not diet) can be used in place of or in addition to the vinegar for a sweeter, more complex flavor profile and added tenderness.
When it comes to the barbecue sauce, don’t be afraid to choose a high-quality brand that you genuinely love, as it’s one of only two primary flavor components. Since there are so few ingredients, the quality of each one really shines through. If you prefer a spicier kick, opt for a hot barbecue sauce or add a pinch of cayenne pepper or a dash of hot sauce to your sauce mixture. For a smoky flavor without a smoker, a few drops of liquid smoke can be added to the sauce, but use sparingly as it’s very potent. If you have extra time and want to infuse even more flavor, you can marinate the ribs in the sauce and vinegar mixture in the refrigerator for a few hours or even overnight before baking. This allows the flavors to penetrate deeper into the meat. For a truly caramelized and slightly crispy exterior, finish the ribs under the broiler for a few minutes, or even better, transfer them to a hot grill for 5-10 minutes, flipping occasionally, after the initial slow bake. This adds a fantastic smoky char that mimics traditional BBQ.
The cooking vessel also plays a role. While a baking sheet covered tightly with foil works perfectly, using a Dutch oven or a large roasting pan with a lid can create an even more consistent braising environment, further ensuring tender results. If you’re short on oven space or prefer a set-it-and-forget-it method, these ribs can also be made in a slow cooker. Simply combine the ribs, barbecue sauce, and apple cider vinegar in a large slow cooker and cook on low for 6-8 hours or on high for 3-4 hours, until tender. For the caramelized glaze, you’ll still want to transfer them to the oven or broiler for a final 15-20 minutes after slow cooking. Finally, don’t rush the resting period. After pulling the ribs from the oven, allow them to rest for 5-10 minutes. This allows the meat fibers to relax and reabsorb the juices, resulting in a more succulent and flavorful rib. Cutting them immediately will cause the juices to run out, leading to drier meat. These small adjustments can make a big difference in achieving barbecue perfection with minimal effort.
Storage and Reheating
Storing and reheating these tender ribs is straightforward, making them an excellent candidate for meal prepping or enjoying delicious leftovers. To store, first allow the cooked ribs to cool completely to room temperature. This prevents condensation from forming inside the storage container, which can lead to sogginess. Once cooled, transfer the ribs and any remaining sauce from the pan into an airtight container. If you have multiple portions, it’s best to store them in layers, perhaps with a little extra sauce between layers to keep them moist. Properly stored in an airtight container in the refrigerator, these ribs will remain fresh and delicious for 3-4 days. For longer storage, you can freeze the ribs. Place them in a freezer-safe airtight container or heavy-duty freezer bags, ensuring as much air as possible is removed to prevent freezer burn. They can be frozen for up to 2-3 months. Thaw frozen ribs overnight in the refrigerator before reheating.
When it comes to reheating, you have a few excellent options to ensure they retain their tenderness and flavor. The oven method is often the best for preserving texture. Preheat your oven to 250-300°F (120-150°C). Place the ribs in an oven-safe dish, adding a tablespoon or two of water or extra barbecue sauce to the bottom of the dish to help create steam and prevent drying out. Cover the dish tightly with aluminum foil. Reheat for 20-30 minutes, or until the ribs are heated through. The low temperature and foil covering will gently warm them without drying them out. If you like a slightly crisper exterior, you can remove the foil for the last 5-10 minutes of reheating.
For a quicker reheating option, especially for individual portions, the microwave can be used, though it may slightly alter the texture. Place 1-2 rib sections on a microwave-safe plate, add a tiny splash of water or sauce, and cover loosely with a microwave-safe lid or damp paper towel. Heat on medium power for 1-2 minutes, checking and flipping halfway, until heated through. Be careful not to overcook, as this can make them tough. If you have a grill handy, reheating on a medium-low grill is also a fantastic option. Wrap the ribs loosely in foil and place them on the grill for 10-15 minutes, turning occasionally, until warmed through. Alternatively, for a slightly smoky flavor, you can place them directly on the grill grates over indirect heat for a few minutes per side until heated. No matter your chosen method, these ribs reheat beautifully, allowing you to enjoy their tender, saucy goodness long after the initial meal.
Frequently Asked Questions
Can I use other types of ribs for this recipe?
Yes, absolutely! While baby back ribs are popular for their lean meat and quick cooking time, spareribs or St. Louis-style ribs also work wonderfully. Spareribs are meatier and fattier, which can result in even more flavor and tenderness, though they may require an additional 30-60 minutes of cooking time in the oven due to their size and bone structure. Just ensure the membrane is removed from any type of rib you choose for the best texture.
What if my ribs aren’t getting tender enough?
If your ribs aren’t as tender as you’d like after the initial cooking time, it likely just needs more time. Tenderness in ribs comes from the slow breakdown of connective tissue, which requires sustained low heat. Ensure your oven temperature is accurate and that the ribs are covered tightly with foil. Continue baking them, checking every 30 minutes, until they reach your desired level of tenderness. The meat should be easily pierced with a fork and starting to pull away from the bone.
Can I prepare these ribs ahead of time for a party?
Yes, these ribs are an excellent make-ahead dish! You can cook them through the initial covered baking step (before the final caramelization). Let them cool completely, then refrigerate them in their pan with the sauce. On the day of your party, reheat them covered in a 275°F (135°C) oven until warmed through, then proceed with the uncovered baking at 375°F (190°C) to caramelize the sauce. This allows you to do most of the work in advance and simply finish them off before serving.
Why is apple cider vinegar the “secret” ingredient?
Apple cider vinegar plays a crucial role in two ways. Firstly, its acidity helps to break down the tough fibers in the meat, contributing significantly to the ribs’ tenderness. Secondly, it adds a bright, tangy counterpoint to the sweetness of the barbecue sauce, creating a more balanced and complex flavor profile that prevents the ribs from being overly sweet or cloying. It’s a simple addition that makes a huge difference!



