Follow Me On Social Media!
Apple Butter

Introduction
The crisp autumn air, the vibrant hues of changing leaves, and the comforting aroma of apples simmering on the stove – these are the sensations that perfectly encapsulate the magic of homemade apple butter. More than just a spread, apple butter is a warm embrace, a spoonful of nostalgia that transports you back to simpler times. While many of us have fond memories of enjoying this delightful fruit spread, perhaps on toast or with a dollop of cream, the idea of making it from scratch can seem daunting. But fear not! This guide will demystify the process, inviting you to create your own batches of this rich, deeply flavored preserve right in your kitchen.
So, what exactly is apple butter? Imagine applesauce, but taken to a whole new level of intensity and silkiness. Unlike its lighter cousin, apple butter is cooked down for a much longer period, allowing most of the water to evaporate, concentrating the apple flavor, and encouraging the natural sugars to caramelize. This slow reduction process is what gives apple butter its signature dark, rich brown color and its incredibly smooth, thick, and spreadable texture – hence the “butter” in its name, though it contains no dairy. It’s typically infused with a medley of warm autumn spices like cinnamon, cloves, nutmeg, and allspice, creating a symphony of flavors that is both comforting and exquisitely delicious.
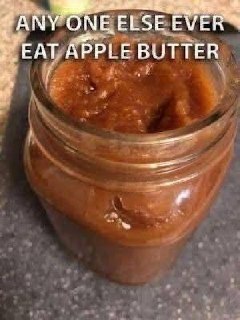
Why go to the effort of making it at home when you can buy it in a jar? The answer lies in the unparalleled freshness, the control you have over ingredients, and the sheer joy of the process. There’s an undeniable satisfaction in transforming a simple pile of apples into a luscious, amber-hued spread, filling your home with an aroma that is nothing short of intoxicating. Plus, making your own means you can adjust the sweetness and spice levels to your exact preference, avoiding any unwanted additives or excessive sugars found in many store-bought varieties. And to answer the age-old question, “Anyone else ever eat apple butter?” – yes, and after you make your own, you’ll wonder how you ever lived without it!
Nutritional Information
Per serving (approximate values, based on 2 tbsp serving):
- Calories: 75
- Protein: 0.5g
- Carbohydrates: 19g
- Fat: 0.2g
- Fiber: 2g
- Sodium: 5mg
Ingredients
- 8 pounds mixed apples (such as Fuji, Gala, Honeycrisp, Granny Smith), peeled, cored, and quartered
- 1 cup apple cider or apple juice
- 1 cup packed light brown sugar (or substitute with maple syrup for a refined sugar-free option)
- 1 teaspoon ground cinnamon
- ½ teaspoon ground cloves
- ½ teaspoon ground nutmeg
- ¼ teaspoon ground allspice
- ½ teaspoon vanilla extract (optional)
- 1 tablespoon lemon juice (optional, helps brighten flavor and prevent browning)
Instructions
- Prepare the Apples: Wash all apples thoroughly. Using a vegetable peeler, remove the skin from each apple. Then, core the apples and cut them into quarters or eighths, depending on their size. Don’t worry about perfect uniformity, as they will be cooked down and blended.
- Combine Ingredients in Slow Cooker: Place the prepared apple pieces into a large slow cooker. Pour in the apple cider (or juice), brown sugar, ground cinnamon, ground cloves, ground nutmeg, and ground allspice. Stir everything together until the apples are well coated with the spices and sugar.
- Slow Cook: Cover the slow cooker and cook on low for 8-10 hours, or on high for 4-5 hours. The apples should be incredibly soft and easily mashed with a spoon. You’ll notice the liquid has reduced and the apples have started to break down significantly.
- Blend for Smoothness: Once the apples are tender, unplug the slow cooker. Carefully use an immersion blender directly in the slow cooker to blend the mixture until it is completely smooth. If you don’t have an immersion blender, transfer the mixture in batches to a standard blender or food processor and blend until smooth. Be cautious when blending hot liquids; ensure the lid is properly vented if using a standard blender.
- Reduce to Apple Butter Consistency: Once blended, leave the lid off the slow cooker. Cook on high for another 1-2 hours, stirring occasionally (every 30-45 minutes), until the apple butter reaches your desired thickness. It should be very thick and spreadable, with a deep, rich brown color. A good test for readiness is to spoon a small amount onto a cold plate; if no liquid separates around the edges, it’s ready.
- Add Final Touches: Stir in the vanilla extract and lemon juice (if using) during the last 30 minutes of cooking. Taste the apple butter and adjust spices or sweetness as needed. If you prefer it sweeter, add a tablespoon or two more sugar or maple syrup. If you want more spice, add another pinch of cinnamon or cloves.
- Jar and Store: Carefully ladle the hot apple butter into clean, sterilized jars, leaving about ½ inch of headspace. Wipe the rims clean, apply lids, and screw on the bands until fingertip tight.
- For Refrigeration: Allow jars to cool completely on the counter before transferring to the refrigerator. It will keep for up to 3-4 weeks.
- For Canning (Long-Term Storage): If you plan to can the apple butter for shelf-stable storage, process the filled jars in a boiling water bath canner for 15 minutes (adjusting for altitude if necessary). Remove jars and let them cool undisturbed for 12-24 hours. Check seals before storing in a cool, dark place.
Cooking Tips and Variations
Achieving the perfect apple butter is a labor of love, and a few key tips can elevate your results. First and foremost, the choice of apples truly matters. While you can use a single variety, a blend of sweet and tart apples yields the most complex and balanced flavor profile. Consider using varieties like Fuji, Gala, and Honeycrisp for sweetness, and Granny Smith or Braeburn for a touch of tartness and structure. This combination ensures a rich, deep apple flavor that isn’t overly saccharine. Patience is another crucial ingredient; apple butter is a slow-cooked delight. Resist the urge to rush the process, especially during the reduction phase. The long, low heat allows the apples to break down thoroughly and the sugars to caramelize, developing that signature dark color and intense flavor. Regular stirring, particularly in the final stages of cooking, is vital to prevent scorching on the bottom of your pot or slow cooker, which can impart an unpleasant taste. If you’re using a stovetop method, this becomes even more critical.
For variations, consider experimenting with your spice blend. While the classic cinnamon, cloves, nutmeg, and allspice are timeless, a pinch of cardamom can add an exotic warmth, or a tiny amount of fresh ginger can provide a subtle, zesty kick. You can also play with the sweetener; while brown sugar lends a deep, molasses-like note, maple syrup offers a distinctively earthy sweetness, and honey can provide a floral undertone. For a truly decadent treat, a tablespoon of bourbon or dark rum added in the last hour of cooking can infuse your apple butter with a sophisticated depth of flavor. If you prefer a chunkier texture, you can blend only half of the mixture and stir it back in with the unblended portion. Finally, for an extra layer of complexity, roast your apples in the oven before adding them to the slow cooker. This step deepens their flavor and can reduce overall cooking time slightly.
Storage and Reheating
Proper storage is essential to enjoy your homemade apple butter for as long as possible. For short-term use, once cooled, transfer the apple butter to clean, airtight containers or jars. It will keep beautifully in the refrigerator for up to 3-4 weeks. The cold temperature will help maintain its freshness and prevent spoilage. Always ensure the lid is tightly sealed to avoid absorbing other odors from the fridge.
For long-term storage, canning is an excellent option that makes your apple butter shelf-stable for up to a year or even longer if properly processed. Follow the instructions for hot water bath canning carefully, ensuring jars are sterilized, filled correctly, and processed for the recommended time. After processing, check that all jars have sealed properly (the lid should be concave and not flex when pressed). Store sealed jars in a cool, dark place, away from direct sunlight or extreme temperature fluctuations. Alternatively, freezing is a fantastic no-fuss method for extended preservation. Simply spoon cooled apple butter into freezer-safe containers or heavy-duty freezer bags, leaving a little headspace for expansion. It can be frozen for up to 6 months. To use, thaw overnight in the refrigerator. Reheating apple butter isn’t typically necessary as it’s often enjoyed at room temperature or chilled. However, if you want to warm it up, a gentle reheat in a small saucepan over low heat, stirring occasionally, or a quick zap in the microwave will do the trick. Be careful not to overheat, as it can scorch easily.
Frequently Asked Questions
What kind of apples are best for apple butter?
A mix of sweet and tart apples generally yields the best results. Sweet apples like Fuji, Gala, Honeycrisp, and Golden Delicious contribute rich flavor and natural sweetness, while tart varieties like Granny Smith or Braeburn add a desirable tang and help balance the overall profile. Using a combination ensures a complex and well-rounded apple butter.
How is apple butter different from applesauce?
While both are made from cooked apples, apple butter is a much more concentrated and reduced version of applesauce. Applesauce is typically cooked for a shorter period, resulting in a lighter color and thinner consistency. Apple butter, on the other hand, is cooked down for a significantly longer time until most of the water evaporates, leading to a much thicker, darker, and more intensely flavored spread with a smooth, almost jam-like texture due to caramelization.
Can I make apple butter without peeling the apples?
You can make apple butter without peeling the apples, especially if you plan to use a food mill or fine-mesh sieve to remove the skins after cooking. However, for the smoothest possible texture when using an immersion or standard blender, peeling the apples is highly recommended. Leaving the skins on can result in a slightly grittier texture, even after blending.
How can I tell if my apple butter is thick enough?
There are a few ways to test for desired thickness. One common method is the “cold plate test”: spoon a small amount of hot apple butter onto a chilled plate. Let it sit for a minute, then draw your finger through it. If your finger leaves a clean path and no liquid seeps back into the space, your apple butter is ready. Another indicator is if it holds its shape on a spoon and doesn’t run off easily. It should be thick, glossy, and spreadable.