Follow Me On Social Media!
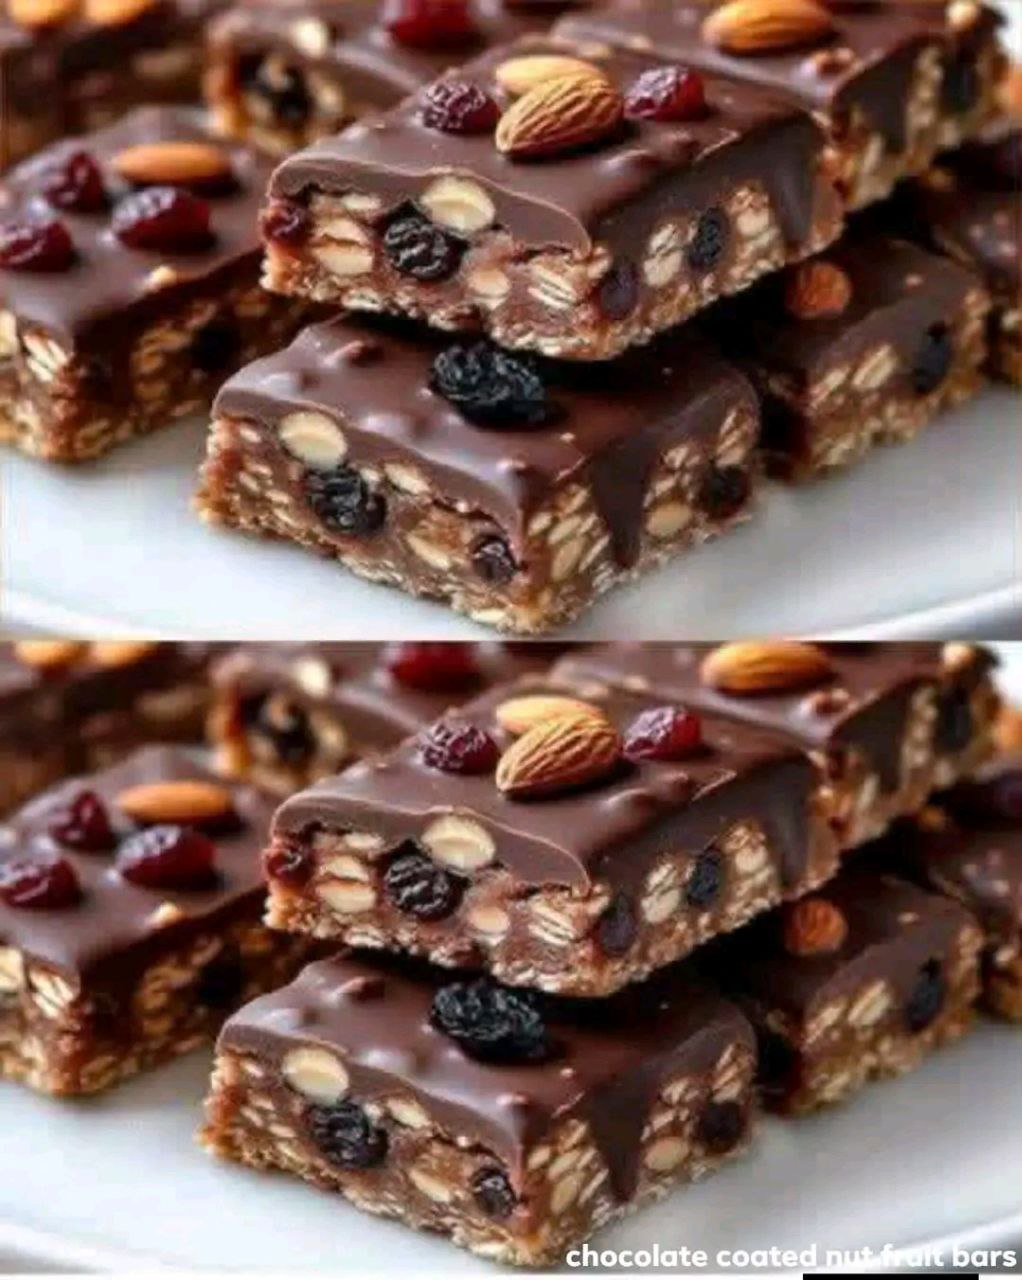
Chocolate Nut and Fruit Bars

Chocolate Nut and Fruit Bars
Imagine a perfect bite: chewy, rich, and bursting with delightful textures and flavors. That’s exactly what you get with these incredible Chocolate Nut and Fruit Bars! These aren’t just any snack bars; they’re a symphony of wholesome oats, crunchy nuts, sweet dried fruits, and luscious chocolate, all coming together in an easy-to-make, utterly satisfying treat. Whether you need a quick energy boost, a delightful dessert, or a portable snack for your adventures, these bars hit all the right notes.
What makes these bars truly special is their irresistible combination of chewiness from the fruit and oats, the satisfying crunch of nuts, and the decadent sweetness of a chocolate coating. They’re a fantastic way to incorporate healthy fats, fiber, and natural sugars into your diet, all while feeling like you’re indulging in something truly luxurious. Forget store-bought versions filled with artificial ingredients; our homemade Chocolate Nut and Fruit Bars are fresh, customizable, and packed with goodness.
The beauty of this recipe lies in its simplicity and versatility. You can whip up a batch in no time, and the no-bake nature means no oven fuss! They’re perfect for meal prepping, gifting, or simply having on hand for those moments when a chocolate craving strikes. Get ready to discover your new favorite snack that’s as delicious as it is nutritious.
Nutritional Information
Per serving (approximate values, based on 16 bars):
- Calories: 285 kcal
- Protein: 6g
- Carbohydrates: 35g
- Fat: 15g
- Fiber: 4g
- Sodium: 25mg
Ingredients
- 1 ½ cups rolled oats (gluten-free if preferred)
- ¾ cup mixed nuts (such as almonds, walnuts, pecans), roughly chopped
- ½ cup dried cranberries
- ½ cup golden raisins (or other dried fruit like chopped apricots, dates)
- ½ cup unsweetened shredded coconut (optional)
- ¼ cup chia seeds or flax seeds (optional, for extra nutrition)
- ½ cup creamy nut butter (peanut butter, almond butter, or cashew butter)
- ⅓ cup honey or maple syrup
- 2 tablespoons coconut oil, melted
- 1 teaspoon vanilla extract
- ½ teaspoon ground cinnamon (optional)
- ½ teaspoon salt
- 8 ounces dark chocolate (60-75% cocoa), chopped
- 1 tablespoon coconut oil (for melting chocolate)
- Flaky sea salt (for sprinkling, optional)
Instructions
- Line an 8×8 inch baking pan with parchment paper, leaving an overhang on the sides to easily lift the bars out later.
- In a large mixing bowl, combine the rolled oats, chopped mixed nuts, dried cranberries, golden raisins, shredded coconut (if using), chia/flax seeds (if using), ground cinnamon (if using), and salt. Stir well to ensure all dry ingredients are evenly distributed.
- In a separate microwave-safe bowl, combine the nut butter, honey or maple syrup, and 2 tablespoons of melted coconut oil. Microwave for 30-60 seconds, or heat gently on the stovetop, until the mixture is warm and smooth enough to stir easily. Add the vanilla extract and stir again.
- Pour the wet mixture over the dry ingredients in the large bowl. Using a sturdy spatula or your hands (lightly greased if sticking), mix thoroughly until all the dry ingredients are completely coated and a cohesive, sticky mixture forms.
- Transfer the mixture to the prepared baking pan. Press down very firmly and evenly into the pan. This step is crucial for the bars to hold together. You can use the bottom of a glass or a flat spatula to help compact the mixture.
- Place the pan in the refrigerator or freezer to chill while you prepare the chocolate topping. Chill for at least 30 minutes, or until firm.
- Once the base is chilled, prepare the chocolate topping. In a microwave-safe bowl, combine the chopped dark chocolate and 1 tablespoon of coconut oil. Microwave in 30-second intervals, stirring well after each interval, until the chocolate is completely melted and smooth. Alternatively, melt the chocolate using a double boiler method.
- Remove the chilled base from the refrigerator. Pour the melted chocolate evenly over the top of the bar mixture, spreading it with an offset spatula or the back of a spoon to create a smooth layer.
- If desired, sprinkle a pinch of flaky sea salt over the melted chocolate for a delightful contrast in flavor.
- Return the pan to the refrigerator for at least 1-2 hours, or until the chocolate topping is completely set and firm.
- Once fully chilled and set, use the parchment paper overhang to lift the entire slab of bars out of the pan. Place it on a cutting board.
- Using a sharp, warm knife (run it under hot water and wipe dry), cut the slab into 16 equal bars (4×4 rows). For cleaner cuts, wipe the knife clean between each slice.
- Serve immediately or store as directed. Enjoy your delicious Chocolate Nut and Fruit Bars!
Cooking Tips and Variations
For the best Chocolate Nut and Fruit Bars, attention to a few details can make all the difference. Firstly, toasting your nuts before adding them to the mixture can significantly enhance their flavor and add a deeper, richer aroma to your bars. Simply spread them on a baking sheet and toast in a preheated oven at 350°F (175°C) for 5-7 minutes, watching carefully to prevent burning. Let them cool completely before chopping and adding to the mixture. This small step truly elevates the nutty notes in the bars. Another crucial tip is to press the base mixture down into the pan as firmly as possible. The more compacted it is, the less likely your bars are to crumble when cut. Use the bottom of a clean glass or a sturdy spatula to really get a good, dense layer. Don’t be shy with the pressure!
When it comes to the chocolate topping, achieving a smooth, glossy finish is key. If you’re melting chocolate in the microwave, make sure to use low power settings and stir frequently to prevent scorching. For a truly professional finish, consider tempering your chocolate, though for home use, simply melting it with a touch of coconut oil works wonderfully to create a smooth, easy-to-spread consistency that sets beautifully. If your kitchen is warm, the coconut oil in the chocolate also helps it to set more quickly and firmly.
The beauty of these bars lies in their incredible versatility. You can easily adapt them to suit your taste preferences or what you have on hand. For a different flavor profile, try swapping out the dark chocolate for milk chocolate or even white chocolate. A drizzle of white chocolate over the dark chocolate layer can also create a visually appealing contrast. Experiment with different nut combinations – pistachios, cashews, or even macadamia nuts would be delicious. For the dried fruit, feel free to use finely chopped dates, dried cherries, blueberries, or even a tropical mix. If you like a bit of spice, a pinch of cardamom or a touch of cayenne pepper in the chocolate can add an unexpected kick. To boost the protein content, you can stir in a scoop of your favorite protein powder (unflavored or vanilla works best) into the wet mixture before combining with the dry ingredients. For a vegan option, ensure your chocolate is dairy-free and use maple syrup instead of honey. If you’re looking for an extra layer of flavor and texture, consider adding a thin layer of caramel or a nut butter swirl on top of the base before adding the chocolate. The possibilities are endless, making these bars a joy to customize every time you make them.
Storage and Reheating
These Chocolate Nut and Fruit Bars are fantastic for meal prep because they store so well. Once cut, the bars should be stored in an airtight container. For optimal freshness and to prevent the chocolate from melting, keep them in the refrigerator. They will stay fresh and delicious for up to 1-2 weeks in the fridge. If you prefer a firmer texture, you can also store them in the freezer. Wrap individual bars tightly in plastic wrap, then place them in a freezer-safe bag or container. They will last for up to 2-3 months in the freezer. When you’re ready to enjoy a frozen bar, simply take it out and let it thaw at room temperature for 10-15 minutes, or eat it straight from the freezer for a super chewy, cold treat. There is no need to reheat these bars; they are best enjoyed chilled or at room temperature.
Frequently Asked Questions
Can I make these bars gluten-free?
Absolutely! The primary ingredient that might contain gluten is the oats. To make these bars entirely gluten-free, simply ensure you use certified gluten-free rolled oats. All other ingredients in this recipe are naturally gluten-free, making it an easy swap for those with gluten sensitivities or celiac disease.
Why are my bars crumbling when I cut them?
Crumbling is usually due to two main reasons: not pressing the mixture firmly enough into the pan, or not chilling the bars long enough. Ensure you compact the base mixture very tightly into the pan using a flat bottomed glass or spatula. Also, make sure the bars are thoroughly chilled in the refrigerator for at least 1-2 hours (or even longer) before attempting to cut them. A warm, sharp knife can also help achieve cleaner cuts.
Can I substitute the honey/maple syrup with another sweetener?
Yes, you can. While honey and maple syrup provide both sweetness and a binding quality, you could experiment with other liquid sweeteners like agave nectar or brown rice syrup. Keep in mind that the texture and overall sweetness might vary slightly. Granulated sugars would not work as a direct substitute as they would not provide the necessary binding properties for a no-bake bar.