Follow Me On Social Media!
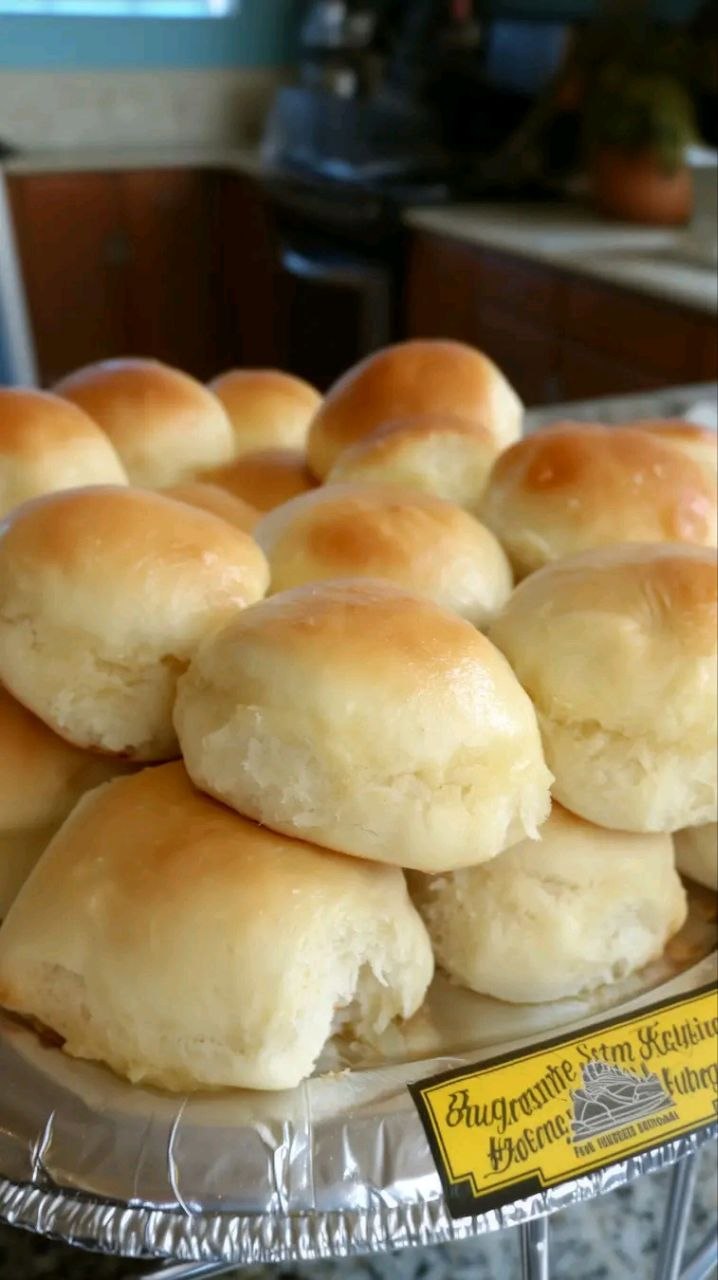
Easy Yeast Big Fat Rolls

Introduction
There’s something undeniably magical about homemade bread, especially when it comes in the form of warm, fluffy rolls. These “Easy Yeast Big Fat Rolls” aren’t just any rolls; they are a testament to the simple joy of baking, delivering generously sized, incredibly soft, and utterly delicious bread that will become a staple in your kitchen. Imagine tearing into a golden-brown roll, steam rising gently, its tender interior ready to soak up butter or cradle your favorite sandwich fillings. This recipe is designed to demystify yeast baking, making it accessible even for beginners, while still producing results that taste like they came from a professional bakery. We’re talking comfort food at its absolute finest, the kind of rolls that disappear from the dinner table almost as quickly as they appear.
What makes these rolls “big fat” and “easy”? The “big fat” comes from a generous dough yield and a clever shaping technique that encourages plump, substantial rolls, perfect for soaking up gravy, making hearty sliders, or simply enjoying on their own. The “easy” part is all about simplicity. We use common pantry ingredients, straightforward mixing and kneading methods, and clear instructions that guide you through each step without any fuss. Forget complicated techniques or endless proofing times; this recipe prioritizes deliciousness without sacrificing your precious time. Whether you’re whipping them up for a weeknight dinner, a holiday feast, or just because you crave the comforting aroma of freshly baked bread, these rolls are guaranteed to impress with minimal effort.
These versatile rolls are more than just a side dish; they can be the star of your meal. Their soft, slightly sweet crumb makes them perfect for slathering with butter and jam for breakfast, serving alongside a hearty bowl of soup or chili, or transforming into gourmet sliders for a casual gathering. They’re the kind of bread that brings people together, sparking conversations and creating lasting memories. So, if you’ve ever dreamed of baking your own show-stopping rolls but felt intimidated by yeast, this is the recipe for you. Get ready to fill your home with the irresistible scent of fresh bread and treat yourself to the most delicious, easy, big fat rolls you’ve ever tasted!
Nutritional Information
Per serving (approximate values):
- Calories: 250
- Protein: 7g
- Carbohydrates: 40g
- Fat: 7g
- Fiber: 2g
- Sodium: 300mg
Ingredients
- 1 cup warm milk (105-115°F / 40-46°C)
- 2 teaspoons active dry yeast (or instant yeast)
- 1/4 cup granulated sugar, plus 1 teaspoon
- 1/2 cup (1 stick) unsalted butter, melted and cooled slightly, plus 2 tablespoons for brushing
- 1 large egg, lightly beaten
- 1 teaspoon salt
- 4 to 4 1/2 cups all-purpose flour, divided, plus more for dusting
Instructions
- In a large mixing bowl, combine the warm milk and 1 teaspoon of granulated sugar. Sprinkle the yeast over the top and let it sit for 5-10 minutes, or until foamy. This indicates the yeast is active. If using instant yeast, you can proceed directly to the next step after mixing, but a few minutes to bloom still won’t hurt.
- Once the yeast is foamy, add the remaining 1/4 cup granulated sugar, the 1/2 cup melted and cooled butter, the lightly beaten egg, and the salt to the bowl. Whisk everything together until well combined.
- Gradually add 3 cups of the all-purpose flour, one cup at a time, mixing with a wooden spoon or a stand mixer with a dough hook on low speed until just combined after each addition.
- Continue adding the remaining flour, 1/2 cup at a time, until a soft, shaggy dough forms. The dough should be slightly sticky but manageable. You may not need all 4 1/2 cups of flour; stop when the dough pulls away from the sides of the bowl and is no longer excessively sticky.
- If using a stand mixer, increase the speed to medium-low and knead for 5-7 minutes, until the dough is smooth and elastic. If kneading by hand, turn the dough out onto a lightly floured surface and knead for 8-10 minutes, pushing and folding the dough until it becomes smooth and springs back when gently poked.
- Lightly grease a clean large bowl with a little oil or cooking spray. Place the dough in the bowl, turning it once to coat the top. Cover the bowl tightly with plastic wrap or a clean kitchen towel.
- Let the dough rise in a warm, draft-free place for 1 to 1 1/2 hours, or until it has doubled in size. This can be done in a slightly warm oven (turned off), near a sunny window, or on top of your refrigerator.
- Once doubled, gently punch down the dough to release the air. Turn the dough out onto a lightly floured surface and divide it into 12 equal pieces. For truly “big fat” rolls, you can divide it into 9 or 10 pieces.
- Shape each piece of dough into a smooth, round ball. To do this, pull the edges of each piece into the center and pinch them together, then turn the ball seam-side down and cup your hand over it, gently rolling it against the counter to create a smooth, taut surface.
- Lightly grease a 9×13 inch baking pan (or a 9×9 inch pan for fewer, larger rolls). Arrange the shaped dough balls in the prepared pan, leaving a small space between them.
- Cover the pan loosely with plastic wrap or a clean kitchen towel and let the rolls rise again in a warm place for another 30-45 minutes, or until they look puffy and have nearly doubled in size. Toward the end of this second rise, preheat your oven to 375°F (190°C).
- Bake the rolls in the preheated oven for 18-22 minutes, or until they are golden brown on top and sound hollow when tapped on the bottom. The exact baking time may vary depending on your oven and the size of your rolls.
- While the rolls are still hot from the oven, brush them generously with the remaining 2 tablespoons of melted butter. This adds shine, flavor, and helps keep them soft.
- Allow the rolls to cool slightly in the pan for 5-10 minutes before serving. Serve warm and enjoy!
Cooking Tips and Variations
For the best results, always ensure your milk is at the correct temperature for activating yeast; too cold and the yeast won’t activate, too hot and it will kill it. A thermometer is your best friend here. If you don’t have one, the milk should feel like warm bathwater, not hot. Don’t be afraid to adjust the flour amount slightly based on humidity and how well your dough comes together; a truly soft dough is key for tender rolls. Over-kneading can make the rolls tough, while under-kneading won’t develop enough gluten for a good structure, so aim for that smooth, elastic consistency. For an extra golden crust, you can brush the rolls with an egg wash (1 egg beaten with 1 tablespoon of water) before baking, instead of just butter after. If your kitchen is cool, you can create a warm proofing environment by warming your oven to its lowest setting for a few minutes, then turning it off and placing the covered dough inside. Just make sure it’s not too hot!
These rolls are incredibly versatile and can be adapted to suit your taste. For a savory twist, consider adding 1/2 cup of shredded cheddar cheese and 1 tablespoon of dried chives or garlic powder to the dough along with the flour. Herb rolls are also delicious; mix in 1-2 tablespoons of dried Italian herbs or fresh chopped rosemary with the dry ingredients. For a slightly sweeter roll, you can increase the sugar by another 1/4 cup or add a teaspoon of vanilla extract. You can also experiment with different flours; replacing 1/2 cup of all-purpose flour with whole wheat flour will add a nutty flavor and more fiber, though it might make the rolls slightly denser. For a richer texture, swap out some of the milk for buttermilk, which also adds a subtle tang. To make these into pull-apart garlic knots, after the first rise, roll the dough into a large rectangle, brush with garlic butter, sprinkle with Parmesan, cut into strips, twist, and tie into knots before the second rise and baking.
Storage and Reheating
These Easy Yeast Big Fat Rolls are best enjoyed fresh, warm from the oven. However, if you have leftovers, they can be stored to maintain their deliciousness. Place cooled rolls in an airtight container or a resealable plastic bag at room temperature for up to 2-3 days. To keep them fresh for a bit longer, you can store them in the refrigerator for up to 5 days, though they may dry out slightly. For longer storage, these rolls freeze beautifully. Once completely cooled, place them in a freezer-safe bag or container, removing as much air as possible, and freeze for up to 2-3 months. Thaw frozen rolls at room temperature or reheat directly from frozen.
To reheat individual rolls, you can warm them in the microwave for 15-30 seconds until heated through, but be careful not to overcook them as they can become tough. For a crisper exterior and soft interior, wrap rolls loosely in foil and reheat in a preheated oven at 300°F (150°C) for 10-15 minutes, or until warmed through. If reheating a larger batch, you can place them directly on a baking sheet. Frozen rolls can be reheated in a similar fashion, adding an extra 5-10 minutes to the oven time, or until fully thawed and warmed. Brushing reheated rolls with a little melted butter can help restore some of their moisture and freshness.
Frequently Asked Questions
What’s the difference between active dry yeast and instant yeast? Can I substitute them?
Active dry yeast needs to be dissolved in warm liquid first (proofed) before adding to other ingredients, which ensures it’s alive and active. Instant yeast, on the other hand, can be mixed directly with the dry ingredients as it doesn’t require proofing. Yes, you can generally substitute them interchangeably in most recipes. If a recipe calls for active dry yeast and you’re using instant, you can often skip the proofing step and add it directly to the flour, and vice versa. However, for best results with active dry yeast, it’s always recommended to proof it first to confirm its viability.
My dough isn’t rising. What went wrong?
There are a few common reasons dough might not rise. The most likely culprit is inactive yeast. This could happen if your yeast is old or expired, or if the liquid you used to activate it was either too cold (preventing activation) or too hot (killing the yeast). Ensure your warm milk is between 105-115°F (40-46°C). Another reason could be a cold environment; yeast needs warmth to thrive, so make sure your proofing spot is warm and draft-free. Lastly, too much salt can inhibit yeast activity, so be sure to measure carefully.
Can I make the dough ahead of time?
Absolutely! This is a great make-ahead recipe. After the first rise, you can punch down the dough, shape the rolls, and then place them on the prepared baking pan. Cover the pan tightly with plastic wrap and refrigerate for up to 24 hours. When you’re ready to bake, take the rolls out of the refrigerator and let them come to room temperature and complete their second rise (this might take 1.5-2 hours or more, depending on your kitchen’s temperature) before baking as directed.
Why are my rolls tough or dry?
Tough rolls are usually a sign of too much flour or over-kneading. Adding too much flour can make the dough stiff and dense, preventing it from becoming light and airy. Over-kneading develops too much gluten, resulting in a chewy, tough texture rather than a tender one. Dry rolls can also be a result of over-baking; ensure you remove them from the oven as soon as they are golden brown and cooked through. Using the melted butter brush after baking helps to keep them moist and adds a lovely flavor and shine.