Follow Me On Social Media!
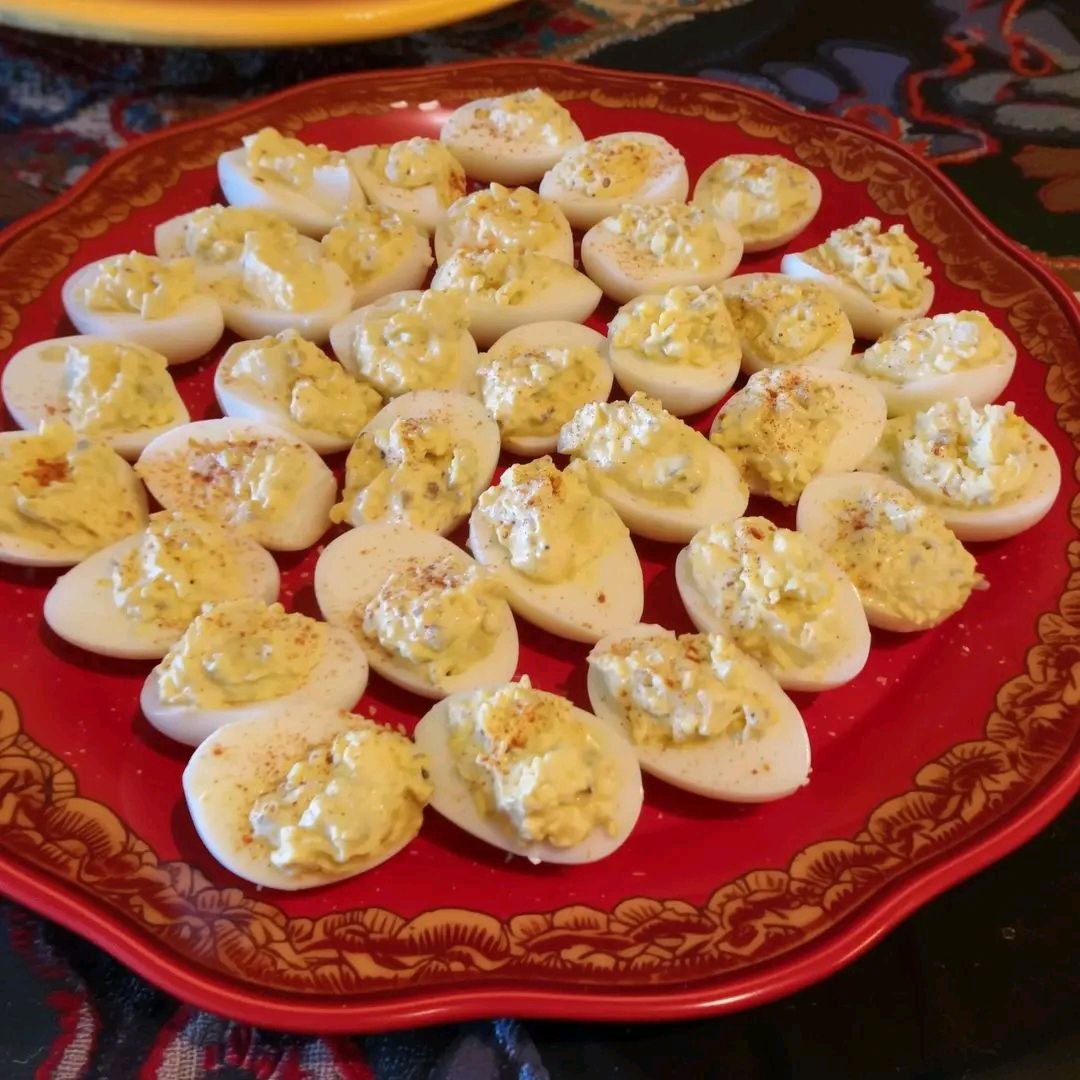
Mama’s Deviled Eggs

Introduction
There are some dishes that just scream “comfort” and “celebration” all at once, and for me, Mama’s Deviled Eggs are at the very top of that list. These aren’t just any deviled eggs; they’re the ones that graced every holiday table, every backyard barbecue, and every potluck my family ever hosted. They’re a classic appetizer for a reason, beloved for their creamy, tangy, and slightly savory flavor profile that perfectly balances richness with a zesty kick. From the moment that platter of perfectly halved eggs, brimming with their golden filling and dusted with a sprinkle of paprika, hit the table, you knew the party had truly begun. They have that magical ability to disappear faster than you can say “seconds,” and it’s a testament to their irresistible appeal.
What makes Mama’s Deviled Eggs so special, beyond the obvious deliciousness, is the wave of nostalgia they bring. Every bite takes me back to childhood memories: the clinking of silverware, the happy chatter of family and friends, and the comforting aroma of home cooking. Mama had a knack for making everything feel effortlessly perfect, and her deviled eggs were no exception. Her secret wasn’t just in the ingredients, though they were always top-notch; it was in the love and care she put into every single batch. She always said the key was patience and a good eye for consistency, ensuring that each egg was perfectly hard-boiled, the yolks mashed to a velvety smoothness, and the seasoning just right. This recipe isn’t just about food; it’s about tradition, family, and the simple joy of sharing something truly delicious with the people you love.
This particular recipe for Mama’s Deviled Eggs stands out because it strikes that perfect balance between creamy richness and a bright, tangy zest. There’s no overly sweet or bland filling here; instead, you get a harmonious blend of flavors that keeps you coming back for more. The secret lies in a careful combination of classic ingredients, ensuring a filling that’s both smooth and flavorful, with just the right amount of tang and a hint of warmth from the paprika. It’s a timeless recipe that has been perfected over years, designed to be easy enough for anyone to master, yet impressive enough to be the star of any gathering. Prepare to fall in love with this quintessential comfort food, just as my family and I have for generations.
Nutritional Information
Per serving (approximate values):
- Calories: 75
- Protein: 4g
- Carbohydrates: 1g
- Fat: 6g
- Fiber: 0g
- Sodium: 90mg
Ingredients
- 12 large eggs
- 1/2 cup mayonnaise (full-fat for best creaminess)
- 2 tablespoons yellow mustard
- 1 tablespoon white vinegar (or apple cider vinegar for a slightly sweeter tang)
- 1/4 teaspoon salt
- 1/8 teaspoon black pepper
- 1/2 teaspoon paprika, plus extra for garnish
- Optional: 1/4 teaspoon sugar (to balance acidity)
- Optional: Pinch of cayenne pepper for a subtle kick
Instructions
- Prepare the Eggs: Carefully place the 12 large eggs in a single layer at the bottom of a large saucepan. Add enough cold water to cover the eggs by at least one inch.
- Boil the Eggs: Place the saucepan over high heat and bring the water to a rolling boil. Once the water is boiling rapidly, immediately remove the saucepan from the heat, cover it tightly with a lid, and let it stand for 12 minutes. Do not lift the lid during this time to ensure the eggs cook evenly.
- Cool and Peel: While the eggs are resting, prepare a large bowl of ice water. After 12 minutes, carefully transfer the eggs from the hot water to the ice bath using a slotted spoon. Allow the eggs to cool in the ice water for at least 10-15 minutes. This “shocking” process helps to stop the cooking and makes the eggs much easier to peel. Once cooled, gently tap and roll each egg on a hard surface to crack the shell all over, then peel them under cool running water for the cleanest removal.
- Halve the Eggs: Once all eggs are peeled, carefully cut each egg in half lengthwise using a sharp knife. Gently scoop out the bright yellow yolks into a medium-sized mixing bowl. Place the hollowed-out egg white halves on a serving platter or a clean plate.
- Prepare the Filling: To the bowl with the egg yolks, add the mayonnaise, yellow mustard, white vinegar, salt, black pepper, and 1/2 teaspoon of paprika. If using, add the optional sugar and cayenne pepper now.
- Mash and Mix: Using a fork, thoroughly mash the egg yolks and all the added ingredients until the mixture is completely smooth and creamy. It’s important to get rid of any lumps to achieve that signature velvety texture. You can also use a small whisk or a rubber spatula to ensure everything is well combined and smooth. Taste the mixture and adjust seasonings as needed – you might want a little more salt, pepper, or a touch more mustard for extra zest.
- Fill the Egg Whites: Now it’s time to fill the egg white halves. You have a couple of options here:
- Spoon Method: Use a small spoon to carefully scoop the yolk mixture into each egg white cavity, mounding it slightly.
- Piping Method (for a fancier look): For a more professional and elegant presentation, transfer the yolk mixture into a piping bag fitted with a star tip (or a Ziploc bag with a corner snipped off). Pipe the filling neatly into each egg white half, creating a decorative swirl or mound.
- Garnish and Chill: Once all the egg whites are filled, lightly dust the tops of the deviled eggs with additional paprika for color and a touch more flavor.
- Chill Before Serving: For the best flavor and texture, cover the platter of deviled eggs loosely with plastic wrap and refrigerate for at least 30 minutes before serving. This allows the flavors to meld and the filling to firm up slightly.
Cooking Tips and Variations
Tips for Perfectly Hard-Boiled Eggs:
- Use Slightly Older Eggs: Fresher eggs tend to be harder to peel. Eggs that are about a week old will peel much more easily.
- Ice Bath is Crucial: Don’t skip the ice bath! It stops the cooking process immediately, preventing that unsightly green ring around the yolk, and causes the egg to contract, making the shell easier to separate.
- Don’t Overcook: Overcooked eggs will have rubbery whites and that greenish-gray discoloration around the yolk. Stick to the 12-minute covered rest time.
- Peel Under Water: Peeling eggs under a gentle stream of cool water can help wash away small shell fragments and make the process smoother.
Achieving a Silky Smooth Filling:
- Mash Thoroughly: Ensure all yolk lumps are gone. For an extra-smooth filling, you can press the yolks through a fine-mesh sieve before mixing them with other ingredients.
- Food Processor Option: For a truly effortless and super-creamy filling, you can place the cooked yolks and all filling ingredients into a food processor and pulse until completely smooth.
Flavor Variations to Explore:
- Spicy Kick: Add a dash of hot sauce (like Tabasco or Sriracha) or finely minced jalapeño to the yolk mixture.
- Savory Crunch: Mix in finely crumbled cooked bacon, chives, or finely diced celery for added texture and flavor.
- Herbaceous Delight: Incorporate fresh herbs like chopped dill, chives, or parsley into the filling.
- Tangy Twist: A teaspoon of sweet pickle relish or dill pickle relish can add a delightful pop of tangy sweetness and texture.
- Smoky Flavor: A tiny pinch of smoked paprika or a drop of liquid smoke can add a unique depth.
- Mustard Variety: Experiment with different types of mustard, such as Dijon mustard for a sharper bite or a whole-grain mustard for texture.
Presentation Pointers:
- Piping Bag Magic: Using a piping bag with a decorative tip (like a star tip) elevates the presentation significantly. If you don’t have one, a Ziploc bag with a corner snipped off works just as well.
- Creative Garnishes: Beyond paprika, consider garnishing with fresh dill sprigs, finely chopped chives, a sprinkle of cayenne pepper, or even a tiny piece of pimento for a splash of color.
Make-Ahead Tips:
- You can hard-boil and peel the eggs up to 2 days in advance. Store them whole and peeled in an airtight container in the refrigerator.
- You can also prepare the yolk filling a day in advance. Store it in an airtight container in the refrigerator. When ready to serve, simply cut the egg whites, pipe in the filling, garnish, and chill. This prevents the whites from drying out and the filling from weeping.
Storage and Reheating
Storage:
Deviled eggs are best enjoyed fresh, but they can be stored in the refrigerator for a short period. Place the deviled eggs in a single layer in an airtight container. If you need to stack them, place a piece of parchment paper or wax paper between the layers to prevent them from sticking and smushing. Store them in the coldest part of your refrigerator. They will typically keep well for 2-3 days. Beyond that, the texture of the whites can become a bit rubbery and the filling may start to lose its freshness. Always ensure they are kept chilled; deviled eggs should not be left at room temperature for more than 2 hours due to the mayonnaise content.
Reheating:
Deviled eggs are traditionally served cold, straight from the refrigerator. They are not meant to be reheated. Reheating deviled eggs would drastically alter their texture, making the egg whites rubbery and the creamy yolk filling oily and separated. The beauty of deviled eggs lies in their cool, refreshing, and creamy bite. If you have leftovers, simply enjoy them cold from the fridge. For this reason, it’s always best to make them as close to serving time as possible or follow the make-ahead tips to assemble them just before your event.
Frequently Asked Questions
Why do my deviled eggs have a green ring around the yolk?
A green-gray ring around the yolk indicates that the eggs were overcooked. This happens when the sulfur in the egg white reacts with the iron in the yolk, forming ferrous sulfide. To avoid this, make sure to follow the precise cooking times and cool the eggs immediately in an ice bath after cooking to halt the process.
Can I make deviled eggs ahead of time?
Yes, you can prepare components of deviled eggs ahead of time. You can hard-boil and peel the eggs up to 2 days in advance, storing them in the refrigerator. The yolk filling can also be made a day in advance and stored in an airtight container. For the best taste and texture, assemble the deviled eggs (fill the whites with the yolk mixture) no more than a few hours before serving, then chill them.
What’s the best way to fill deviled eggs for a neat presentation?
For a clean and professional look, use a piping bag fitted with a star tip to pipe the yolk mixture into the egg white cavities. If you don’t have a piping bag, a sturdy Ziploc bag with one corner snipped off works perfectly. This method allows for precise placement and creates an attractive, mounded appearance compared to using a spoon.
My deviled egg filling is too thick/thin. How can I fix it?
If your filling is too thick, you can thin it out by adding a very small amount of mayonnaise, a tiny splash of milk, or a bit more vinegar, a quarter teaspoon at a time, until you reach the desired consistency. If it’s too thin, you can try adding a bit more mashed egg yolk (if you have extra) or a small amount of finely crumbled hard-boiled egg white to thicken it slightly, though it’s harder to correct a very thin filling. It’s always better to add liquids gradually.