Follow Me On Social Media!
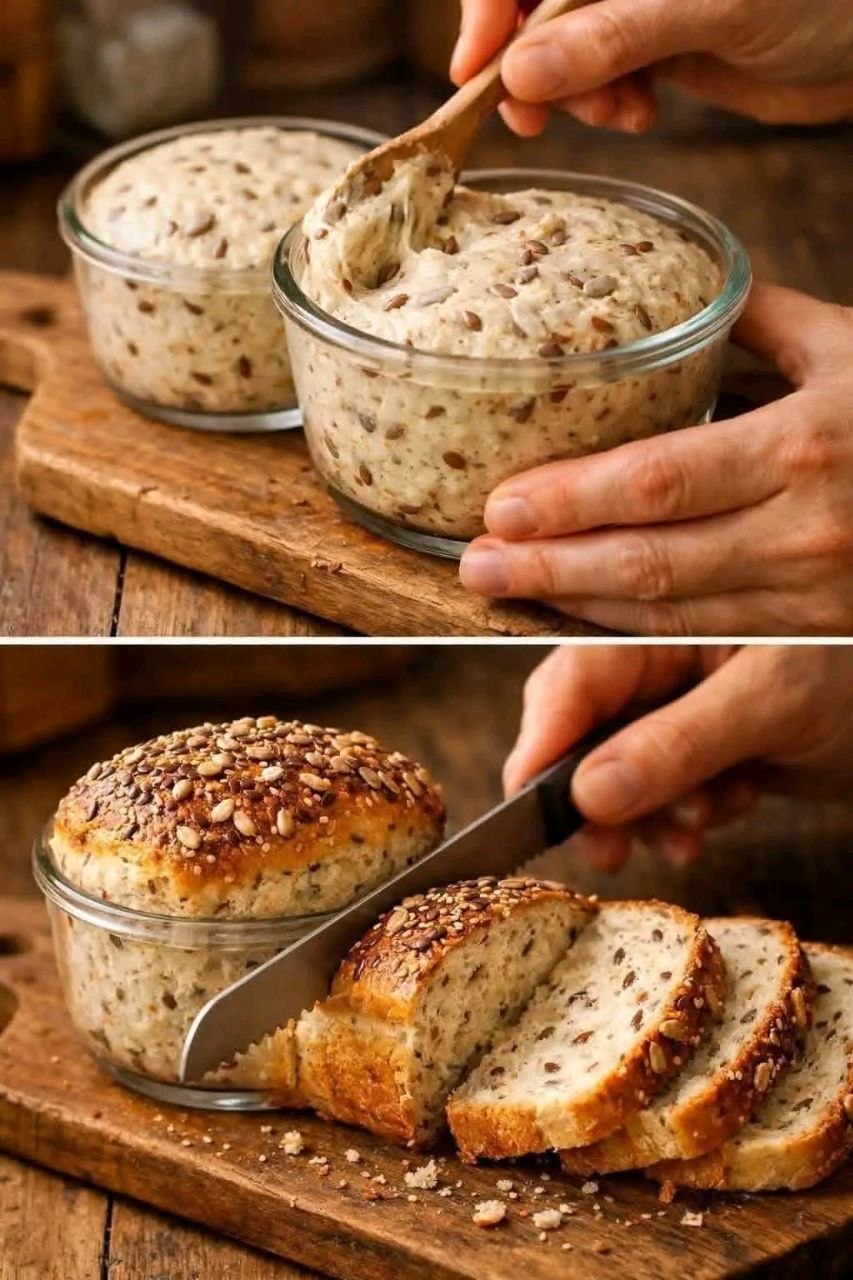
Seeded no knead jar bread

Introduction
Imagine the aroma of freshly baked bread wafting through your kitchen, a crusty exterior giving way to a soft, airy crumb, all without the endless kneading or complicated techniques. Welcome to the wonderful world of no-knead bread, and today, we’re elevating it with a charming twist: Seeded No-Knead Jar Bread! This isn’t just any bread; it’s a rustic, effortlessly elegant loaf baked right in an oven-safe jar, offering perfect portion control and an undeniably beautiful presentation. It’s the kind of bread that looks like it took hours of painstaking effort, but in reality, demands very little from you, letting time and nature do most of the work.
The magic of no-knead bread lies in its simplicity. By combining flour, water, yeast, and salt, and allowing a long, slow fermentation, you achieve incredible flavor and texture with minimal hands-on time. The jar baking method adds an extra layer of appeal, producing individual, beautifully shaped loaves that are ideal for gifting, picnics, or simply enjoying a fresh, warm slice anytime. The addition of a generous mix of seeds – think flax, sunflower, and perhaps a sprinkle of sesame or poppy – not only boosts the nutritional profile but also adds a delightful crunch and nutty flavor that perfectly complements the bread’s chewy interior and crisp crust. Get ready to impress yourself and your loved ones with this incredibly easy, yet utterly delicious, seeded no-knead jar bread.
Nutritional Information
Per serving (approximate values):
- Calories: 350-400
- Protein: 12-15g
- Carbohydrates: 60-70g
- Fat: 8-12g
- Fiber: 5-7g
- Sodium: 400-500mg
Ingredients
- 3 cups (360g) all-purpose flour or bread flour
- 1 ½ teaspoons fine sea salt
- ½ teaspoon instant yeast (or active dry yeast, proofed)
- 1 ½ cups (360ml) lukewarm water (around 105-115°F or 40-46°C)
- 2 tablespoons mixed seeds (e.g., flax, sunflower, pumpkin, sesame, poppy), plus more for topping
- Olive oil or neutral oil, for greasing the jars
- Optional: A pinch of sugar if using active dry yeast
Instructions
- Prepare the Dough: In a large mixing bowl, combine the flour, salt, yeast, and 2 tablespoons of mixed seeds. If using active dry yeast, you may want to proof it first by dissolving it in the lukewarm water with a pinch of sugar for 5-10 minutes until foamy, then add to the dry ingredients.
- Mix the Dough: Pour the lukewarm water into the dry ingredients. Using a wooden spoon or a spatula, mix until all the flour is incorporated and a shaggy, sticky dough forms. Do not overmix; just ensure there are no dry pockets of flour. The dough will be very wet and sticky – this is normal and desirable for no-knead bread.
- First Rise (Bulk Fermentation): Cover the bowl tightly with plastic wrap or a damp kitchen towel. Let the dough rise at room temperature (ideally 68-72°F or 20-22°C) for 12-18 hours. The longer the rise, the more flavor will develop. The dough should at least double in size, be bubbly, and have a dome-like top.
- Prepare the Jars: Approximately 30 minutes before you plan to bake, generously grease the inside of two (16-ounce or 500ml) wide-mouth, oven-safe glass jars (such as Mason jars) with olive oil or another neutral oil. Ensure you coat the sides and bottom thoroughly to prevent sticking. You can use one larger jar if preferred, adjusting baking time.
- Preheat Oven: Place the greased jars into a cold oven. Preheat the oven to 425°F (220°C) with the jars inside. Heating the jars with the oven helps prevent thermal shock and ensures even baking.
- Shape the Dough (Minimal): Once the dough has completed its first rise, gently scrape it out onto a lightly floured surface. Avoid deflating it too much. Divide the dough into two equal portions for two jars, or keep it whole for one larger jar.
- Transfer to Jars: Carefully, and with minimal handling, gently fold each portion of dough a few times to create a rough ball. Gently lift and place each dough ball into its preheated, greased jar. The dough will be loose and soft.
- Second Rise (Proofing in Jars): Return the jars with the dough to a warm place (or simply leave them on the counter) for a secondary short rise, about 20-30 minutes, or until the dough has slightly puffed up and nearly reached the top of the jar.
- Add Toppings (Optional): If desired, sprinkle extra seeds on top of each dough ball just before baking for an extra flourish.
- Bake: Carefully transfer the jars back into the preheated oven. Bake for 30-40 minutes, or until the tops are golden brown and the internal temperature of the bread reaches 200-210°F (93-99°C). If the tops are browning too quickly, you can loosely tent them with foil.
- Cool: Once baked, carefully remove the jars from the oven using oven mitts. Let the bread cool in the jars for 10-15 minutes.
- Remove from Jars: Using a butter knife or a thin spatula, carefully run it around the edges of the bread to loosen it from the jar. Gently tip the jars to release the bread onto a wire rack. If it sticks, you may need to gently twist or tap the bottom of the jar.
- Final Cooling: Let the bread cool completely on the wire rack before slicing. This is crucial for developing the proper texture and preventing a gummy interior.
Cooking Tips and Variations
Seed Variations: Don’t limit yourself to just flax and sunflower! Experiment with other seeds like black sesame, white sesame, poppy seeds, chia seeds, or even a blend of all of them. For an extra nutty flavor, lightly toast the seeds before adding them to the dough.
Flour Power: While all-purpose flour works beautifully, using bread flour will give you a chewier crumb due to its higher protein content. You can also experiment with a blend of whole wheat flour (up to 25%) for a heartier, nuttier loaf, though this may require a tiny bit more water to maintain hydration.
Jar Selection: Always use oven-safe glass jars. Wide-mouth jars are easiest for removing the bread. Ensure they are free of cracks or chips before use. Preheating the jars with the oven helps prevent thermal shock and ensures they don’t crack when the dough is added.
Hydration is Key: No-knead dough is intentionally very wet and sticky. Resist the urge to add more flour during the initial mixing or when transferring to the jars. This high hydration is what creates the characteristic open, airy crumb.
Doneness Test: To ensure your bread is fully baked, tap the bottom of the loaf – it should sound hollow. For ultimate precision, use an instant-read thermometer; the internal temperature should be between 200-210°F (93-99°C).
Crispier Crust: For an even crispier crust, you can place a shallow pan of hot water on the bottom rack of your oven during the first 10-15 minutes of baking. The steam helps create a beautiful, crackly crust.
Flavor Boosters: For savory variations, consider adding a teaspoon of dried herbs like rosemary or thyme, or a tablespoon of finely grated Parmesan cheese to the dough. A sprinkle of flaky sea salt on top before baking also adds a lovely touch.
Troubleshooting a Stuck Loaf: If your bread is difficult to remove from the jar, ensure you greased it very generously. You can try letting it cool completely, or even placing the jar in the freezer for 15-20 minutes, which can sometimes help the bread shrink slightly and release.
Overnight Fermentation: Don’t rush the first rise. The long fermentation (12-18 hours) is crucial for developing the complex flavors and open crumb structure. If your kitchen is cold, it might take closer to 18 hours. If it’s warm, it might be ready in 12.
Slicing Perfection: Always let the bread cool completely before slicing. Slicing warm bread can compress the crumb and make it appear gummy. Patience is a virtue here!
Storage and Reheating
Storage: Once completely cooled, store the seeded no-knead jar bread in an airtight container or a bread bag at room temperature for up to 3-4 days. For longer storage, you can freeze individual slices or whole loaves. Wrap tightly in plastic wrap, then in aluminum foil, and store in the freezer for up to 2-3 months.
Reheating:
- From Room Temperature: To refresh a whole loaf, preheat your oven to 350°F (175°C). Lightly spritz the loaf with water (this helps revive the crust) and bake for 5-10 minutes, or until warmed through and the crust is crisp again. For slices, you can toast them in a toaster, toaster oven, or pan-fry them lightly.
- From Frozen: For a whole loaf, unwrap it and bake directly from frozen in a preheated 350°F (175°C) oven for 20-30 minutes, or until thawed and heated through. For frozen slices, you can often toast them directly from frozen, though they may take slightly longer.
Frequently Asked Questions
Can I use any type of jar for baking this bread?
No, it’s crucial to use oven-safe glass jars, such as wide-mouth Mason jars, that are designed to withstand high temperatures. Regular glass jars or thin-walled containers may crack or shatter in the oven due to thermal shock. Always inspect jars for cracks or chips before use.
My dough didn’t rise much during the first fermentation. What went wrong?
Several factors can affect the rise. The most common issues are inactive yeast (check the expiration date!), water that was too hot or too cold (lukewarm is key), or a kitchen that is too cold for a sufficient rise. Ensure your yeast is fresh and your water temperature is correct (around 105-115°F or 40-46°C). A longer fermentation time might also be needed if your kitchen is cool.
Do I need to grease the jars even if they are non-stick?
Yes, absolutely! Glass jars are not inherently non-stick, and even if they were, the high sugar content that develops in the crust of the bread can cause it to adhere. Generously greasing the jars with olive oil or a neutral oil is essential for easy removal of the baked bread and preventing it from sticking.
How can I make this bread gluten-free?
Adapting this recipe to be entirely gluten-free can be challenging due to the lack of gluten structure, which is crucial in no-knead bread. You would need to use a specialized gluten-free flour blend that often includes starches and gums (like xanthan gum) to mimic gluten’s elasticity. The hydration and rising times would also likely need significant adjustment, so it’s best to seek out a dedicated gluten-free no-knead bread recipe rather than directly substituting flours in this one.